Naturopathic By Nature

Healthy Eating & Healthy Living

Navigation
  • Recipes
  • Articles
    • Naturopathic
    • Pregnancy & Postnatal
    • Healthy Foods
    • Grocery Lists
  • About Us
  • Contact Us

Heart Healthy Omega Burgers

May 26, 2018 by Dr. Nicholas Anhorn, ND Leave a Comment

IMG_0400

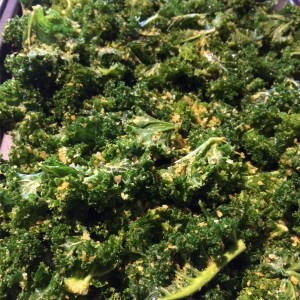
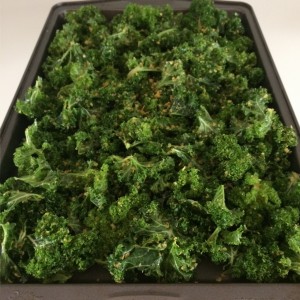
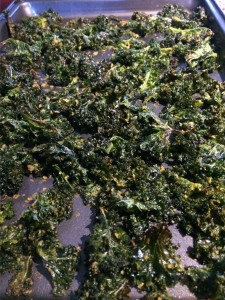
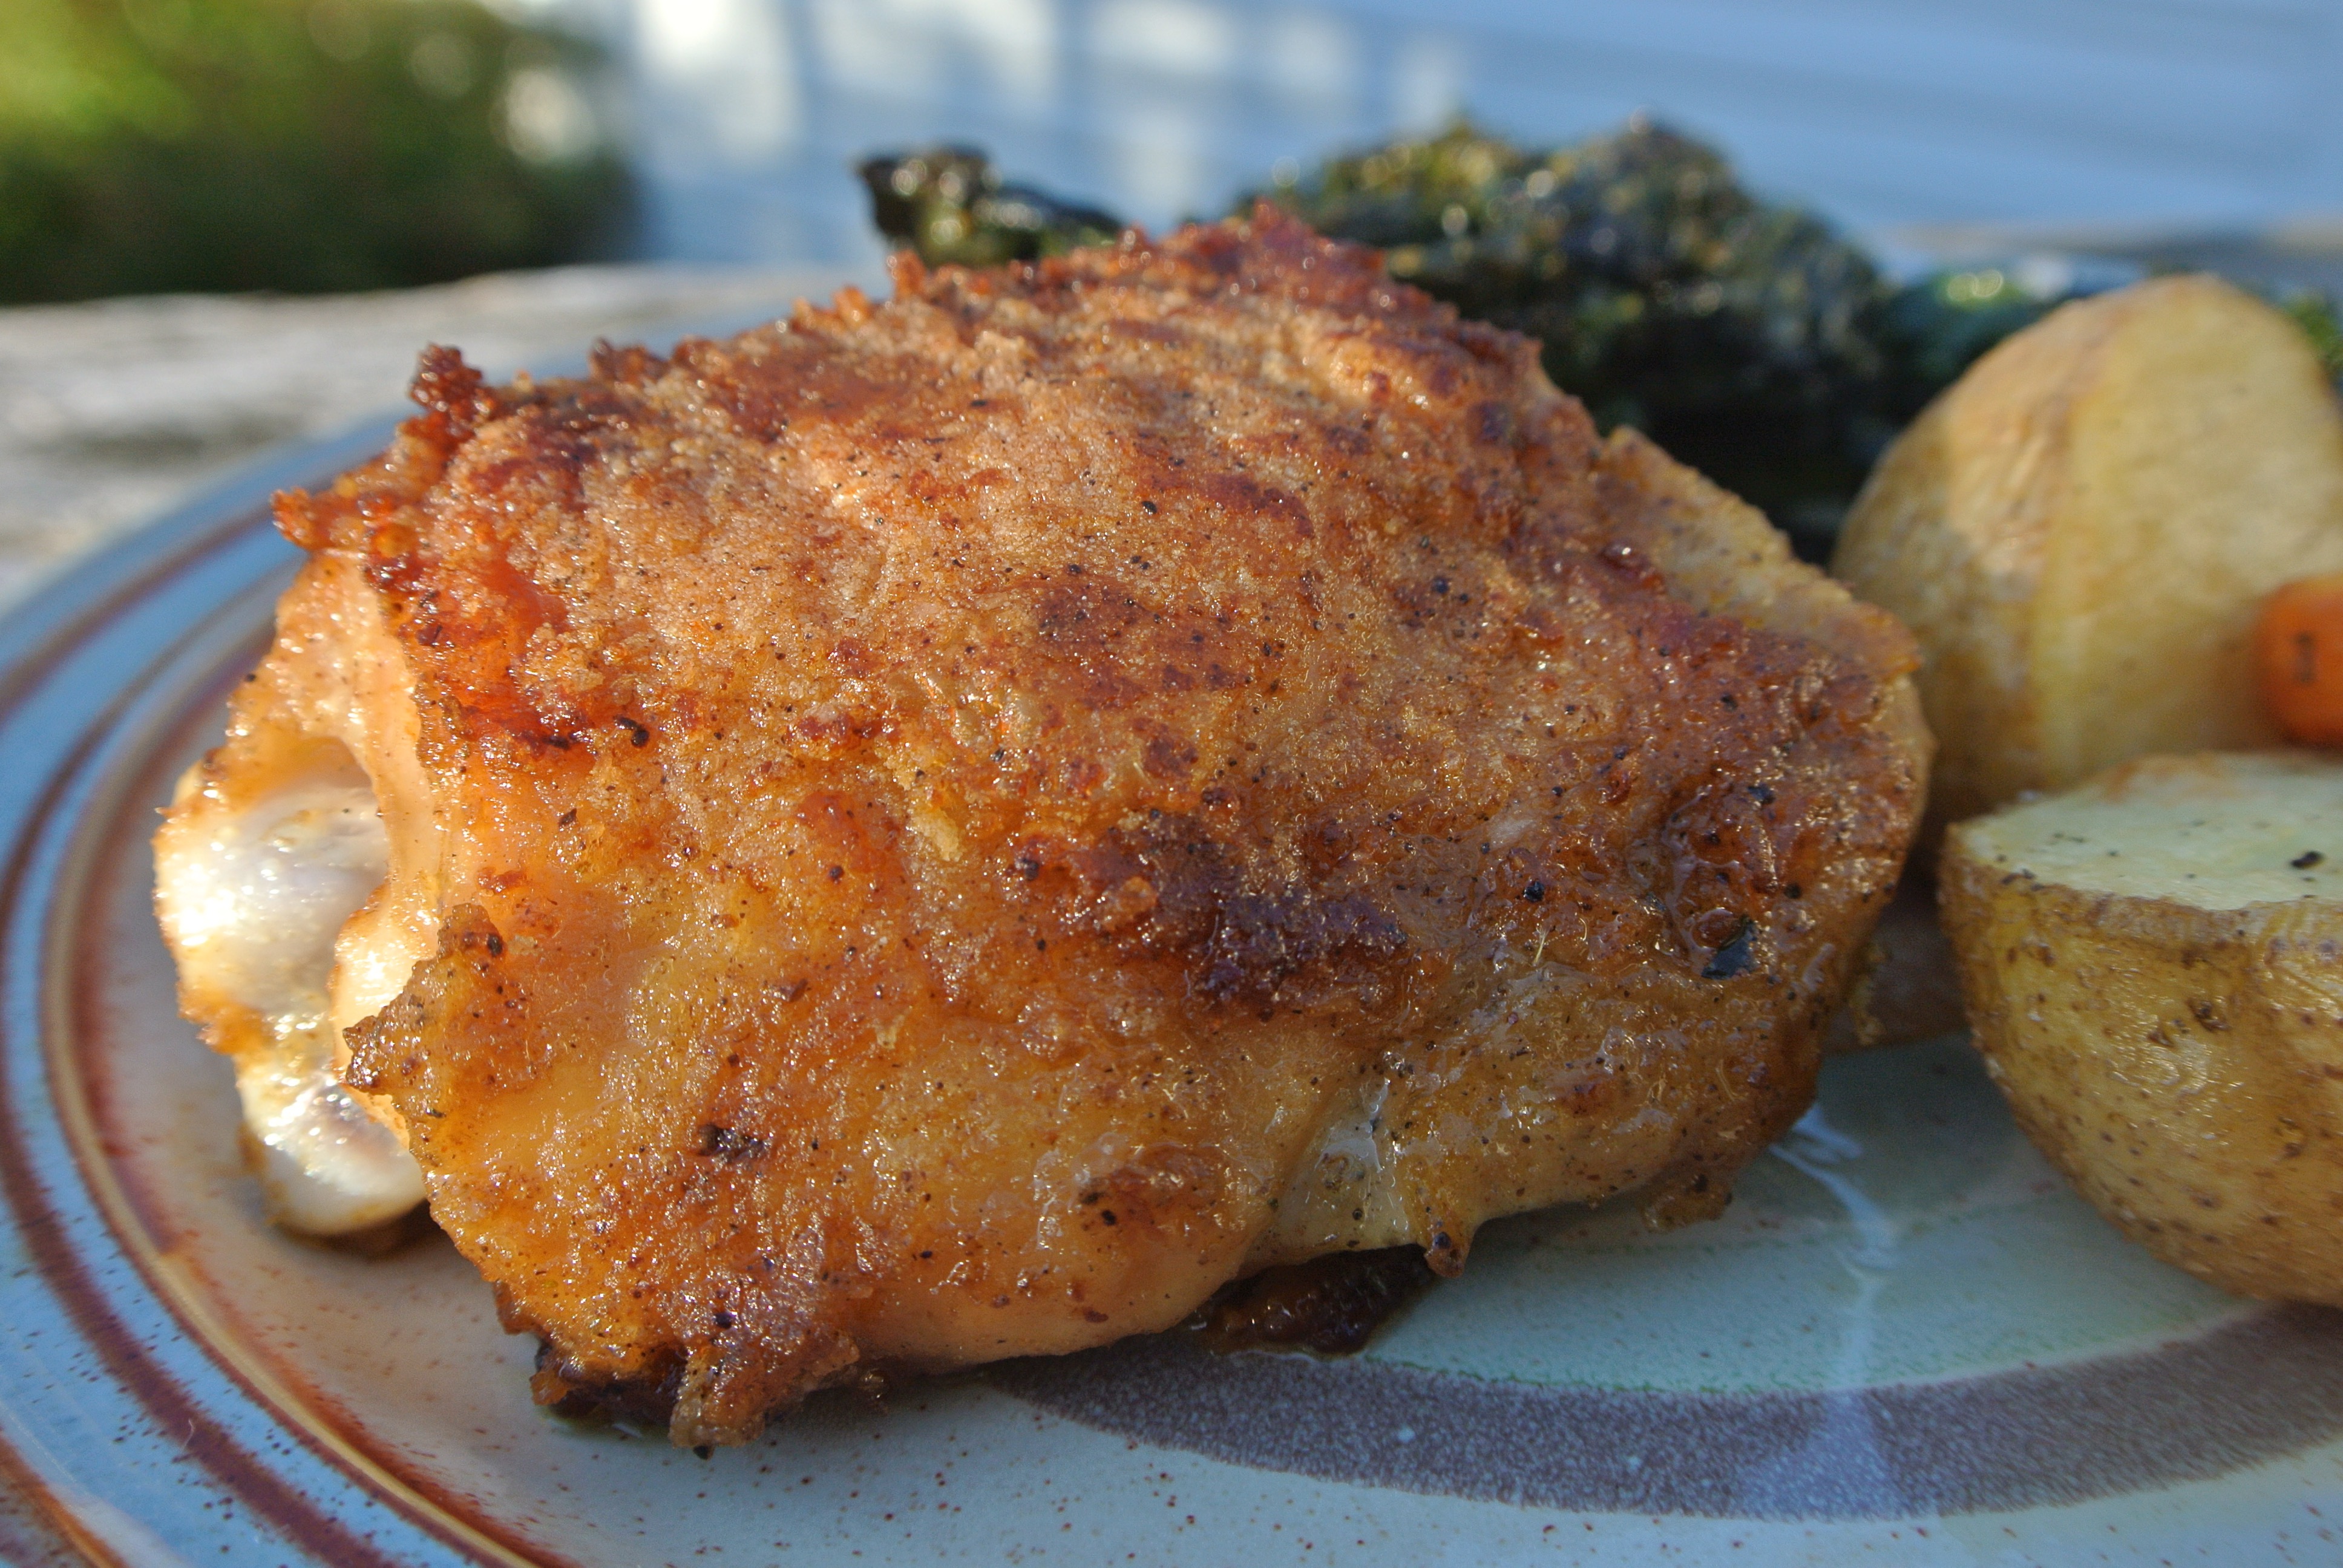
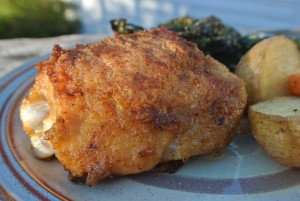
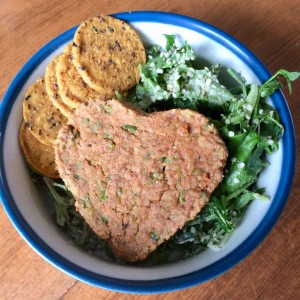
Heart Healthy Omega Burgers with a green salad & sweet potato crackers

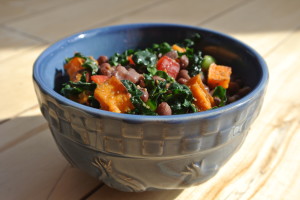
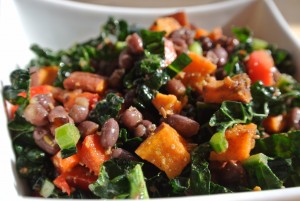
These burgers are pretty quick to make up and can be paired with many side dishes. Of course, you can use your favourite burger bun to make them into a burger, stuff it into a pita with veggies, hummus, and Dijon mustard, or use large lettuce leaves as your ‘bun’. Our favourite way to enjoy these is to eat the burgers on top of a salad, or pair it with roasted root veggies (like turnip, carrots, potato, & yam).

Salmon is known to be a high source of heart healthy omega-3 fatty acids. Ideally, you would be using wild or sockeye salmon. We used canned here because that is what we have available year round, and because when we have fresh salmon, we like to enjoy it ‘as is’ instead of mixing it up into burgers. The walnuts are an added dose of omega-3 fatty acids, and if you are using pasture-raised free-range eggs, they are known to be a good source of omega 3 fatty acids as well!

Heart Healthy Omega Burgers
 
Print
Prep time
10 mins
Cook time
15 mins
Total time
25 mins
 
The heart-healthy omega fatty acids come from the salmon, walnuts, and eggs. We have ground up wheat-free market bread for the bread crumbs, or you can use ground Mary's crackers to keep it gluten-free.
Cuisine: dairy-free
Serves: 6-7 patties
Ingredients
  • 1 can wild or sockeye salmon, drained
  • ½ cup gluten-free or wheat free bread crumbs
  • 1 cup of walnuts
  • 2 free range eggs
  • ½ cup peas, fresh or frozen
  • 1-2 tsp lemon juice
  • 1 tsp Dijon mustard
  • ¼ tsp sea salt, and more to taste
  • ¼ tsp dried thyme (or ½ tsp if using fresh)
  • ½ tsp dried dill (or 1 tsp if using fresh)
  • black pepper, to taste
Instructions
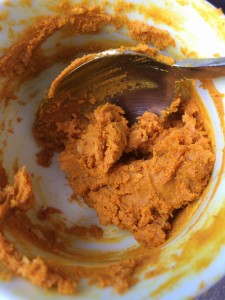
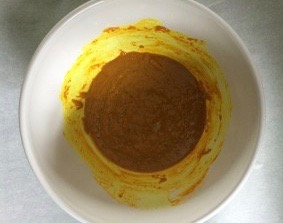
  1. Put canned salmon, walnuts, breadcrumbs & eggs and in a food processor and process for 10-15 seconds.
  2. Add peas and the rest of the ingredients and process for another 10 seconds.
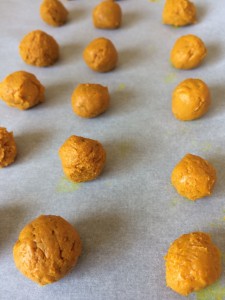
  3. Divide into 6-7 patties.. filling heart cookie cutter is optional 🙂
  4. Place on a silicone lined or parchment paper lined baking sheet with a little bit of space in between each pattie.
  5. Bake 375 for 10 minutes, flip the burgers and continue baking for another 5 min.
3.4.3177


Filed Under: Lunch & Supper, Recipes Tagged With: canned salmon recipes, healthy dinner meal ideas, healthy fats, healthy salmon burgers, kid friendly meals, omega 3, quick dinner meals, quick supper meals, salmon burgers, sockeye salmon burgers

Dairy-free Cashew Cream for Breakfast Parfaits & more!

May 26, 2018 by Dr. Nicholas Anhorn, ND Leave a Comment

MVIMG_20180524_085815

Dairy-free cashew cream in a breakfast parfait with raspberries & nutty granola

This is a nice option to have around for a weekend brunch, as it enhances a lot of dishes – topped on fruit salad, granola, pancakes, waffles, or made into a breakfast parfait or a fruit dip. It’s very easy to make, and only has 4 ingredients. I imagine that you could add flavours like cinnamon, ginger, lemon or orange zest to elevate the flavour of your sweet dish even more. I’m going to try it as a dairy-free substitute in recipes that call for yogurt! I’ll keep you posted on how that goes on our Facebook & Instagram pages.

Cashew Cream Parfait
 
Print
Cook time
5 mins
Total time
5 mins
 
Layer cashew cream with your choice of chopped dried fruits, fresh or frozen fruit, nuts, seeds, or granola. We’ve also spread it on top of pancakes!
Cuisine: dairy free, gluten-free, vegan
Serves: 1 cup
Ingredients
  • 1 cup raw cashews, soaked overnight (or at least 3 hours), rinsed & drained
  • ½ cup unsweetened almond milk (plus 1-2 Tbsp more, if needed)
  • 2 Tbsp maple syrup
  • ½ tsp vanilla extract
Instructions
  1. Add all ingredients to the blender and gradually increase speed to blend on high, adding more almond milk, as needed.
  2. Blend on high for a good 30-60 seconds, until it is smooth & creamy.
  3. Store in fridge for up to 3 days.
3.4.3177


Filed Under: Breakfast, Desserts, Recipes Tagged With: brunch ideas, dairy free breakfast, dairy free cream, dairy free parfait, dairy-free dessert, dairy-free yogurt, vegan breakfast ideas, yogurt substitute

Four essential ways to use Turmeric

February 20, 2017 by Dr. Nicholas Anhorn, ND and Dr. Lyndsay Wareham, ND Leave a Comment

07:56:30Turmeric is a fascinating remedy that is nourishing, healing, and anti-inflammatory.

There are no real contraindications for taking turmeric at culinary doses (such as the Golden Tea recipe below and Cooking with Turmeric suggestions) but when you are taking isolated curcumin or potent turmeric supplements (or even when taking Turmeric Bombs or Turmeric Paste), then you will want to consult your healthcare physician, especially if you are on antiplatelet or blood thinning medication, have gallstones, bile duct obstruction, stomach ulcers or hyperchlorydria (high stomach acid).

It is also important to note that culinary turmeric will stain nearly everything in its path. So, if you don’t want yellow finger tips or yellow-stained hands, wear non-latex gloves when working with turmeric, use a cutting board you don’t mind having yellow marks, wipe your counter with cold water right away if it turmeric spills on it, and also your grater may turn yellow/orange & look like rust, but its most likely just turmeric.

~ Golden Tea – Turmeric Milk ~

IMG_2613

There are many recipes out there for Golden Tea, otherwise known as Golden Milk, Turmeric Tea, Anti-Inflammatory Golden Milk. All of the recipe names point to the fact that turmeric works as a natural anti-inflammatory, and it is gold in color, thanks to the active ingredient curcumin (*not to be confused with cumin*).

There are a few ingredients that you can add to the tea to help enhance the flavour, such as ginger, cinnamon, nutmeg, and ground cardamum. But more importantly, there are ingredients you can add to improve the healing properties turmeric by way of increasing the absorption of curcumin: fat & black pepper.

Here is our recipe. Give it a try and tweak it to make it your own!

Golden Milk Turmeric Tea
 
Print
Prep time
10 mins
Cook time
5 mins
Total time
15 mins
 
If you want a real decadent treat, replace your choice of milk with coconut cream (the thick part of canned coconut milk).
Author: Lyndsay and Nicholas
Cuisine: anti-inflammatory, gluten-free
Serves: 2 cups
Ingredients
  • 2 cups milk alternative (coconut, almond milk)
  • 1 Tbsp (packed) fresh turmeric, grated (or 1 tsp turmeric powder)
  • ¾ - 1 Tbsp fresh ginger, grated (or ½-3/4 tsp tsp ginger powder)
  • 1 Tbsp honey, or more to taste
  • 1 Tbsp coconut oil
  • 5-6 black peppercorns
  • a few dashes of cinnamon (optional)
Instructions
  1. Place all ingredients in a saucepan, heat on high until it's just about to boil, then lower the heat to simmer for about 5 mins.
  2. Pour into a high powered blender and blend on high for about 10 seconds.
  3. We don't mind a few ginger strands so we just pour into a mug & enjoy, but if you do mind the texture, strain into a mug and enjoy!
3.4.3177

~ Cooking with Turmeric ~

IMG_3118

Turmeric is a wonderful root to cook with – it has a mild, pleasant flavour and gives dishes a beautiful yellow colour. If you add more turmeric than a recipe calls for, it doesn’t really change the taste of your dish too much, but does increase the health benefits. Turmeric powder and fresh, grated turmeric substitute nicely for each other, and so, you can add both to any dish if you have them both on hand. Here are a few of our favourite turmeric-containing recipes:

Dahl is a highly nutritious, delicious & underrated dish! It’s so easy to make and is sure to satisfy appetites big and small! There are alot of recipes out there, but here’s our version: Delicious Red Lentil Dahl

Butter chicken is a crowd pleaser in our house. In this Butter Chicken recipe, we replace heavy cream with coconut cream, and add in 1 Tbsp turmeric powder.

When it comes to Indian cooking, we first think of Vij (a well-known Indian chef who has a Vij’s Restaurant in Vancouver). He uses heavy cream in most of his dishes, but we replace it with equal amounts of coconut cream with good results. If you want to be the talk of the town, here are a two crowd pleaser recipes that go really well together to make a delicious & satisfying meal. And they are surprisingly simple o make! – Vij’s Marinated Lamb Popsicles & Turmeric New Potatoes

Lastly, you can also add turmeric to your Smoothies for added healing effect. It may stain your blender container a bit, but it is worth it! Here’s a recipe that we tried & liked very much (we swapped the frozen banana for frozen mango, and juiced the ginger along with the carrots) –> Creamy Vegan Golden Milk Smoothie

~ Turmeric Bombs ~

IMG_3181

This is an inexpensive DIY supplement which contains fat & black pepper to help increase absorption. Honey can be added to improve the flavour and give it a desirable sweetness. You can chew these little bombs, let it dissolve in your mouth, or swallow it whole with water. There are recipes out there that also add quercetin, which may also increase absorption but we’ve created a simple recipe that uses ingredients that you likely already have on hand.

IMG_3166

It is best to start by keeping your coconut oil at room temperature. If you store it in the fridge, take it out about an hour before you make these so it can soften a bit. If it is summer and your coconut oil is liquid, then you will end up with turmeric blobs instead of bombs – You will lose the aesthetics of having a bomb, but you won’t loose the medicinal aspect of the bomb.

We are in the midst of ‘fancifying’ a recipe for these, but here is the bare bones recipe for Turmeric Bombs.

In a medium sized bowl, add:

  • 8 Tbsp turmeric powder
  • a few dashes of cracked pepper
  • 3 Tbsp coconut oil (at room temperature)
  • 3 Tbsp raw honey (if you don’t want to use honey, just add another 3 Tbsp coconut oil)

Mix all of the ingredients together well with a spoon. This may take a few minutes, as you work on mixing the coconut oil chunks with the other ingredients. When everything is well mixed together, get a small bowl with water in it to dip your fingers in while you make the small bombs. Line a baking sheet with parchment paper, and clear some room in your freezer for the baking sheet.

Spoon out a small marble-sized ball, dip your fingers in the water, and roll the ball into a smooth ball and place it on the prepared baking sheet. Continue to do this until you have no mixture left. It will make 40-50 balls. Place the balls/baking sheet in the freezer for about 1 hour to let them set. Then, remove the bombs from the baking sheet and store them in a glass jar, in the freezer so they maintain a creamy texture.

Take 1-2 bombs/day for maintenance, and up to 4 to treat aches and pains. You may be surprised that you may start to actually crave these little golden nuggets!

~ Turmeric Paste ~

IMG_2944-300x225 2

This method of preparing turmeric is very similar to turmeric bombs but you cook the turmeric powder with water to give you a potent turmeric supplement. If you experience gas & bloating when taking the paste, cut back on the dose until you no longer experience digestive upset.

Ingredients:

  • 1/2 cup turmeric powder
  • 1-2 cups water ( start with 1 cup and add more, up to 2 cups, if needed)
  • 1/3 cup coconut, olive or flax oil
  • 3 tsp freshly ground black pepper

Directions: Combine turmeric powder and water in a small saucepan, and bring to a boil. Reduce the heat simmer for 7-10 minutes. Stir often to prevent sticking, and add more water as need to keep it to a paste consistency (this can be adjusted to suit your preference).

Remove mixture from the heat and allow it to cool until the pot is warm to the touch. Add oil & pepper, and stir thoroughly until they are completely mixed in.

Store in a clean, sterilized jar in the refrigerator for up to 10-14 days. If you see any signs of mold, or notice an ‘off’ flavour, discard immediately. If you know that you won’t use all of the mixture within two weeks, you can freeze some for later use.

Take 1/4 tsp 1-2 times daily, with food.

Filed Under: Articles, Healthy Foods, Naturopathic Articles Tagged With: best root ever, best turmeric recipes, easy ways to use turmeric, fresh turmeric, golden milk, golden milk recipes, golden milk smoothie, golden tea, how to cook with turmeric, how to use turmeric, turmeric, turmeric balls, turmeric bombs, turmeric curry recipes, turmeric milk, turmeric paste, turmeric recipes, turmeric tea

Easy, Every Day Spa Treatments to Enjoy at Home

January 9, 2017 by Dr. Nicholas Anhorn, ND and Dr. Lyndsay Wareham, ND Leave a Comment

fullsizerender-3

These days, it seems as though if you ask anyone ‘How are things going? How was your day? Or weekend?’, more than likely, they respond with “Busy”. And when I say anyone, I mean anyone… like you’re retired grandmother, elementary-aged niece, or enlightened friend. ‘Busy’ has become the new normal way of living in modern society.

Thus, there is no shortage of articles, books, blogs, magazines, and courses highlighting the fact that many of us would benefit greatly from slowing down, saying no more often, and carving out daily quality ‘me time’.

And, I agree. Personally, we have very busy (sometimes jam packed..) days, and it is essential to commit to making time to slow down & relax during the day, every day. This can be difficult. Society (and our mind) tells us that it is not productive, meaningful, or dutiful to make time for ourselves. But even if you can manage taking 5 minutes to relax, in whichever way works for you, can benefit your physical, mental emotional & spiritual self. You may even find that it feels so good to get into this relaxed state that you want to take an extra few minutes to enjoy feeling your body and mind reset.

Doing this can actually make you more productive, clear-minded, and energized.

It’s kind of like if you perform sustained exercise for a long time (such as running, swimming, or cycling), you may find yourself getting tired at some point in your journey, and you could just trudge through it, without stopping, to get it done, or you could stop to catch your breath. When you get started again, you may find that you feel refreshed & recharged to finish your exercise.

We wanted to share a few ways to invite relaxation into your day or night by taking a ‘spa’ bath. This can be done by taking a few key ingredients used in spa treatments and bringing them into your bathroom. You may even find that you have all of these ingredients in your home already!

fullsizerender-2

Three main ingredients: Epsom salts, sea salt, & baking soda. Lavender essential oil is optional.

1. Hot Detoxing Bath

Draw a deep hot bath & while the water is running, add:

  • 4 cups epsom salt
  • 1 cup sea salt
  • 1/2 cup baking soda
  • 30 drops of lavender oil (optional)

Light a candle or two, hop in the bath, lay back, and enjoy!

You may notice that you feel a little boyant from all of the salt. The epsom salts help relax your muscles, and the sea salt and baking soda make your skin feel soft and smooth. And if you’re using lavender oil, that is helpful, of course, for relaxation. 

For a thoughtful gift idea, add all of these ingredients (minus the water) into a large bowl, mix together well and scoop into two 1 Litre glass jars. Decorate the bottle with some colourful twine and a homemade gift tag, and mix in dried lavender flower ‘petals’ if you have them  – and you have a gift that will be greatly appreciated by whomever you gift it to. (This is #24 on our article 50 Ways to Use Lavender)

2. At-Home Sauna Treatment

Sweating is one of the ways that we detox estrogens, pesticides and other persistent organic pollutants (POPs) from our bodies. The key is to make sure that you rinse off after a good sweat in order to prevent reabsorption of these toxins through the skin. Taking a shower, bath, and rinsing with a wet cloth are effective ways to do so.

One way to create sauna-like sweating at home is by drinking a hot cup of tea while soaking in a hot bath. Combining these two therapies warms the internal temperature to induce sweating and detoxification.

3. Contrast Hydrotherapy in the Shower

Contrast hydrotherapy is also one of the few ways to move the lymphatic fluids, along with exercise (ie. jumping, walking), massage, and dry brushing. Admittedly, contrast hydrotherapy is not the most relaxing therapy but it sure is rejuvenating! Have you ever done a Polar Bear Dip (traditionally done on New Year’s Day)? That is the ultimate contrast hydrotherapy! It is believed to stimulate the immune system, metabolism, and overall vital force.

And, although you may need to build up courage to actually do contrast hydro, you won’t regret it when you do!

But you don’t need a hole cut into a frozen lake to get the benefits of hydrotherapy. A few ways to do this at home are: to take your regular warm-hot shower and then turn the water to full on cold for 10 seconds (don’t forget to breathe!) before you shut off the shower. You can build up to 1 minute of cold, over time. 

The key is to let the body’s vital force warm you up after being exposed to the cold. You’ll experience this as you ‘pink up‘, and you’ll be surprised by how warm you feel a few seconds after you’ve been doused in cold.

Alternatively, if you have a removeable shower head, you can place the shower head over an area of the body (thyroid, adrenals, intestines, or an injured muscle) and alternate between a blast of warm-hot water for 10 seconds to a blast of cold water for 10 seconds for 2-3 rounds of each. Be sure to always end on cold.

fullsizerender-1

Enjoy relaxing at your personal at-home spa!

Filed Under: Articles, Naturopathic Articles Tagged With: at home spa, bath, detox, detoxification, epsom salts, feel good, refresh, rejuvinate, relax, spa

Crispy Cheesy Kale Chips

January 2, 2017 by Dr. Lyndsay Wareham, ND 1 Comment

img_1588

~ It’s time to turn yummy kale into yummier kale chips ~

This is one of the easiest ways to get our kids to eat a whole ‘bunch’ of kale in one sitting. But it’s not just kids who like these “chips” – this recipe is for anyone who is looking for a healthier alternative to the crispy texture and salty flavour of potato chips.

There are a few keys to making these kale chips which are important in getting the finished product that you want. Here they are:

  • Curly kale seems to be the best variety to make kale chips
  • Wash and thoroughly dry your kale before using
  • Use your hands to massage the olive oil into the leaves
  • Arrange the prepared kale leaves into a single layer on the baking sheet

    Propping open the oven door just a crack allows moisture escape

    Propping open the oven door just a crack allows moisture escape

… And I have to share my secret to getting crispy kale chips every time — prop the oven door open, just a bit, with a tea towel, wash cloth, or oven mitt! This allows the moisture to escape, so what you’re left with is as close to dehydrated as you’ll get in 20 mins.

We hope you enjoy this recipe as much as our family does. Let us know how you like them, and if you have any questions about the process!

Crispy Cheesy Kale Chips
 
Print
Prep time
10 mins
Cook time
18 mins
Total time
28 mins
 
The measurements and baking times to this recipe will vary depending on the size of the bunch of kale you use and your oven's temperament.. As you make more and more batches, they will get better & better!
Author: Nicholas & Lyndsay
Cuisine: vegetarian
Ingredients
  • one bunch of curly kale
  • 3-4 Tbsp olive oil
  • ½-1tsp sea salt
  • ⅓ - ½ cup nutritional yeast flakes
Instructions
  1. Preheat oven to 350 F.
  2. Wash and thoroughly dry each kale leaf.
  3. Remove the leaves from the stem, ripping the leaves into fairly large bite-sized pieces
  4. Place leaves into a large bowl
  5. Pour olive oil over leaves and massage oil into leaves with your hands until each pieces has some oil on it (add more oil if necessary)
  6. Start with ½ tsp salt and mix it into the leaves to coat evenly. Taste and add more if necessary (Be conservative with the salt as you can always add more at the end of baking, but its not possible to take salt out)
  7. Sprinkle nutritional yeast over the leaves, turning the leaves to get them evenly coat (start with ⅓ cup and gradually add more to get the right seasoning for you)
  8. Arrange prepared kale leaves onto a baking sheet and spread them out so there is only a single layer of kale. You may need to use 2 baking sheets if you started with a large bunch of kale.
  9. Put the kale into the oven to bake, and be sure to use a wash cloth, tea towel or oven mitt to prop open the oven door just a crack to allow moisture to escape.
  10. After about 10 mins, turn & mix your kale (especially if your oven has hot spots) to get an even bake throughout the batch as the ones on the edges tend to cook quicker
  11. Bake for 15-18 mins (or even up to 20 mins), depending on your oven.
  12. Doneness is shown by dark green leaves with slight/light brown edges (*Don't let your kale burn, as it isn't very pleasing to the palate...)
3.4.3177

Before baking

What kale leaves look like BEFORE BAKING

After baking

What kale chips look like AFTER BAKING


Filed Under: Recipes, Snacks & Baked Goods Tagged With: baked kale chips, best kale chip recipe, cheesy kale chips, crispy kale chips, curly kale, healthy chip recipe, homemade kale chips, how to make kale chips, kale chips, veggie chips

Ken-Tucky Fried Chicken

January 27, 2016 by Dr. Nicholas Anhorn, ND and Dr. Lyndsay Wareham, ND 2 Comments

Ken's version of the famous 11 herbs & spices recipe

Ken’s version of the famous 11 herbs & spices KFC recipe

I have to give my Dad full credit for this recipe. It’s his delicious rendition of the famous 11 herbs & spices combination you’ll find in KFC recipes. The more basic herbs are brought to a whole new level with the addition of kosher salt, white pepper, curry & chili powders. (My Dad’s name is Ken, hence the ‘Ken-Tucky’ recipe name).

You can fry the chicken, as suggested below, but we’ve also baked the chicken at 350F for 35-40mins (omitting the oil), which gives you a less crispy chicken but it’s lower in fat as well. You can also start off with frying for about 15 mins to brown the chicken, and then throwing it in the oven to bake for another 20-30mins. There are alot of variations to cooking this recipe, as you can see. 

My Dad’s motto (courtesy of Chef Michael Smith) is “never make the same dish twice”.

Ken-Tucky Fried Chicken (gluten-free, dairy-free)
 
Print
Prep time
5 mins
Cook time
50 mins
Total time
55 mins
 
Add a little more of this & a little less of that with equally delicious results. Serve it alongside roasted potatoes, carrots, and kale chips - and you've got yourself one tasty meal!
Author: Lyndsay & Nick
Recipe type: gluten-free, dairy-free, dinner
Serves: 10 thighs
Ingredients
  • 10 bone in chicken thighs, skin on
  • 1 tsp (heaping) oregano, dried
  • 1 tsp (heaping) basil, dried
  • 1 tsp curry powder
  • 1 tsp chili powder
  • 1 tsp kosher salt
  • ¼-1/2tsp white pepper (depending on how spicy you want it)
  • 3-4 Tbsp brown rice flour
  • 2-3 Tbsp oil
Instructions
  1. Rinse chicken thighs in under cold water. Pat each thigh dry, individually. Place them on a cutting board or mat.
  2. Pre-heat 2 Tbsp oil on medium high heat in a large (at least 12 inch) sautee pan.
  3. Add all herbs, spices, salt, brown rice flour into a large mixing bowl. Mix together well.
  4. One by one, coat chicken thighs with spice mix by mixing it around in the bowl.
  5. Add coated chicken thigh to sautee pan, skin side up. Continue until all pieces are coated.
  6. You can sprinkle the remaining spice mixture onto each piece, or discard it.
  7. Fry chicken for 20 minutes, add 1 Tbsp oil more, if needed (if the bottom of the pan looks dry).
  8. After 20 mins, turn each piece with a fork or spatula (watch yourself!) and let cook for another 15-20 mins, or until done. You may have to let them cook for another 10-15 mins depending on the size of the thighs.
3.4.3177


Filed Under: Lunch & Supper, Recipes Tagged With: fried chicken recipe, healthy fried chicken, healthy KFC recipe, homemade KFC recipe

Dairy-free Seafood Chowder

January 16, 2016 by Dr. Nicholas Anhorn, ND and Dr. Lyndsay Wareham, ND 14 Comments

DSC_8877

Thick, creamy & dairy-free!

If we had a secret weapon – this would be it! This recipe ‘wows’ people every single time. It’s thick, rich, and decadent. We’ve made it a few times now with a few minor variations, and it’s worked out great every time – we hope you like it!

Dairy-free Seafood Chowder
 
Print
Prep time
15 mins
Cook time
40 mins
Total time
55 mins
 
This one-pot wonder satisfies any creamy chowder cravings you may be having this winter... and its dairy-free - bonus!
Author: Lyndsay & Nick
Recipe type: dairy-free, gluten-free
Serves: 6-8
Ingredients
  • 4 Tbsp ghee, earth balance, or your favorite butter-like oil (... or butter if you can tolerate some dairy)
  • 1 onion, chopped
  • ½ tsp celery seed
  • 1-2 bay leaf
  • 2 tsp dill, dried (4tsp if using fresh)
  • 1 tsp sea salt or 1½-2 tsp Herbamare
  • ¼ tsp pepper, fresh ground (or more to taste)
  • 4 medium potatoes, peeled & cut into 1in cubes
  • 1 cup water, no salt chicken or seafood broth
  • 2 cans coconut milk, but just mostly the cream (reserve the water for a smoothie)
  • 2-3 cups fresh or frozen seafood combination (skinless haddock fillet pieces, wild salmon fillet pieces, shrimp, lobster claws with liquid, scallops, crab)
  • 1½ cup frozen corn
  • lemon wedges or parsley, as garnish (optional)
Instructions
  1. In a large pot, melt ghee or oil over medium heat.
  2. Add in onions, herbs, salt & pepper. Sautee for 5 mins, until onions are browning.
  3. Add potatoes & sautee for 5 mins more. (feel free to add a bit of the water to prevent potatoes from sticking to the pot)
  4. Increase heat to high, add 1 cup water/broth & bring to a boil.
  5. Turn heat down slightly & boil potatoes, stirring often, until they reached desired tenderness (about 10 mins)
  6. Turn heat to low, add frozen corn & coconut cream and stir well. Add some coconut water or more water/broth if you prefer a slightly thinner chowder.
  7. Add in seafood & fish, and cook for another 5 mins, or until the fish is flaky, stirring often.
  8. Add salt & pepper to taste, and remove bay leaf.
  9. Serve with lemon wedges, fresh chopped parsley, and fresh ground pepper, as garnish if you'd like.
3.4.3177


Filed Under: Lunch & Supper, Recipes, Soups & Salads Tagged With: dairy-free chowder, dairy-free seafood chowder, maritime chowder, maritime dairy-free seafood chowder, maritime seafood chowder, one-pot wonder

3 Ingredient Mango Creamsicle (dairy-free, gluten-free)

May 27, 2015 by Dr. Nicholas Anhorn, ND and Dr. Lyndsay Wareham, ND Leave a Comment

DSC_7576

*Creamy Mango Popsicle*

Yes, our last post was also a popsicle recipe, but with summer on it’s way it is just so gratifying to eat (at least) one popsicle per day. 

The already sweet mango is elevated by adding a touch of honey, which also balances the sometimes strong flavour of the coconut cream. You could use other sweeteners to make it vegan (agave syrup, coconut or cane sugar, etc), but the mango & honey do “marry” well together.

3 Ingredient Mango Creamsicle (dairy-free, gluten-free)
 
Print
Prep time
5 mins
Total time
5 mins
 
Fresh mangos give a nice buttery creamy texture to the unfrozen popsicle, whereas you can get nice little fruit chunks in your popsicle when using frozen mango chunks. We like blending it until everything is smooth & creamy.
Author: Lyndsay and Nicholas
Serves: 6-10
Ingredients
  • 4-5 cups ripe mango chunks, fresh or frozen (or both!)
  • 1 can coconut milk (unshaken! As we'll use mostly just the cream)
  • 1-2 Tbsp honey
Instructions
  1. Place mango chunks & honey in a high powered blender.
  2. Scoop in coconut cream (the thick top layer in the can of coconut milk). If its summer time, you may have to refrigerate your can of coconut milk for a day to separate the cream from the water.
  3. Add in coconut water in small amounts - just enough to allow your blender to blend everything into a smooth creamy mixture (if using frozen chunks you may need to add all of the water, but if using fresh then you won't need much). Blend until you've reached your desired consistency.
  4. The key to a creamy popsicle is adding as little water as possible.
  5. Scoop into popsicle molds. Freeze for at least 8 hours.
  6. Enjoy as a snack or dessert!
3.4.3177

Filed Under: Desserts, Recipes Tagged With: dairy-free dessert, dairy-free popsicle, homemade popsicle recipe

Adzuki Bean, Yam & Kale Salad (gluten-free, dairy-free, vegan)

April 29, 2015 by Dr. Lyndsay Wareham, ND Leave a Comment


Another delicious way to enjoy kale

Another delicious way to enjoy kale

This is actually the first “meal” that I made for Nicholas while in Naturopathic College. He was working a long day at the school’s clinic, and I had the day off, so I invited him to meet me at a park during his lunch break where I brought along a little picnic with this salad as the highlight. We’ve made this salad many times since then, and we’ve been asked a few times at potlucks & dinners to share this recipe. It is healthy, hearty & is a great year-round side dish, but it is especially delicious in the fall when kale & yams are at their sweetest.

This vegetarian salad is so easy to make, and can be done relatively quickly if you use canned beans (we suggest Eden Organics as they use BPA free cans). However, if using dried beans, you’ll need to plan a bit ahead of time to soak the beans for 8-12 hours, boiling them for about 45 mins, and letting cool slightly before using the beans in the dish.

Adzuki Bean, Yam & Kale Salad
 
Print
Prep time
20 mins
Cook time
30 mins
Total time
50 mins
 
This side dish can be prepared ahead of time, stored in the fridge, and served cold, but it is an especially charming dish when served warm.
Author: Lyndsay & Nicholas
Cuisine: gluten free, dairy free, vegan
Serves: 4-6
Ingredients
  • 1-2 Tbsp olive oil, plus a bit more if needed
  • 1 large yam, cut into ½ inch cubes
  • 2 cups adzuki beans, soaked, cooked & drained (or 1 can works too)
  • 1 red bell pepper, chopped
  • 2-4 Tbsp ground cumin (fresh ground is best)
  • 6-7 stalks black (lacinato) kale, sliced thin
  • salt & pepper, to taste
  • juice of ½ of lime
Instructions
  1. Preheat oven to 400.
  2. Scrub & dry the yam, and remove any obvious blemishes from the yam, but otherwise you can leave the skin on.
  3. Cut yam into ½ inch cubes and place them into a bowl and toss with olive oil to coat. Spread yam cubes onto a baking sheet lined with a silicone baking mat or parchment paper. Bake for 20-25 mins or until soft & slightly browned. Remove from oven and let cool for a few minutes.
  4. In a large bowl, toss together cooked yam cubes with the rest of the ingredients. Mix together well. Add more olive oil, if needed.
  5. Add salt & pepper to taste, along with a splash of fresh lime.
  6. Enjoy!
3.4.3177

Filed Under: Recipes, Soups & Salads Tagged With: adzuki beans, bean salad, black kale, cumin, fall salad, how to use kale, kale, kale salad, lacinato kale, pot luck recipe, winter salad, yams

Strawberry-Blueberry Ice Cream-Popsicles (dairy-free, gluten-free, vegan)

April 29, 2015 by Dr. Nicholas Anhorn, ND and Dr. Lyndsay Wareham, ND Leave a Comment

DSC_7165

Dairy-free Blueberry Popsicles

Confusing title, right? But, I wanted to pay homage to the two beautiful berries that could potentially make up this versatile dessert. There are many other frozen berry & fruit options that you could use to create a refreshing ice cream (served now) or creamy popsicle (served later) — the possibilities are endless & also delicious! We have had the best success using strawberries & blueberries, because they are both naturally sweet fruit, but I imagine that frozen mango & peaches would also be delicious! We’ve also tried berry mixes with mainly raspberries and blackberries, but we found that you need to add more sweetener to make up for the tartness of the berries, which takes away from the fresh berry flavour.

Our daughter affectionately calls the strawberry version “Pink possicle” or “Pink ice cream” (depending on what form it’s in), and asks for it no matter what season it is. It makes for a nice ice cream-like dessert to enjoy after a meal, or as an afternoon snack (or before bed…or as part of breakfast….). It is best served immediately if you want to enjoy it as ice cream, or pour into popsicle molds to be enjoyed later. 

You’ll need a high powered blender such as a Vitamix in order to get the frozen ingredients blended into a creamy mixture. I haven’t tried making it in a food processor, but if you try it, let us know how it works out!

Strawberry/Blueberry Ice Cream Popsicles
 
Print
Prep time
5 mins
Total time
5 mins
 
Enjoy this delicious berry ice cream immediately after making, or pour into popsicle molds to enjoy later.
Author: Lyndsay & Nicholas
Recipe type: dairy-free, dessert
Serves: 4-6
Ingredients
  • 2 generous cups frozen strawberries or blueberries
  • 1 medium banana, frozen
  • 1 can high fat coconut milk (*do not shake as we want to keep the cream & water separated)
  • 6-8 ice cubes
  • ¼ tsp vanilla (optional)
  • sweetener: 1-2 Tbsp cane or coconut sugar, 2-3 medjool dates, or 3-4 pitted baking dates (soaked in warm water for 5-10mins)
Instructions
  1. Place berries, frozen banana, sweetener, vanilla (if using) and ice cubes in a high powered blender such as the Vitamix.
  2. Scoop the thick coconut cream layer in with the other ingredients. Add a few Tbsp coconut water and start blending - slowly turning the blender speed to high.
  3. If the mixture needs more liquid, stop the blender & add a few more Tbsp of coconut water. (Sometimes you'll use all of the coconut water & other times you'll just need a little bit)
  4. Blend just until mixture turns creamy.
  5. *Too much blending will heat up the ice cream and make it more runny. Too little blending will give you a creamy texture, but with tiny ice crystals... which all still tastes delicious. But, to get an ice-creamy consistency, I gradually increase the blender to high and when the mixture just starts to easily turn in on itself, then I know it's done.
3.2.2265

Caught in the act

Caught in the act


Filed Under: Desserts Tagged With: coconut milk dessert, coconut milk ice cream, dairy-free dessert, dairy-free ice cream, dairy-free popsicle, easy ice cream recipe

  • 1
  • 2
  • 3
  • …
  • 7
  • Next Page »

Meet Dr. Nicholas ND & Dr. Lyndsay ND

We are two naturopathic doctors with a vision to inspire healthy cooking, healthy eating, and healthy living for you and your family.  Read more about us >>

  • Email
  • Facebook

Subscribe

Heart Healthy Omega Burgers

Dairy-free Cashew Cream for Breakfast Parfaits & more!

Four essential ways to use Turmeric

Easy, Every Day Spa Treatments to Enjoy at Home

Crispy Cheesy Kale Chips

Ken-Tucky Fried Chicken

Dairy-free Seafood Chowder

3 Ingredient Mango Creamsicle (dairy-free, gluten-free)

Copyright © 2023 · Foodie Theme by Shay Bocks · Built on the Genesis Framework · Powered by WordPress