Naturopathic By Nature

Healthy Eating & Healthy Living

Navigation
  • Recipes
  • Articles
    • Naturopathic
    • Pregnancy & Postnatal
    • Healthy Foods
    • Grocery Lists
  • About Us
  • Contact Us

Dairy-free Cashew Cream for Breakfast Parfaits & more!

May 26, 2018 by Dr. Nicholas Anhorn, ND Leave a Comment

MVIMG_20180524_085815

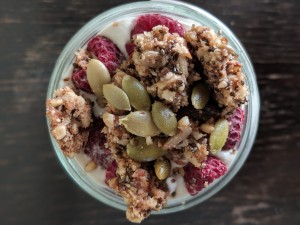
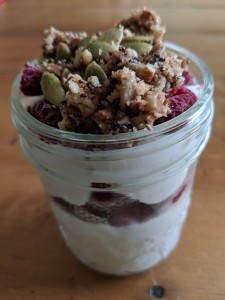
Dairy-free cashew cream in a breakfast parfait with raspberries & nutty granola

This is a nice option to have around for a weekend brunch, as it enhances a lot of dishes – topped on fruit salad, granola, pancakes, waffles, or made into a breakfast parfait or a fruit dip. It’s very easy to make, and only has 4 ingredients. I imagine that you could add flavours like cinnamon, ginger, lemon or orange zest to elevate the flavour of your sweet dish even more. I’m going to try it as a dairy-free substitute in recipes that call for yogurt! I’ll keep you posted on how that goes on our Facebook & Instagram pages.

Cashew Cream Parfait
 
Print
Cook time
5 mins
Total time
5 mins
 
Layer cashew cream with your choice of chopped dried fruits, fresh or frozen fruit, nuts, seeds, or granola. We’ve also spread it on top of pancakes!
Cuisine: dairy free, gluten-free, vegan
Serves: 1 cup
Ingredients
  • 1 cup raw cashews, soaked overnight (or at least 3 hours), rinsed & drained
  • ½ cup unsweetened almond milk (plus 1-2 Tbsp more, if needed)
  • 2 Tbsp maple syrup
  • ½ tsp vanilla extract
Instructions
  1. Add all ingredients to the blender and gradually increase speed to blend on high, adding more almond milk, as needed.
  2. Blend on high for a good 30-60 seconds, until it is smooth & creamy.
  3. Store in fridge for up to 3 days.
3.4.3177


Filed Under: Breakfast, Desserts, Recipes Tagged With: brunch ideas, dairy free breakfast, dairy free cream, dairy free parfait, dairy-free dessert, dairy-free yogurt, vegan breakfast ideas, yogurt substitute

3 Ingredient Mango Creamsicle (dairy-free, gluten-free)

May 27, 2015 by Dr. Nicholas Anhorn, ND and Dr. Lyndsay Wareham, ND Leave a Comment

DSC_7576

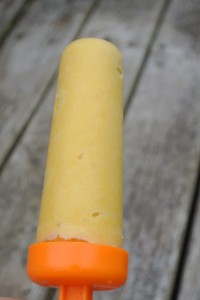
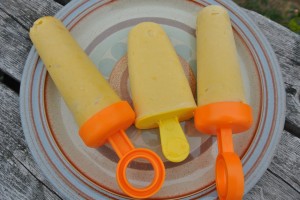
*Creamy Mango Popsicle*

Yes, our last post was also a popsicle recipe, but with summer on it’s way it is just so gratifying to eat (at least) one popsicle per day. 

The already sweet mango is elevated by adding a touch of honey, which also balances the sometimes strong flavour of the coconut cream. You could use other sweeteners to make it vegan (agave syrup, coconut or cane sugar, etc), but the mango & honey do “marry” well together.

3 Ingredient Mango Creamsicle (dairy-free, gluten-free)
 
Print
Prep time
5 mins
Total time
5 mins
 
Fresh mangos give a nice buttery creamy texture to the unfrozen popsicle, whereas you can get nice little fruit chunks in your popsicle when using frozen mango chunks. We like blending it until everything is smooth & creamy.
Author: Lyndsay and Nicholas
Serves: 6-10
Ingredients
  • 4-5 cups ripe mango chunks, fresh or frozen (or both!)
  • 1 can coconut milk (unshaken! As we'll use mostly just the cream)
  • 1-2 Tbsp honey
Instructions
  1. Place mango chunks & honey in a high powered blender.
  2. Scoop in coconut cream (the thick top layer in the can of coconut milk). If its summer time, you may have to refrigerate your can of coconut milk for a day to separate the cream from the water.
  3. Add in coconut water in small amounts - just enough to allow your blender to blend everything into a smooth creamy mixture (if using frozen chunks you may need to add all of the water, but if using fresh then you won't need much). Blend until you've reached your desired consistency.
  4. The key to a creamy popsicle is adding as little water as possible.
  5. Scoop into popsicle molds. Freeze for at least 8 hours.
  6. Enjoy as a snack or dessert!
3.4.3177

Filed Under: Desserts, Recipes Tagged With: dairy-free dessert, dairy-free popsicle, homemade popsicle recipe

Strawberry-Blueberry Ice Cream-Popsicles (dairy-free, gluten-free, vegan)

April 29, 2015 by Dr. Nicholas Anhorn, ND and Dr. Lyndsay Wareham, ND Leave a Comment

DSC_7165

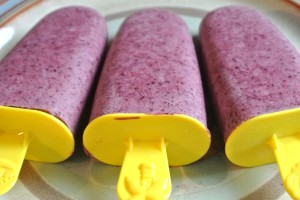
Dairy-free Blueberry Popsicles

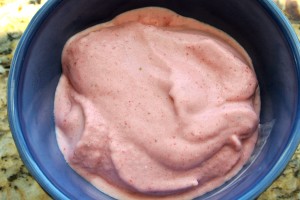
Confusing title, right? But, I wanted to pay homage to the two beautiful berries that could potentially make up this versatile dessert. There are many other frozen berry & fruit options that you could use to create a refreshing ice cream (served now) or creamy popsicle (served later) — the possibilities are endless & also delicious! We have had the best success using strawberries & blueberries, because they are both naturally sweet fruit, but I imagine that frozen mango & peaches would also be delicious! We’ve also tried berry mixes with mainly raspberries and blackberries, but we found that you need to add more sweetener to make up for the tartness of the berries, which takes away from the fresh berry flavour.

Our daughter affectionately calls the strawberry version “Pink possicle” or “Pink ice cream” (depending on what form it’s in), and asks for it no matter what season it is. It makes for a nice ice cream-like dessert to enjoy after a meal, or as an afternoon snack (or before bed…or as part of breakfast….). It is best served immediately if you want to enjoy it as ice cream, or pour into popsicle molds to be enjoyed later. 

You’ll need a high powered blender such as a Vitamix in order to get the frozen ingredients blended into a creamy mixture. I haven’t tried making it in a food processor, but if you try it, let us know how it works out!

Strawberry/Blueberry Ice Cream Popsicles
 
Print
Prep time
5 mins
Total time
5 mins
 
Enjoy this delicious berry ice cream immediately after making, or pour into popsicle molds to enjoy later.
Author: Lyndsay & Nicholas
Recipe type: dairy-free, dessert
Serves: 4-6
Ingredients
  • 2 generous cups frozen strawberries or blueberries
  • 1 medium banana, frozen
  • 1 can high fat coconut milk (*do not shake as we want to keep the cream & water separated)
  • 6-8 ice cubes
  • ¼ tsp vanilla (optional)
  • sweetener: 1-2 Tbsp cane or coconut sugar, 2-3 medjool dates, or 3-4 pitted baking dates (soaked in warm water for 5-10mins)
Instructions
  1. Place berries, frozen banana, sweetener, vanilla (if using) and ice cubes in a high powered blender such as the Vitamix.
  2. Scoop the thick coconut cream layer in with the other ingredients. Add a few Tbsp coconut water and start blending - slowly turning the blender speed to high.
  3. If the mixture needs more liquid, stop the blender & add a few more Tbsp of coconut water. (Sometimes you'll use all of the coconut water & other times you'll just need a little bit)
  4. Blend just until mixture turns creamy.
  5. *Too much blending will heat up the ice cream and make it more runny. Too little blending will give you a creamy texture, but with tiny ice crystals... which all still tastes delicious. But, to get an ice-creamy consistency, I gradually increase the blender to high and when the mixture just starts to easily turn in on itself, then I know it's done.
3.2.2265

Caught in the act

Caught in the act


Filed Under: Desserts Tagged With: coconut milk dessert, coconut milk ice cream, dairy-free dessert, dairy-free ice cream, dairy-free popsicle, easy ice cream recipe

Here it is! Quinoa Chocolate Cake (gluten-free, flour-free, with dairy-free option)

July 6, 2013 by Dr. Lyndsay Wareham, ND 6 Comments

I’ve had so many people ask me for this recipe that I just had to post it. The original recipe comes from the head chef Moreka Jolar at the beautiful Hollyhock on Cortes Island, BC. Moreka just recently came out with a new cookbook, Garden to Table. And for those who have had the honour of spending time at Hollyhock know that they are known for their cuisine – gorgeous buffets and luscious salads made from food grown and harvested straight from their garden… a little piece of advice for you: always save room for dessert!

 In the recipe below you’ll see the substitutions that I made in (brackets). Please note “Lyndsay’s Tip” at the bottom of the recipe for a delicious chocolate sauce that not only makes the cake look pretty when you drizzle chocolate sauce over a slice of cake but also “completes” the dessert for us chocolate lovers out there. And here’s another tip for chocolate lovers… my favorite cocoa powder to use is ‘Rudy Red 22-24% fat cocoa powder’ but this is difficult to find… however, I have seen it at Bulk Barn. I’ve also used the regular 10-12% fat cocoa powder and the end product was still divine. Some other ideas for toppings are top it with coconut cream (refrigerate a can of coconut milk, scoop off the top thick layer and whip it with a little maple syrup or sugar), raspberry jam, fresh fruit, or fold in chocolate chips into the batter towards the end of mixing for nice little bursts of extra chocolate.

Dairy-free version: substitute coconut oil for the  butter and a ‘mylk’ alternative (I suggest vanilla almond, rice, or coconut mylk) instead of cow’s milk. 

QUINOA CHOCOLATE CAKE (gluten-free, flour-free, option for dairy-free)

by Moreka Jolar from Hollyhock, Cortes Island BC

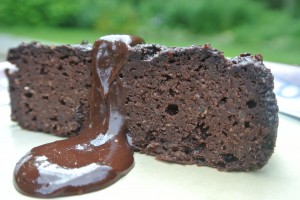
Flourless Quinoa Chocolate Cake with Chocolate Sauce <3

Flourless Quinoa Chocolate Cake with Chocolate Sauce <3


Serves: 8–10
 

Ingredients

  • 1 1/3 cup water
  • 2/3 cup quinoa
  • ¾ cup cane sugar* (I used coconut sugar)
  • ½ cup butter, melted (I used melted coconut oil)
  • 1⁄3 cup milk or dairy alternative (I used vanilla almond milk)
  • ¼ cup grapeseed oil (I’ve omitted this, or swapped it with light olive oil & it still tasted great)
  • 4 eggs
  • 1 cup cocoa powder
  • 1½ tsp baking powder
  • ½ tsp baking soda
  • ½ tsp salt

Directions

  • Rinse quinoa & place quinoa and water in a small saucepan, cover and bring to boil. Reduce heat & simmer for 15 minutes. Remove lid and allow to cool.
  • Preheat oven to 350°.

  • Process cane sugar, melted butter, milk, oil and eggs in a blender at high speed for 30 seconds.
  • Add the cooked quinoa & continue to blend on high for about 1 minute.
  • Use a rubber spatula to transfer batter to a large bowl.
  • In a medium bowl, sift together the remaining dry ingredients.
  • Add to the wet batter and combine thoroughly with a wooden spoon until there are no clumps left.
  • Scoop batter into a parchment-lined 8″ springform pan or 8″ round cake pan and bake for 40–45 min until a knife comes out of the center clean.
  • Allow to cool completely before removing from pan and serving. (In fact, if you’ve got the patience, keep it in the fridge for at least 5 hours before serving. Or, you can serve it the next day for a (seriously…) super-fudgy cake!)

Moreka’s tip: Make this completely maple-sweetened by replacing sugar with maple syrup and omitting milk.

Lyndsay’s tip: make a delicious chocolate sauce with ½ cup dark chocolate chips, ¼ cup can coconut milk, 2 Tbsp maple syrup. Add all ingredients to saucepan and heat over low heat until melted. Allow to cool for 5 mins and drizzle over top of each piece before serving.

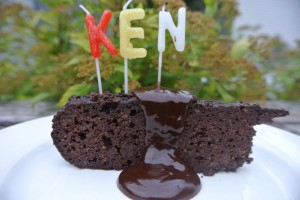
My Dad's 55th birthday cake!

Quinoa Chocolate Cake, chocolate sauce, and personalized candles for my Dad’s 55th birthday cake!

Filed Under: Desserts, Recipes Tagged With: flourless chocolate cake, gluten free chocolate cake, vegan chocolate cake

Smooth & Creamy Chocolate Avocado Pudding (Dairy-free, gluten-free, vegan)

November 22, 2012 by Dr. Lyndsay Wareham, ND Leave a Comment

I have a confession to make … I do NOT like avocado! I have tried it in salads, on sandwiches, as guacamole, and even as a face mask, I just can’t enjoy it. But, my next confession is that I LOVE chocolate pudding! I would choose chocolate pudding any day over any of Grandma’s pumpkin pie, Auntie’s famous carrot cake, Sister-in-laws to-die-for cheesecake, or other tantalizing dessert. 

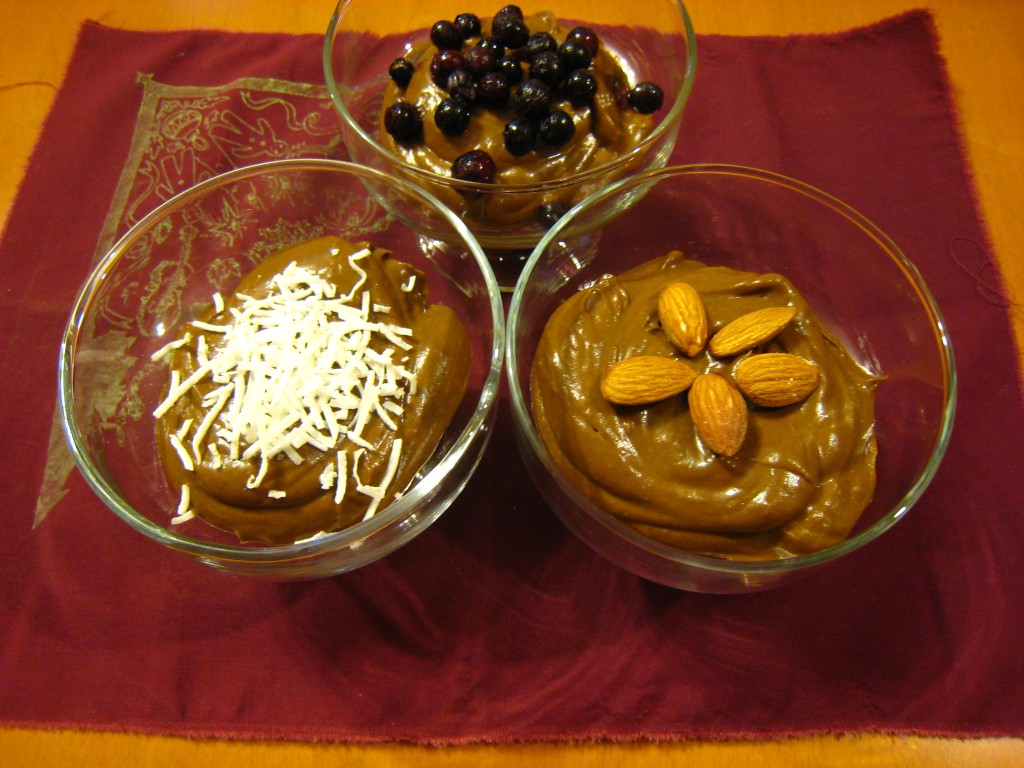
So when I saw this recipe, I thought I would be open minded & give it a try. And I have to say that I was very impressed. The chocolate & sweetness factor is perfect, the creaminess is divine (and quite remarkable), and the options for toppings are endless. We choose to try organic shredded coconut, organic frozen wild blueberries, and organic raw whole almonds. You can find the original version of this recipe on this great blog by a Vancouver-based woman named Madhuri, who specializes in yoga & Ayurveda. I highly recommend her articles and videos for anyone interested in Ayurveda, yoga, and health in general.

So the next time you have some avocados but are tired of making guacamole and would rather something sweet – give this a try!

* And as a little disclaimer for others who are averse to avocado, this pudding has the least amount of avocado impact when eaten on the same day as it was made. Otherwise, the continuously ripening avocado flavour will start to creep in the leftovers.

SMOOTH & CREAMY CHOCOLATE AVOCADO PUDDING (Dairy-free, gluten-free)

Creamy & Sweet Chocolate Avocado Pudding!

Serving size 1-6 (depending on your generosity level)

Ingredients

  • 2 avocados, ripe, medium size
  • 4 Tbsp maple syrup – I use generous tablespoons to mask the avocado 😉 
  • 4 Tbsp cacao powder
  • 1/3 cup vanilla or chocolate almond milk
  • 1/4 tsp pure vanilla extract

optional toppings:

  • shredded coconut
  • crushed or whole nuts (pistachios, almonds, walnuts, etc)
  • berries (blueberries, strawberries, raspberries)
  • sliced banana
  • crushed candy cane (to get into the Holiday spirit)

Directions

It’s as easy as 1, 2, 3!

1. Cut the avocados in half lengthwise, scoop out the pit & scrape the avocado flesh into the blender.

2. Add all the other ingredients and blend.

3. Garnish with toppings of your choice, and serve.

Filed Under: Desserts, Recipes Tagged With: dairy free, dairy-free chocolate pudding, dairy-free pudding, gluten-free, healthy chocolate pudding, vegan, vegan chocolate pudding, vegan pudding

Meet Dr. Nicholas ND & Dr. Lyndsay ND

We are two naturopathic doctors with a vision to inspire healthy cooking, healthy eating, and healthy living for you and your family.  Read more about us >>

  • Email
  • Facebook

Subscribe

Heart Healthy Omega Burgers

Dairy-free Cashew Cream for Breakfast Parfaits & more!

Four essential ways to use Turmeric

Easy, Every Day Spa Treatments to Enjoy at Home

Crispy Cheesy Kale Chips

Ken-Tucky Fried Chicken

Dairy-free Seafood Chowder

3 Ingredient Mango Creamsicle (dairy-free, gluten-free)

Copyright © 2023 · Foodie Theme by Shay Bocks · Built on the Genesis Framework · Powered by WordPress