Naturopathic By Nature

Healthy Eating & Healthy Living

Navigation
  • Recipes
  • Articles
    • Naturopathic
    • Pregnancy & Postnatal
    • Healthy Foods
    • Grocery Lists
  • About Us
  • Contact Us

Chicken Noodle Miso Soup (gluten-free, dairy-free)

June 10, 2014 by Dr. Nicholas Anhorn, ND and Dr. Lyndsay Wareham, ND 1 Comment

DSC_5279

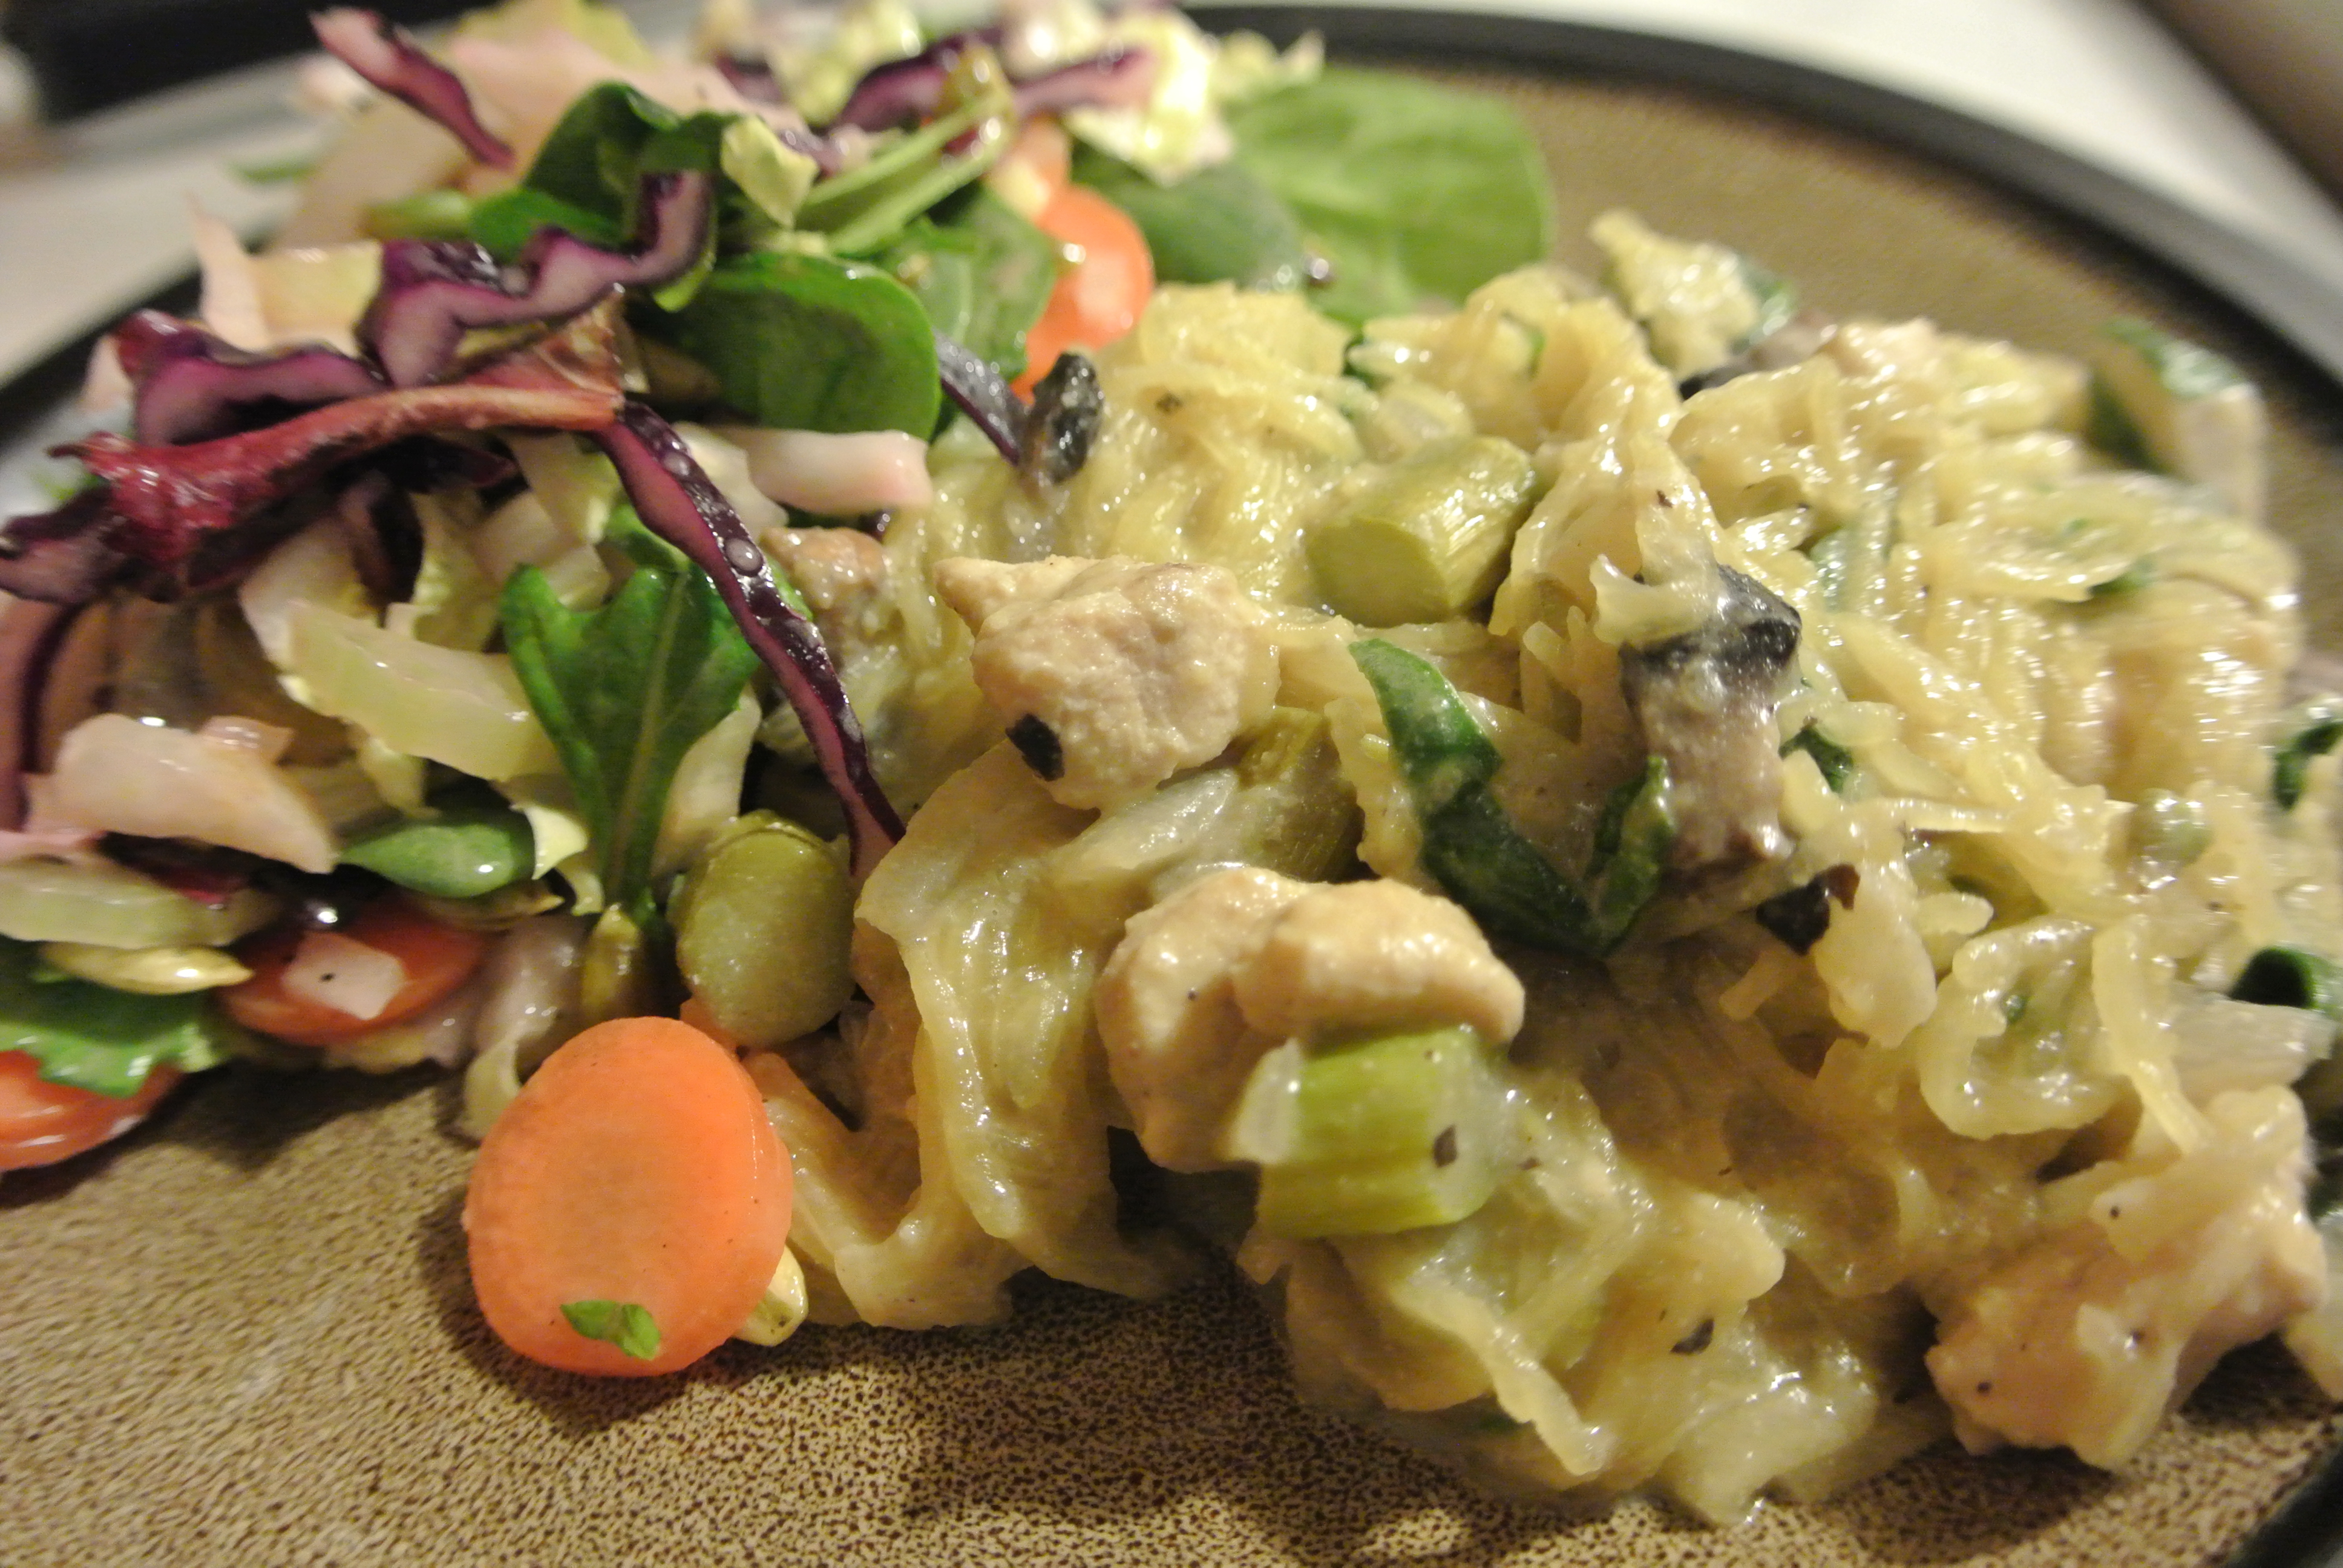
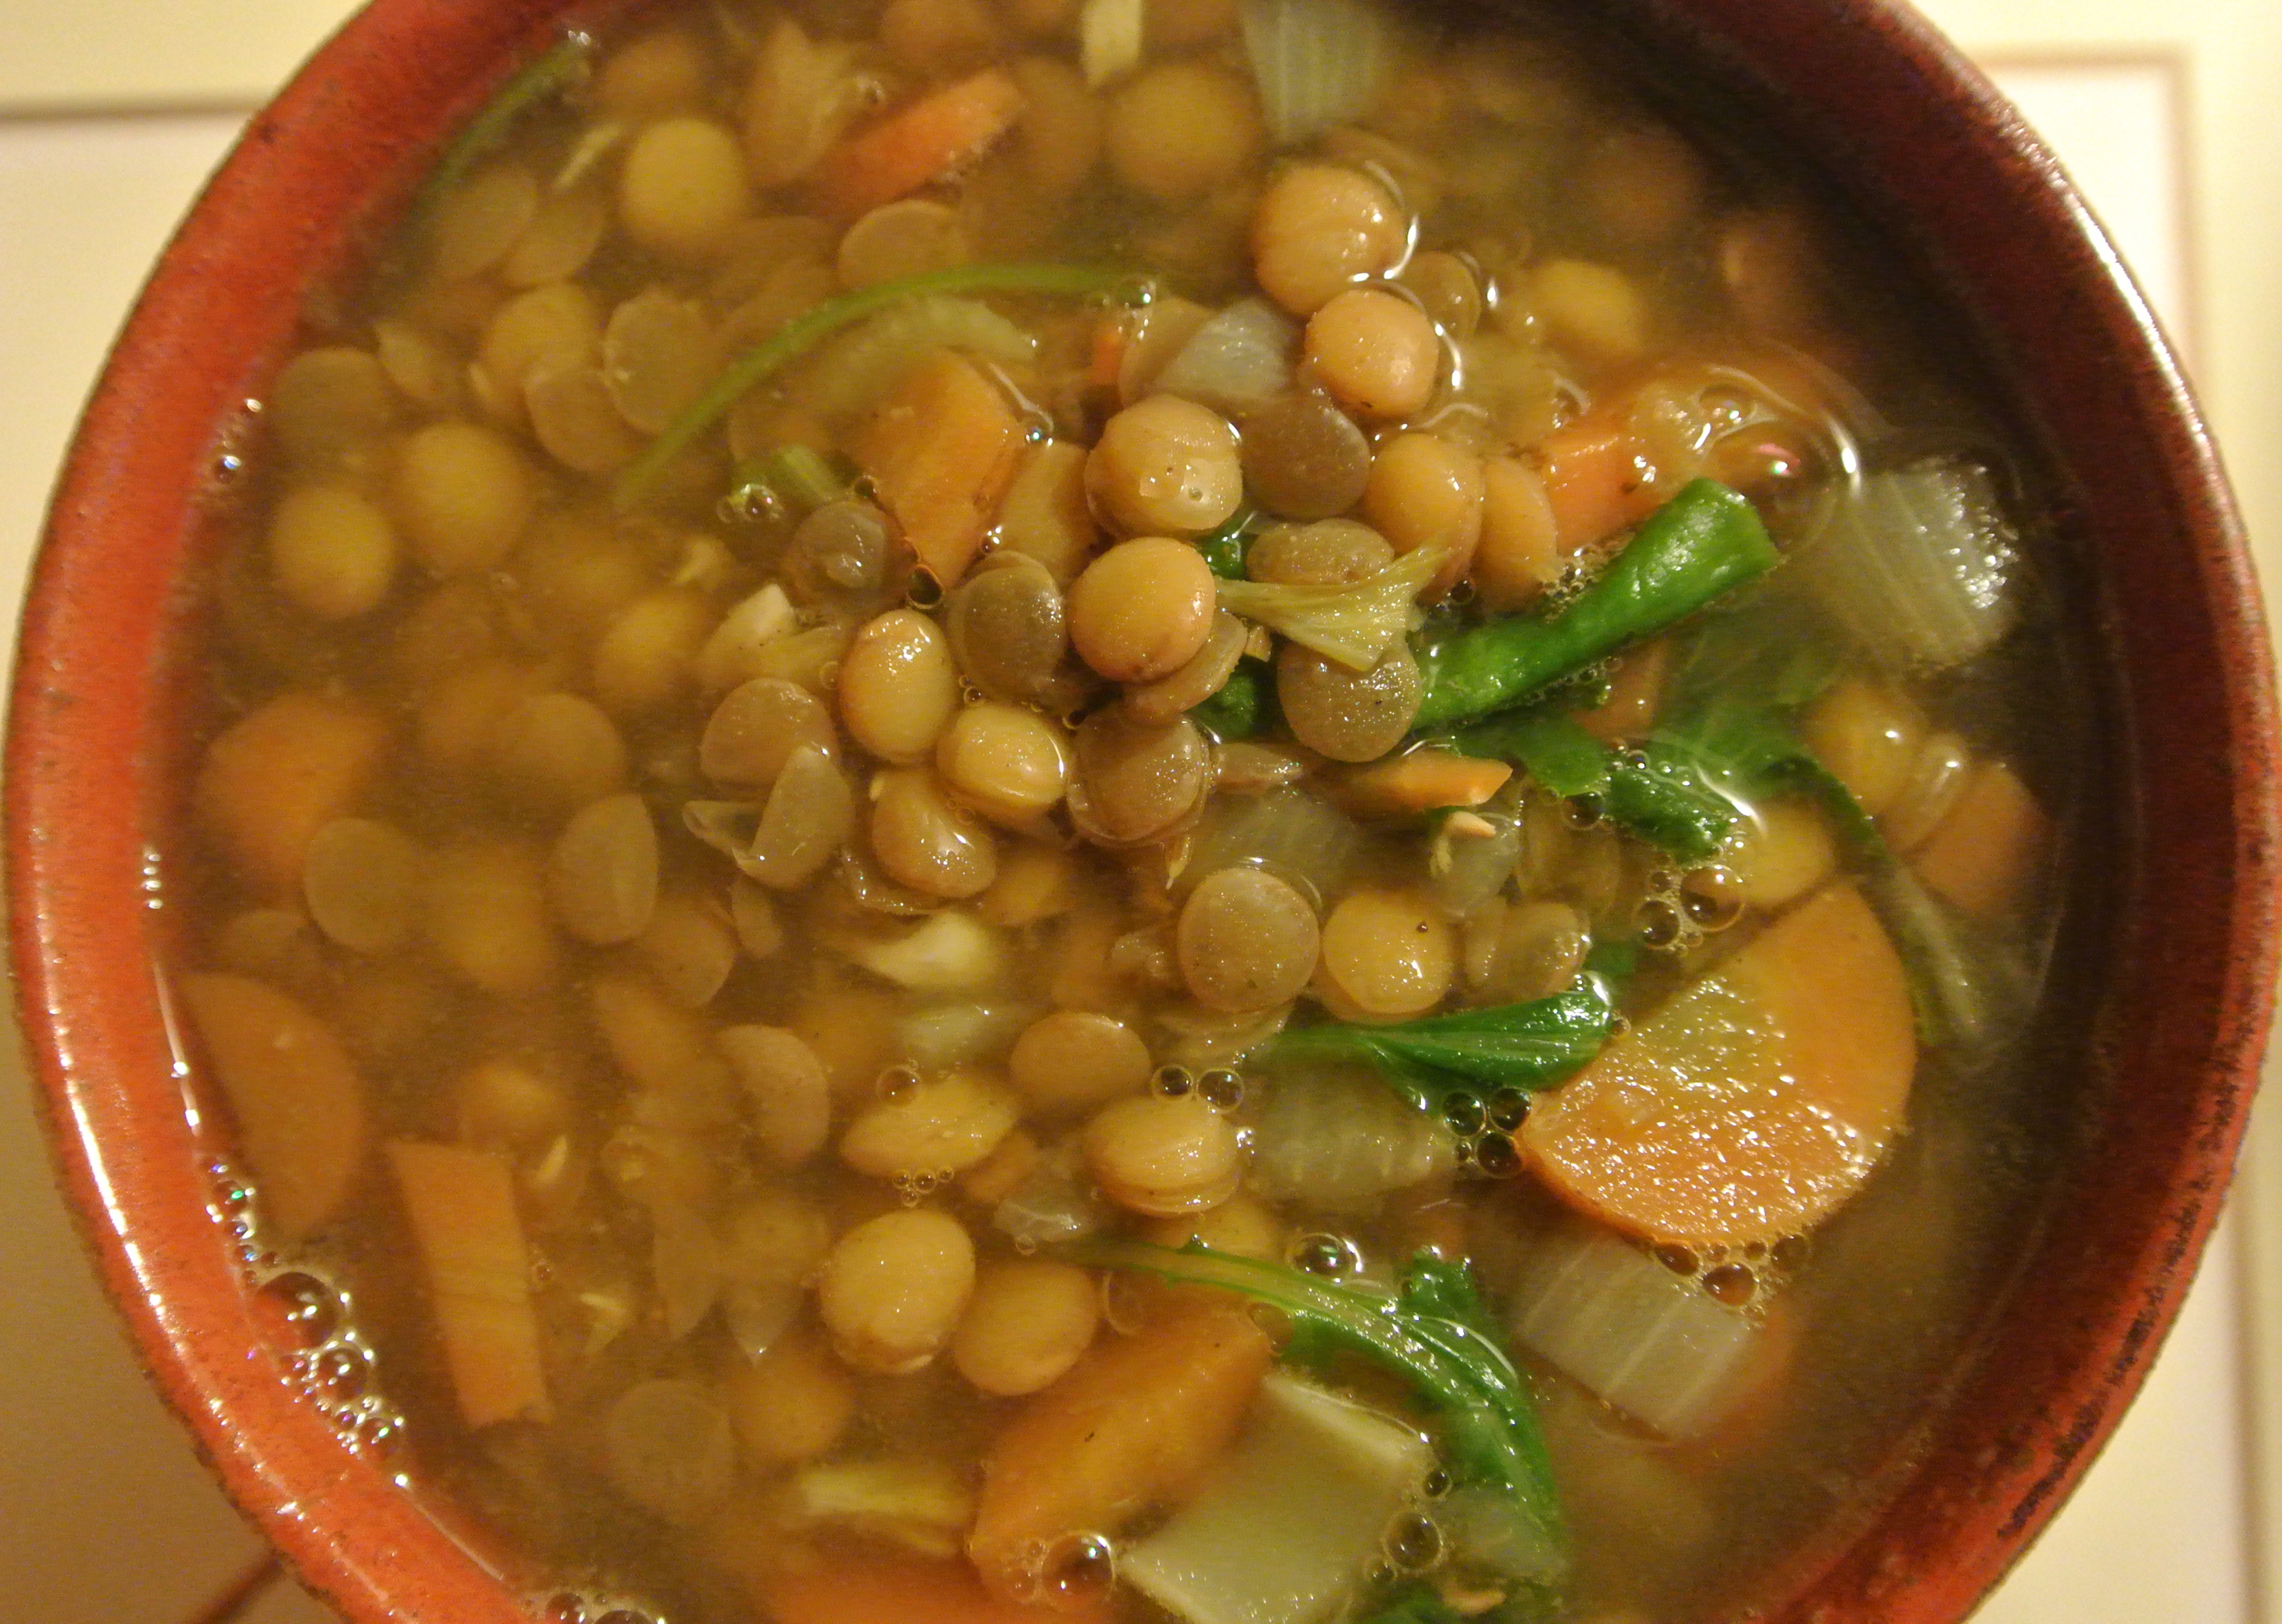
A nourishing soup to satisfy your salty and comfort food cravings.

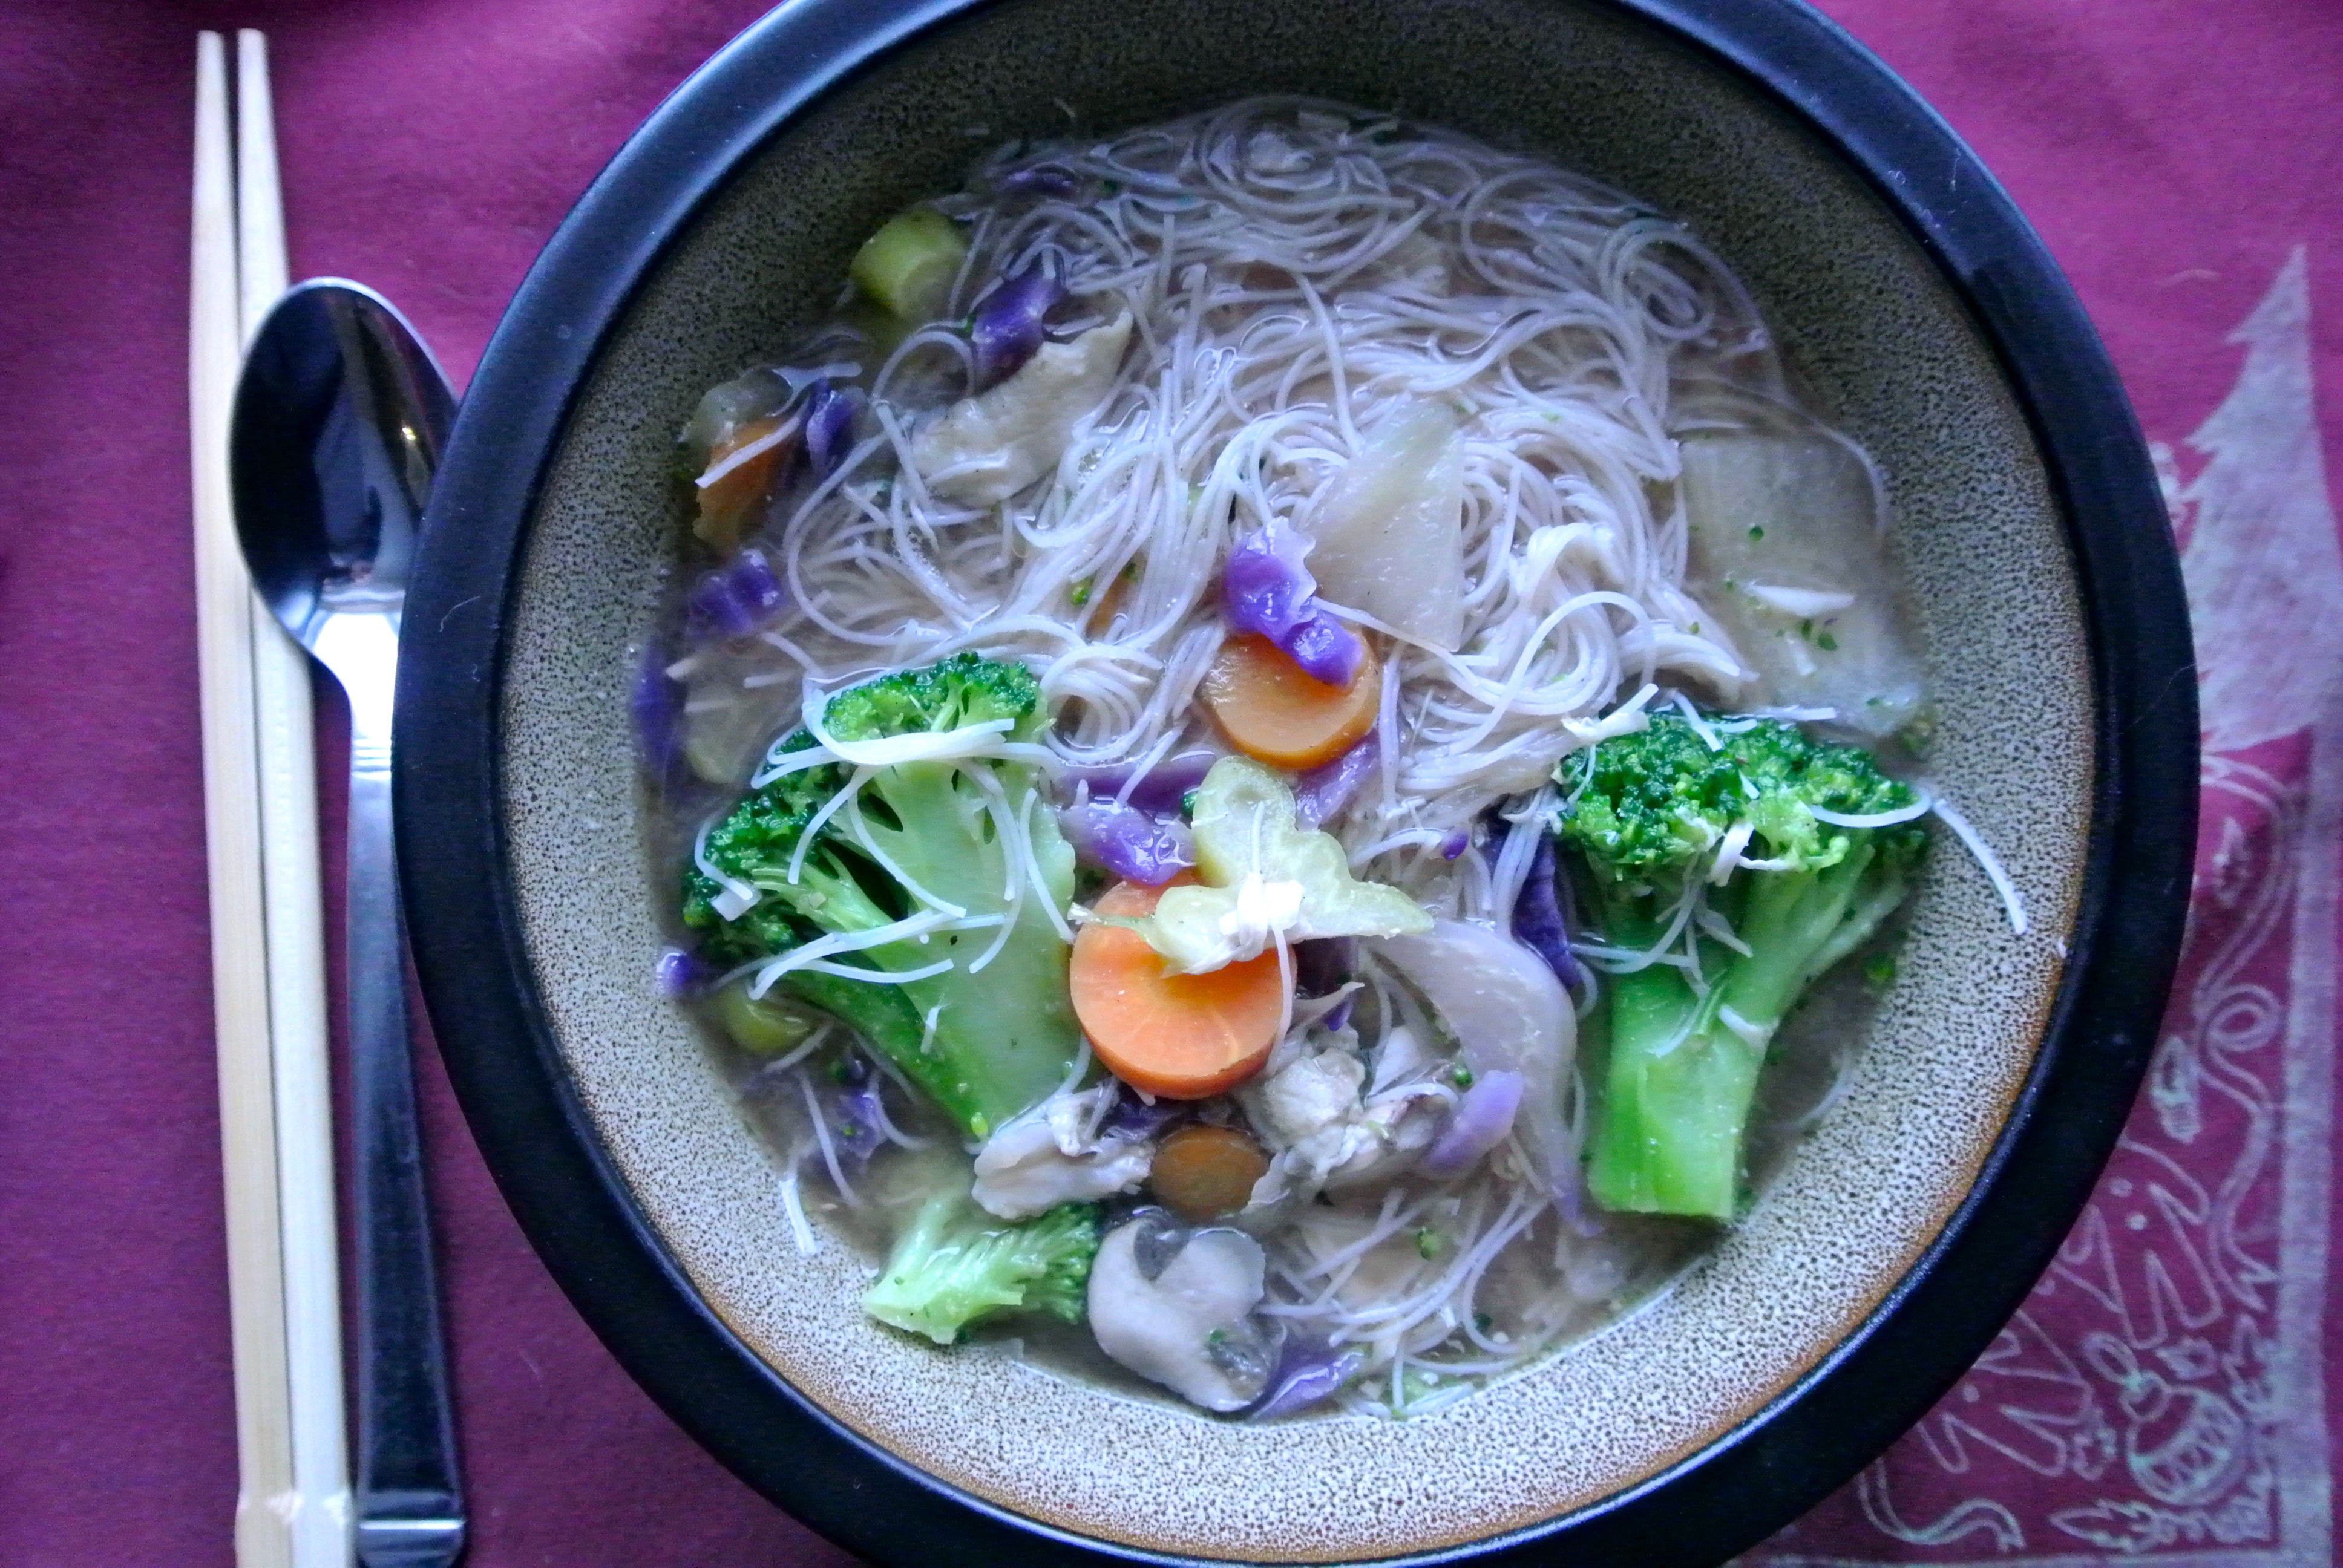
This is an easy, light supper to make the night after a roasted chicken dinner. You can make a really tasty chicken stock by simmering the chicken carcass in about 8-10 cups water for 2-3 hours. Add a splash of vinegar to help draw the calcium out of the bones to give you a mineral rich stock, and any other herbs or spices to intensify the flavour. Usually I just add the cooked spices that were rubbed on the chicken before it was roasted. When the stock is done simmering, let cool completely and remove the chicken pieces from the bone – keep the chicken pieces in the stock and discard the bone.

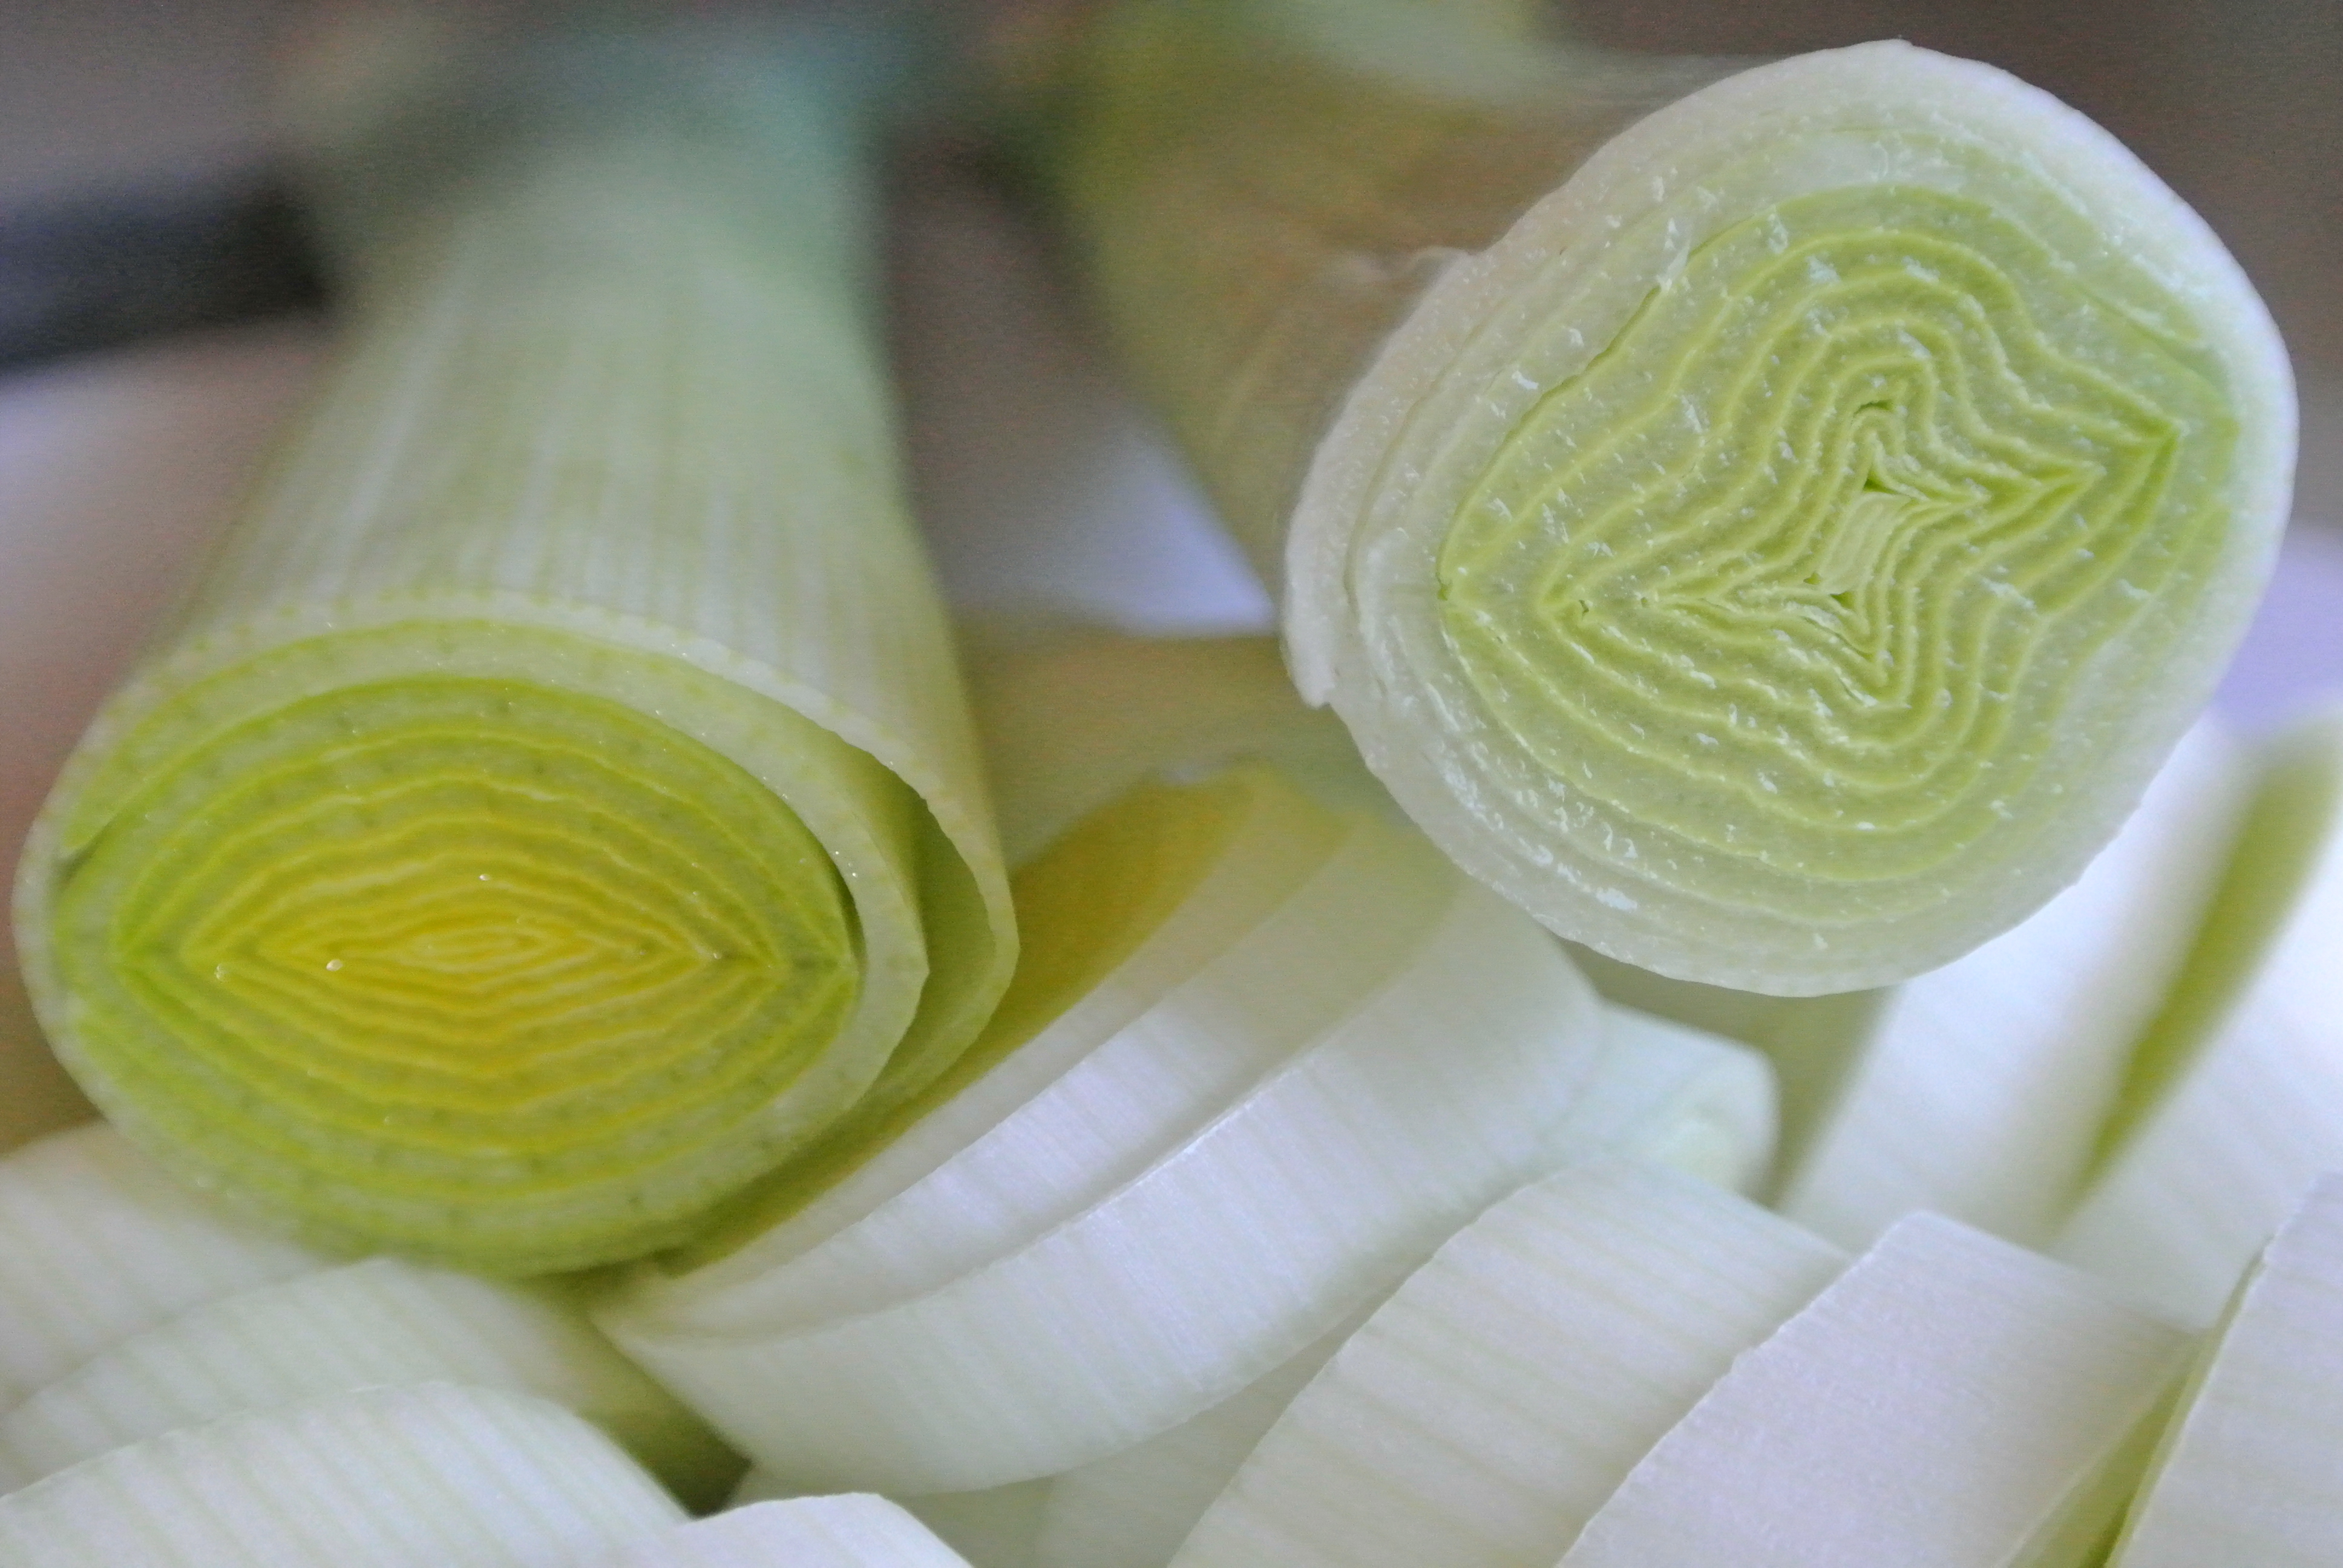
And as always, feel free to add whatever veggies you like to this soup. We like to throw the shorter-cooking veggies like cabbage or other leafy greens at the end of cooking to retain their crisp texture and freshness.

Chicken Noodle Miso Soup (gluten-free, dairy-free)
 
Print
Prep time
10 mins
Cook time
15 mins
Total time
25 mins
 
If you added salt when making your homemade chicken stock, you'll likely need a little less tamari & miso. If you didn't add salt, just leave it out completely because it cancels out the saltiness from the tamari when you add them both in the soup.
Author: Lyndsay & Nicholas
Recipe type: Soup
Cuisine: gluten-free, dairy-free
Serves: 4
Ingredients
  • 7-8 cups chicken stock
  • 1 large onion, sliced into half moons
  • 2 large carrots, thinly sliced into rounds
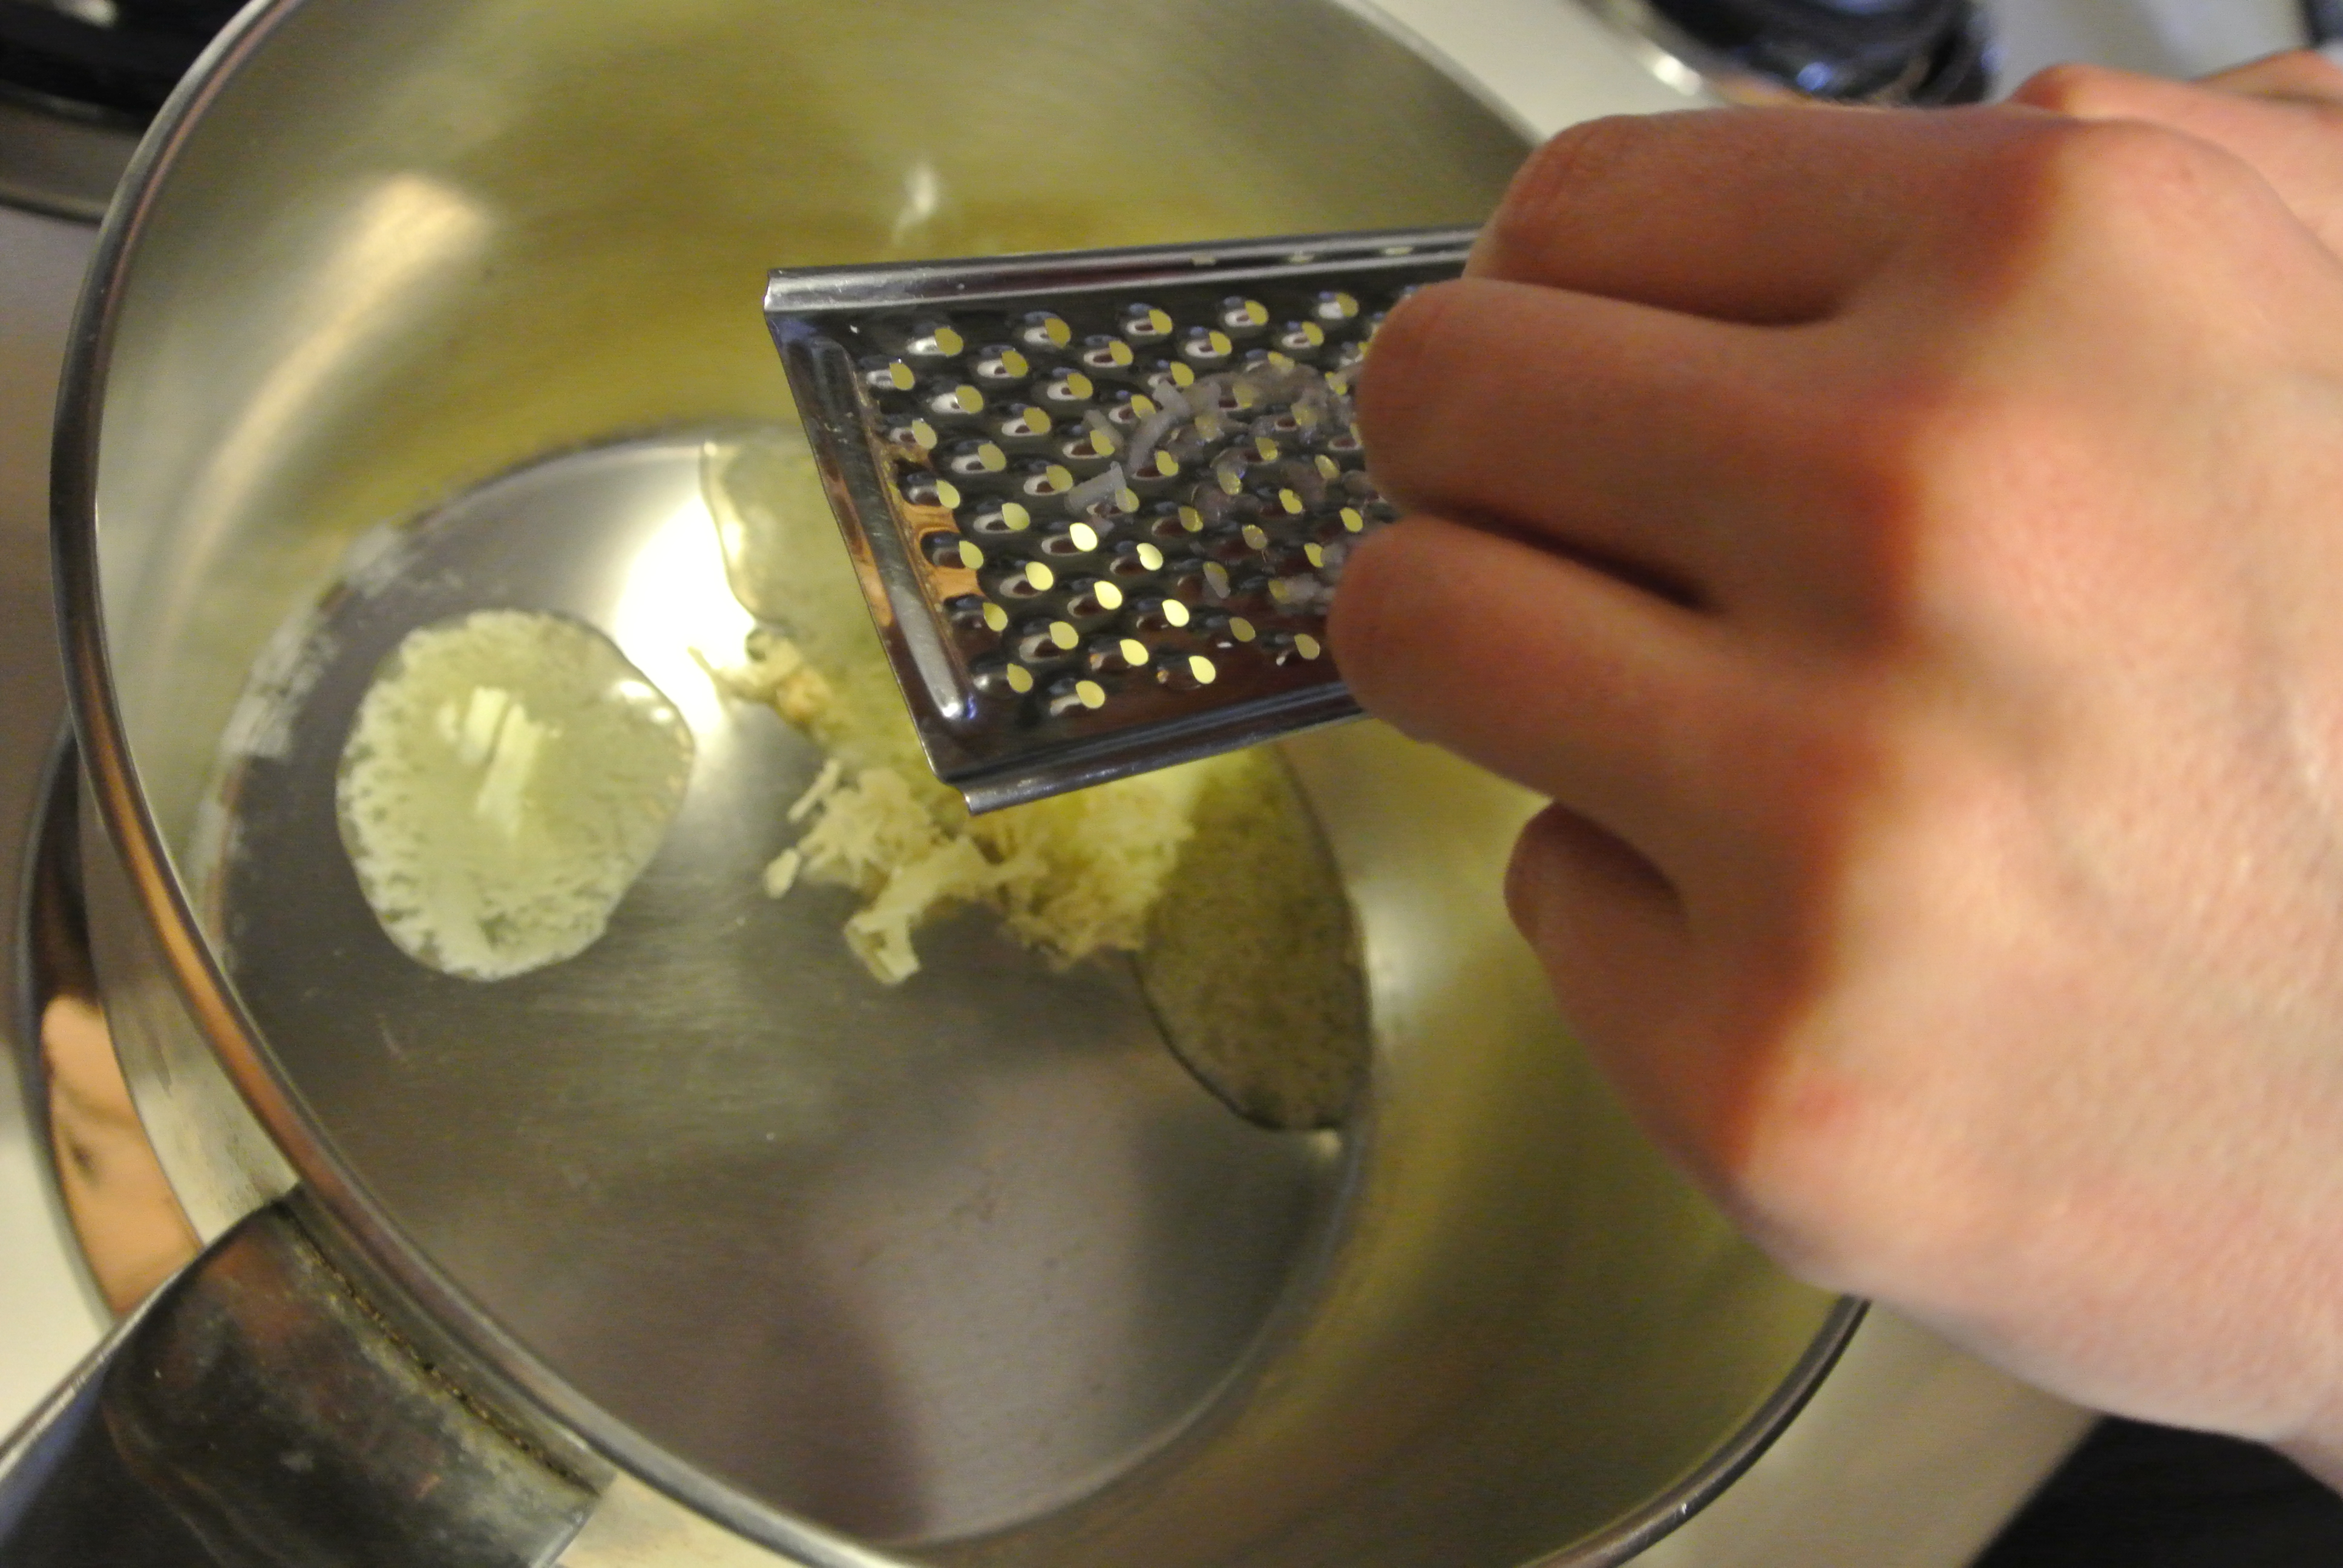
  • 3 cloves garlic, minced
  • 1 cup savoy cabbage (or purple), thinly sliced
  • 1 cup fresh or frozen broccoli florets
  • 1 red thai chili pepper, chopped, or 1 tsp red chili pepper flakes (optional)
  • 4-5 baby bella or white mushrooms, sliced (optional)
  • 5-6 Tbsp Genmai miso
  • 4-5 Tbsp tamari
  • 1 Tbsp rice wine vinegar
  • 2 "patties" of brown rice vermicelli noodles
Instructions
  1. Bring stock to a near-boil & add onion, garlic, carrots. Also add chili pepper & mushrooms, if using. Turn heat down ti simmer, cover & let cook 8-10mins.
  2. Add noodles, broccoli & cabbage and cook for 3-4 more minutes. While the noodles & veggies are cooking, add miso paste, tamari, vinegar & pepper.
  3. Taste and adjust seasoning to your liking. (We tend to be lighter on the vinegar and heavier on the miso & tamari for a flavourful soup).
  4. Serve with a soup spoon & chopsticks.
  5. Enjoy!
3.2.2265

Filed Under: Recipes, Soups & Salads Tagged With: asian chicken noodle soup, asian miso soup recipe, chicken noodle soup, gluten-free chicken noodle soup, miso soup recipe

Potato Leek Soup (gluten-free, dairy-free, vegan)

April 14, 2014 by Dr. Lyndsay Wareham, ND 46 Comments

DSC_5271

Nature’s beautiful symmetric designs in sliced leeks

Simple and delicious, this is a classic winter soup that is easy and quick to prepare – it just involves a little prep time to cut the veggies and then time to let them soften before you blend it up into a creamy and flavourful soup. The thyme gives it the classic savoury flavour that you’re looking for. I mostly use dried thyme since I usually make this soup in the winter and many herbs don’t make it through our snow-packed, chilly winters. But if you live in a milder climate and have fresh thyme on hand, that is always the way to go.

We like to serve this creamy comfort soup with a slice of gluten-free toast for a satisfying meal. Check out our ‘Favourite gluten-free foods‘ post for a list of gluten-free breads we like.  FYI: if you’re new to gluten-free breads, many homemade breads are delicious when eaten fresh. But the store-bought breads are best toasted, and are found in the freezer section of the ‘health food/organic’ section of grocery and health food stores.

Potato Leek Soup (gluten-free, dairy-free, vegan)
 
Print
Prep time
15 mins
Cook time
60 mins
Total time
1 hour 15 mins
 
This creamy soup can be served as a meal with your favourite crackers or toast, and some pumpkin seeds for garnish and extra nutrition.
Author: Lyndsay
Recipe type: Soup
Cuisine: gluten-free, dairy-free, vegan
Serves: 5-6
Ingredients
  • 3-4 Tbsp olive oil
  • 6-8 medium potatoes, peeled and chopped into 1" cubes
  • 2 large leeks, sliced into rounds
  • 6 cups veggie stock or 6 cups water + 1 veggie bouillon cube
  • 2 tsp dried thyme, or 1-2 Tbsp chopped fresh thyme
  • ½ tsp dried dill, or 1 tsp chopped fresh dill (optional)
  • 1-2 tsp sea salt
  • ½ tsp black pepper, and more to taste
Instructions
  1. Heat olive oil in a large pot over medium heat.
  2. Add leeks and potatoes, and sauté for about 5 mins, stirring constantly.
  3. Add in thyme, salt, & pepper, and dill if using. Saute for another 5-10 minutes.
  4. Add veggie stock and bring soup to a near boil. Reduce to low heat, cover pot, and simmer for about 45 minutes.
  5. At the end of simmering, use a stainless steel immersion blender to puree of the soup in the pot until you reach the desired level of smoothness.
  6. Taste and add more salt and pepper if necessary.
  7. Garnish with fresh parsley or pumpkin seeds, and serve along side your favourite gluten-free toast.
3.4.3177

Filed Under: Recipes, Soups & Salads Tagged With: creamy potato leek soup, dairy-free potato leek soup, dairy-free soup recipe, potato leek soup recipe, vegan potato leek soup, vegetarian soup recipes

Thai Panang Curry with Chicken (gluten-free, dairy-free)

March 30, 2014 by Dr. Nicholas Anhorn, ND and Dr. Lyndsay Wareham, ND Leave a Comment

DSC_5254

A fragrant and delicious red curry dish.

You know how most people have a certain style of cooking? Well, not Nick – he’s the most versatile, well-rounded, and talented cook I know. He takes his time when cooking – it takes him most of the day to cook a meal… as it should when using traditional cooking methods 🙂 But the end result is a dish that is complex, sophisticated, and so full of flavour! So, at first, this recipe may look a little intimidating, but please know that you will not be disappointed if you decide to take on this recipe.

One of Nick’s favorite cuisines to prepare is Thai food. His inspiration for this recipe comes from the time he spent at Yousabai farm in Northern Thailand, taking part in a weeklong Thai vegetarian cooking course. This dish contains a few special herbs that are essential to Thai cooking. Galangal, kaffir lime leaves, lemongrass, and Thai basil. You may not recognize galangal and kaffir lime leaves, but these two herbs are indispensable in authentic Thai cooking. They are optional in this recipe because of the difficulty in finding these Thai herbs, but if happen to have them in your kitchen – bonus!

You can easily make this dish vegetarian/vegan by substituting chicken for fried tofu, or cooked chickpeas.

Thai Panang Curry with Chicken
 
Print
Prep time
30 mins
Cook time
60 mins
Total time
1 hour 30 mins
 
The heat from the chilies is balanced by the coconut milk, and the addition of Thai herbs and spices give this dish an authentic Thai flavour in the comfort of your own kitchen.
Author: Nicholas
Recipe type: gluten-free, dairy-free
Cuisine: Thai cooking, dinner
Serves: 4-6
Ingredients
  • 5 thai red chilies, de-seeded, soaked in warm water for 30 mins
  • 2 chicken breasts, cut into strips
  • 1 ½ cups wild rice blend, or long grain brown rice
  • 2⅓ cup water
  • 2-3 Tbsp coconut oil
  • 2 medium onions, chopped
  • 4 cloves garlic, minced
  • 1 Tbsp cumin seeds, whole
  • ½ Tbsp coriander seeds, whole
  • 3 Tbsp Thai red curry paste
  • 1 can coconut milk
  • ¼ cup tamari soy sauce
  • 2 Tbsp coconut or cane sugar
  • 1 Tbsp galangal powder, or 2Tbsp fresh chopped (optional)
  • 5-10 keffir lime leaves (optional)
  • 2 lemongrass stalks, chopped (optional)
  • 1 cup green beans, fresh or frozen, cut into 1” pieces
  • ½ cup green peas, fresh or frozen
  • ½ cup zucchini, diced
  • ½ cup broccoli florets, chopped
  • 1 Tbsp dried thai basil, or 3 Tbsp if using fresh
  • cashews, roasted or dry roasted, for garnish
Instructions
Preparation:
  1. In a small bowl, place red thai chili peppers in warm water to soak for 30 mins.
  2. At the end of soaking time, remove chilies from water, chop off stems and cut lengthwise. Place chilies back in water and de-seed. When most of the seeds are removed (you can leave a few in for heat), take chilies out of water and chop well. Discard water & seeds. Transfer chopped chilies to a mortar. With a pestle and mortar, grind chilies into a paste. Set aside.
  3. Cut chicken breasts into strips. Set aside.
  4. Rinse rice, and add to a medium-sized pot with water. Bring to a boil. Reduce heat to simmer, cover and let sit for 45 mins. When done, fluff with a fork.
Cooking:
  1. In a large skillet, heat 1-2 Tbsp coconut oil over medium-high heat.
  2. Add chopped onions & cook for 2 mins, or until softened.
  3. Add minced garlic, and cook for 1 minute.
  4. Add 1 more Tbsp coconut oil with cumin and coriander seeds. Heat for 30 sec.
  5. Add 3 Tbsp Thai red curry paste, and homemade red thai chili pepper paste. Mix well, and heat for 30 sec.
  6. Empty skillet into a bowl, and set aside.
  7. In the same skillet, heat 1 Tbsp coconut oil. Add chicken strips & cook until done (when there’s no more pink), about 5 mins.
  8. Add chili/curry paste mixture back into skillet, and canned coconut milk. Mix well.
  9. Mix in tamari soy sauce, sugar, and thai basil. Add galangal, kefir lime leaves & chopped lemongrass if using.
  10. Add in green beans, green peas, zucchini, & broccoli florets.
  11. Reduce heat to low, and let simmer for 5-10 mins.
  12. Serve by scooping about ½ cup rice in a bowl, add a large scoop of veggies, and cashews for garnish.
3.2.2265

Filed Under: Lunch & Supper, Recipes Tagged With: homemade red curry dish, homemade thai curry recipe, panang thai curry, red curry, thai cooking

Gluten-free Chocolate Protein Bar (also dairy-free)

March 11, 2014 by Dr. Lyndsay Wareham, ND 6 Comments

DSC_5247

The combination of dark chocolate, nuts & seeds make for a healthy treat & a delicious snack

There are several sources of protein in these bars – nut butter, sunflower and sesame seeds, hemp hearts, and pumpkin seed protein powder. The whole recipe contains about 100 g protein. So if you cut the bars into 12, you get just over 8g of protein for each bar. The protein content in these bars combined with nutritious sources of carbohydrates and healthy fat helps stabilize blood sugar levels, provides energy, and will help you feel satisfied. And we can’t forget the star ingredient – dark cocoa powder – that makes these protein bars decadent!

We like pumpkin seed protein powder because it is a high quality and easy-to-digest protein source.  It is naturally high in vitamin K and important minerals such as zinc, magnesium, and iron. The mild flavour also makes it a versatile protein powder that can be easily added many recipes and smoothies. We use Omega Nutrition Organic Pumpkin Seed Protein Powder. If you’re a ‘Monctonian’, you can find this product at Corn Crib, otherwise check with your local health food store.

*Inside Scoop: So, after the first experiment with this recipe, I was feeling pretty good about myself – this recipe came intuitively to me and I got the exact flavour that I wanted! But ,the texture was a little runny… so I thought I would try to tweak a few things to get the right texture. But that didn’t work out so well, so I tried again. And again… and again… It wasn’t until ‘Experiment #12’ that I finally got the bar that I had envisioned – taste, texture, and all – so I hope you enjoy these little bars of imperfect perfection as much as we do 🙂

Gluten-free Chocolate Protein Bar (dairy-free)
 
Print
Prep time
30 mins
Total time
30 mins
 
These soft, chewy protein bars are perfectly sweet & balanced with nut butter & seeds. We try to always have a batch of these bars in the freezer for a tasty snack.
Author: Lyndsay
Recipe type: gluten-free snacks
Serves: 12 bars
Ingredients
dry ingredients:
  • ½ cup pumpkin seed protein powder
  • ¼ cup dark cocoa powder
  • ½ cup roasted sunflower seeds or raw pumpkin seeds
  • ¼ cup sesame seeds, raw
  • ¼ cup hemp hearts
  • ¼ cup shredded coconut (optional)
wet ingredients:
  • 6 Tbsp natural peanut butter or roasted almond butter
  • 3 Tbsp honey (& maybe a few squirts more, if needed)
  • 1 tsp pure vanilla extract
other ingredients:
  • ⅔ cup dates, pitted
  • ¼ cup hot water
Instructions
  1. Line a 10"x6" or 8"x8"glass baking dish with wax paper. Set aside.
  2. In a kettle, heat some water to near boil.
  3. Place chopped dates in a blender (a magic bullet works well, or immersion blender), add hot water, and cover. Let sit for 10 mins.
  4. Place all dry ingredients in a medium sized bowl. Mix together well.
  5. Add wet ingredients to dry ingredients and mix together a little bit. (At this point, there won’t be enough wet ingredients to combine with the dry).
  6. When dates are done soaking, blend on high for about 20 seconds (stopping to scrape down the sides) until you get a date paste. A magic bullet-like blender works really well here.
  7. Add date paste to dry & wet ingredients. Mix together really well with a large spoon. If you need a little more moisture, add a few extra squirts of honey.
  8. Spoon ingredients into wax paper-lined baking dish.
  9. Wet your hand, and smooth out mixture - this prevents the mixture from sticking.
  10. Refrigerate for 3-24 hours.
  11. Cut into bars and store in a covered container in fridge (for 10 days) or freezer (for 3 months or more). Place wax paper between the layers of bars to prevent bars from sticking together.
3.4.3177

Don’t have pumpkin seed protein powder? If you’d rather use whey protein powder, you can substitute in 1/2 cup whey protein powder and 1/4 cup almond meal in order to get the a nice chewy texture. But, since whey is derived from milk, it is no longer dairy-free. As well, whey contains small amounts of lactose, so if you are really sensitive to lactose, whey could cause digestive upset. Whey protein isolate, however, goes through an extra filtering process to remove the carbohydrate (lactose). If you think you’re lactose intolerant but whey protein isolate still wreaks havoc on your digestive system, then it is likely the whey protein itself that you’re reacting to.

Filed Under: Recipes, Snacks & Baked Goods Tagged With: chocolate almond butter protein bars, chocolate peanut butter protein bars, dairy-free snack idea, gluten and dairy free protein bar, gluten free snack idea, gluten-free protein bars, homemade gluten-free protein bars, homemade protein bars, homemade snack bars

Oatmeal Chocolate Chip Lactation Cookie Bars

March 10, 2014 by Dr. Lyndsay Wareham, ND 25 Comments

DSC_5189These cookie bars were created with breastfeeding mothers in mind as they contain a few ingredients that are believed to help promote a healthy milk supply. One ingredient is Oats, which are very nutritious, and are a good source of fiber; Flax, which contain omega-3 fatty acids and are also a source of fiber; and Brewer’s yeast, which has traditionally been known to help enrich milk supply due to its high B-vitamin content. These bars are chewy, sweet, and hearty – and best of all, they work! So feel free to indulge in these little treats Mama, because you deserve it!

In the article ‘Healthy Foods to Nurture the New Mom’, I state that chocolate is on the ‘limited or avoid’ list of foods for new moms to eat, but if you aren’t super sensitive to chocolate, then the amount of chocolate in these bars shouldn’t bother you or your baby. But in the event that it does, just omit the chocolate chips and substitute in your favourite nut or seed, shredded coconut, or even carob chips. But if you can tolerate chocolate, then I highly suggest keeping it in since it seems to be the key ingredient to take the edge off the taste of brewer’s yeast.

Gluten-sensitive or Celiac? Oats themselves do  do not contain gluten, but they are so frequently contaminated with wheat during processing that you will need to look for certified ‘Gluten-free Oats’ if you are concerned about having gluten in your diet. As well, because brewer’s yeast is a by-product of beer, it is often contaminated with barley which is a gluten-containing grain. So, if you have Celiac disease, these bars are not gluten-free but you could make them gluten-free by omitting the brewer’s yeast and selecting gluten-free oats. For those who are gluten-sensitive, these bars are gluten-limited since we are using gluten-free flours such as almond flour and coconut flour.

Oatmeal Chocolate Chip Lactation Cookie Bars
 
Print
Prep time
20 mins
Cook time
35 mins
Total time
55 mins
 
If you’d rather enjoy these bars as cookies, simply swap out the coconut oil for organic butter, spoon dough onto a cookie sheet lined with a silicone baking mat or parchment paper, gently flatten, and bake for 10-12 mins.
Author: Lyndsay
Recipe type: baking
Serves: 24-28 bars
Ingredients
dry ingredients:
  • 3 cups large flake oats
  • ½ cup almond flour
  • ½ cup coconut flour
  • ¼ cup brewer’s yeast
  • 1 tsp cinnamon
  • 1 tsp baking soda
  • ½ tsp sea salt
wet ingredients:
  • ½ cup ground flax
  • ¾ cup hot water (+ 1-2 Tbsp, if needed)
  • ½ cup coconut oil, melted
  • ½ cup unsweetened applesauce
  • ½ cup maple syrup
  • 2 tsp pure vanilla extract
other ingredients:
  • ½ cup raisins (soaked in hot water for at least 15mins, and drained)
  • ½ cup dark chocolate chips or dark chocolate bar piece
optional ingredients:
  • walnuts pieces
  • shredded coconut
Instructions
  1. Preheat oven to 350 degrees.
  2. Grease a large 13"x 9" baking dish with coconut oil.
  3. Add hot water to raisins and let sit for 15 mins. Set aside.
  4. In a large bowl, combine dry ingredients and mix together well.
  5. In a medium sized bowl, mix ground flax with wet ingredients, and blend together with a hand blender.
  6. Add wet ingredients to dry ingredients and stir together until all ingredients are incorporated. Don’t worry about over mixing.
  7. Drain raisins. Fold raisins and chocolate chips into mixture. If you need more moisture, add 1-2 Tbsp more water and mix together well.
  8. Scoop dough into greased baking dish. Smooth out the top evenly with your hand or the back of a spoon.
  9. Bake for 30-35 mins, or until edges are browned.
  10. Let cool completely before cutting into 24-28 bars.
  11. Enjoy these bars when fresh, or store them in an airtight container in the freezer. These bars freeze really well and straight out of the freezer is my favourite way to eat them!
3.2.2265

*Please note: Even though these are special for nursing Moms, other family members can safely eat them without any unwanted milk-making effects. But,  you can also make them without brewer’s yeast for a delicious oatmeal chocolate chip cookie bar treat! 

Filed Under: Recipes, Snacks & Baked Goods Tagged With: breastfeeding friendly food, gluten-limited lactation cookies, lactation bar recipe, lactation bars for gluten-sensitive, lactation cookie recipe, milk making mama bars, oatmeal lactation cookie, oatmeal lactation cookie bars, recipes for breastfeeding moms

Jenna’s Creamy Garlic ‘Cheese’ Sauce with Spaghetti Squash Noodles (gluten-free, dairy-free option)

March 6, 2014 by Dr. Lyndsay Wareham, ND 2 Comments

DSC_5109

A creamy pasta dish all made from veggies

My sister, Jenna, created this recipe. If you know her, you probably didn’t know that she’s a fantastic cook – a very intuitive and brilliant cook! She has a taste for savoury flavours and can create delicious, healthy dishes intuitively just by adding a bit of this and a bit of that… You should hear her explain one of her recipes to me…”Then you add some dijon, and maybe DSC_5101a bit of lemon juice. Stir it around and just before its done, add whatever else you want”…. Not exactly easy to interpret into an easy-to-follow recipe ;) And she doesn’t use measuring cups… ever. So, when I can catch her, I follow her around the kitchen, taking pictures so I don’t forget anything, and eventually we create a recipe.

This “cheese” sauce gets its cheesy flavour from  nutritional yeast, which is a deactivated yeast that is high in B vitamins (don’t be alarmed when your pee turns bright yellow-green colour after eating this stuff – its just your body excreting the extra B vitamins that it doesn’t absorb). In the culinary world, you’ll see many people sprinkle nutritional yeast on popcorn or kale chips to give a cheesy flavour without the cheese.

If you want to make this dairy-free & vegan, substitute Earth Balance instead of butter, omit chicken and parmesan garnish. 

Jenna's dairy-free mac & cheese with spaghetti squash (gluten-free, dairy-free, vegan)
 
Print
Prep time
10 mins
Cook time
1 hour 30 mins
Total time
1 hour 40 mins
 
Other veggies that are good with this combination: broccoli florets, green peas, chopped carrots, sliced zucchini, and shredded purple cabbage.
Author: Jenna Wareham
Recipe type: gluten-free supper, gluten-free pasta
Serves: 5-6
Ingredients
  • 1 medium spaghetti squash
  • 2 chicken breast, cut into pieces
  • 1 large onion, chopped
  • 6-8 mini portabello or white button mushrooms, chopped
  • 8-10 asparagus spears, chopped into ½" slices
  • 3-4 cups spinach, chopped
sauce:
  • 2 Tbsp butter
  • 3 cloves garlic, whole
  • 2 Tbsp brown rice flour
  • 1½ - 2 cups unsweetened almond milk
  • 2 Tbsp dijon mustard
  • juice of ½ lemon
  • ¼ - ⅓ cup nutritional yeast flakes
  • salt & pepper, to taste
optional ingredients:
  • fresh parmesan, grated
Instructions
  1. Preparing the Squash:
  2. Preheat oven to 375.
  3. Wash outside of squash and poke several shallow holes in the skin to allow air to escape.
  4. Place squash in a baking dish and bake for 1 hour.
  5. Remove from oven and let cool.
  6. Cut squash lengthwise with a serrated knife, and scoop the seeds into the compost.
  7. With a fork, grate lengthwise along the inside of the squash to make "spaghetti" and place spaghetti in a large bowl. Set aside.
  8. Discard outer squash shell
  9. Preparing the veggies:
  10. Chop all veggies to desired size, including chopped spinach. Set aside.
  11. In a large skillet, heat 1-2 Tbsp olive oil. Add chicken pieces and cook 5-7 mins, stirring often.
  12. When chicken is done, add veggies (except spinach) and sautee until almost done (about 10 mins). This will take about the same amount of time to make the sauce, so you can start the sauce while sautéing the veggies.
  13. Preparing the sauce:
  14. As veggies are sautéing, in a small saucepan, over medium heat, melt 2 Tbsp butter. While butter is melting, grate 3 cloves of garlic into butter. Add a few pinches of salt and pepper, and 2 Tbsp brown rice flour. Stir quickly to mix together well.
  15. Add 1½ cup unsweetened almond milk, stirring continuously. As the sauce thickens, add about ½ cup more almond milk. Continue stirring for 3-5 more minutes.
  16. Add 2 Tbsp dijon mustard, juice from ½ lemon, and about ⅓ cup nutritional yeast flakes, starting with ¼ cup and adding more until you get the desired taste. Add more salt and pepper, if needed.
  17. Remove sauce from heat.
  18. Putting it all together:
  19. To the large skillet of sautéed veggies and chicken, add spaghetti squash and chopped spinach. Stir to combine.
  20. Pour sauce over veggies and stir to mix all ingredients together. Add more salt & pepper, to taste.
  21. Garnish with grated parmesan, if using. Serve it on its own, or with a green salad for an extra serving of veggies.
  22. Enjoy!
3.2.2265

Filed Under: Lunch & Supper, Recipes Tagged With: dairy-free cheese sauce, dairy-free creamy pasta, gluten-free pasta dish, healthy gluten-free pasta dish, spaghetti squash pasta

Luscious Lentil Soup (gluten-free, dairy-free, vegan)

March 2, 2014 by Dr. Lyndsay Wareham, ND Leave a Comment

The cumin adds an aromatic twist to this hearty soup.

Fresh ground cumin & garam masala add an aromatic twist to this hearty soup.

The spices in this soup make it so flavourful – cumin and garam masala. We find that its best to  grind your own cumin from cumin seeds rather than buying ground cumin. You’ll get a  more intense and fresh flavour, and you’ll likely notice that you need less spice to get the flavour that you’re looking for. The same goes for coriander seeds, cardamom, and cloves. You can either use a seed grinder, a good blender, or pestle and mortar. You can also grate nutmeg with a fine grater to get fresh nutmeg which makes a big difference when added to baking. And if you’re feeling really adventurous, you can mix up your own garam masala too – we use Vij’s recipe from his cookbook: Vij’s Elegant and Inspired Indian Cuisine. 

If you don’t have any veggie stock, you can use a bouillon cube. Generally bouillon cubes are higher in sodium than homemade veggie stock, but adding a bouillon cube can help boost the flavour quite a bit. We like GoBio organic yeast-free vegetable bouillon cube, which can be found at most grocery stores and also at Corn Crib. If you use a bouillon cube, you’ll probably only need to add 1 tsp salt.

Cooking Tip: When cooking with dried lentils and beans, it is best to avoid adding salt before or during cooking, because it will cause the outside of the bean or lentil to become hard and the inside will separate from the outer shell and become mushy. However, after the beans and lentils are fully cooked, adding salt to season is a good idea. Often bean or lentil soups are better the next day and won’t taste as ‘fresh’ because, with time, the spices and seasonings will be absorbed by the beans & lentils.

Luscious Lentil Soup (gluten-free, dairy-free, vegan)
 
Print
Prep time
10 mins
Cook time
50 mins
Total time
1 hour
 
This simple lentil soup recipe is made 'luscious' by adding garam marsala and freshly ground cumin.
Author: Lyndsay
Recipe type: Soup
Serves: 6-8
Ingredients
  • 1 Tbsp olive oil
  • 1 large onion, chopped
  • 3-4 cloves garlic, crushed
  • 3 carrots, chopped
  • 2-3 tsp garam marsala
  • 2-3 tsp ground cumin
  • 2 cups green lentils, rinsed & drained
  • 8-10 cups veggie stock or water +1 organic veggie bouillon cube
  • 4 large handfuls of baby kale or baby spinach leaves
  • 1-2 tsp sea salt, to taste
  • pepper, to taste
  • splash of red wine vinegar (optional)
Instructions
  1. Heat olive oil in a large pot over medium heat. Add onion & garlic. Sauté for 3-5 mins, or until onions begin to soften.
  2. Add carrots & spices; sauté for about 5 mins more.
  3. Rinse lentils and add to pot with water.
  4. Cover pot, bring to a boil, and simmer 35-40 mins.
  5. Add salt & pepper (and bouillon cube, if using), and simmer another 10 mins. Add spinach or kale toward the end of this 10 mins and stir the soup to incorporate the greens.
  6. Add a splash of red wine vinegar, if using. Season with a little more salt and pepper, to taste.
  7. And, Serve!
3.2.2265

Filed Under: Recipes, Soups & Salads Tagged With: easy lentil soup, green lentil soup, homemade soup, homemade vegetarian soup, tasty lentil soup, vegan soup recipe

Spirulina Energy Balls (gluten-free, dairy-free, vegan)

February 27, 2014 by Dr. Lyndsay Wareham, ND Leave a Comment

These energy balls as great as part of breakfast, as a snack on-the-go, or dessert!

These energy balls as great as part of breakfast, as a snack on-the-go, or dessert!

 I got this idea from Rita Mustafa’s ‘Gluten-free, dairy-free, egg-free recipes’ cookbook. These energy balls are quick to prepare and quick to disappear! People of all ages love them – the combination of sweet, nutty, and crunchy rolled into a little ball is irresistible even for the ‘little people’ in our lives – what a great way to get some protein into our children! 

All of the ingredients are likely something that you already have in your cupboard… except, spirulina. So, if you don’t have spirulina, you can just omit it and they will turn out just as tasty and will still contain a generous amount of protein from the almonds, almond butter, and hemp hearts.

Enjoy!

Spirulina Energy Balls (gluten-free, dairy-free, vegan)
 
Print
Prep time
25 mins
Total time
25 mins
 
These energy balls are a good vegan source of protein - hemp hearts, almonds, and spirulina
Recipe type: gluten & dairy free dessert or snack
Serves: 16-18 balls
Ingredients
  • ½ cup almonds, chopped well
  • ⅓ cup dates, pitted and chopped
  • ⅔ cup gluten-free ‘crispy rice’ cereal
  • ⅓ cup almond butter
  • ⅓ cup raisins or dried cranberries
  • 2 Tbsp maple syrup
  • 2 Tbsp hemp hearts
  • 1 Tbsp spirulina powder
optional ingredients:
  • ¼ cup chopped almonds for garnish
  • ¼ cup shredded coconut for garnish
Instructions
  1. Chop almonds well and set aside ¼ cup for garnish.
  2. Place remaining chopped almonds and other ingredients into a food processor or blender. (I used our Vitamix)
  3. Process until mixture turns sticky and will form into a ball. You’ll need to pulse and scrape down the sides a few times.
  4. Scoop mixture out by the Tbsp, roll into a ball and them roll through reserved chopped almonds, if using.
  5. Continue until remaining mixture is gone.
  6. Serve immediately or chill before serving.
  7. Store in fridge for up to 10 days or in the freezer for longer.
3.2.2265


Filed Under: Recipes, Snacks & Baked Goods Tagged With: energy balls, gluten free energy balls, gluten free snack idea, homemade protein energy balls

Maple-kissed sesame seed cookies (gluten-free, dairy-free, vegan)

February 7, 2014 by Dr. Lyndsay Wareham, ND Leave a Comment


DSC_4872

Nutritious and delicious!

These cookies are slightly sweet, peanut-like flavour, and have a flaky texture similar to a sugar cookie. They are also high in calcium, which is important for most people – especially women, in particular pregnant and nursing women. And this low-sugar, nutritious cookie can be a tasty treat for kids to enjoy too!

Maple-kissed sesame seed cookies (gluten-free, dairy-free, vegan)
 
Print
Prep time
20 mins
Cook time
14 mins
Total time
34 mins
 
Treat yourself by sitting down to relax, and enjoy these sweet, nutritious cookies alongside your favourite cup of tea...
Author: Lyndsay
Recipe type: gluten-free cookies
Serves: 16 cookies
Ingredients
dry ingredients:
  • ½ cup brown rice flour
  • ½ cup sorghum flour
  • ⅓ cup tapioca starch
  • ½ tsp baking soda
  • pinch of salt
wet ingredients:
  • ⅓ cup maple syrup
  • ¼ cup tahini
  • ¼ cup melted coconut oil
  • 1 tsp pure vanilla extract
other ingredients:
  • ⅓ cup raw sesame seeds
Instructions
  1. Preheat oven to 350 degrees.
  2. Line a baking sheet with parchment paper or a silicone baking mat and set aside.
  3. In a medium bowl, add dry ingredients and mix together well.
  4. Stir in tahini, coconut oil, and maple syrup until you get a smooth batter.
  5. Roll batter into 16 equal sized balls.
  6. Place sesame seeds in a small bowl and, one by one, dip the balls into the sesame seeds and flatten into cookies.
  7. Place cookies on the prepared cookie sheet. (there will be sesame seeds everywhere, and that’s ok)
  8. Bake in oven for 12-14 minutes, or until the edges turn a golden brown.
  9. Transfer to a wire rack, let cool completely, and enjoy!
3.2.2265


Filed Under: Recipes, Snacks & Baked Goods Tagged With: calcium rich cookies, dairy free cookies, dairy-free calcium-rich foods, dairy-free source of calcium, easy gluten-free cookie recipe, featured, gluten free cookies

Sweet & Spicy Warming Rooibos Chai Tea

February 5, 2014 by Dr. Lyndsay Wareham, ND 1 Comment

Chai tea is a warming, spicy tea that helps promote healthy digestion by reducing bloating, boosts immunity, and is a nice sweet treat to sip on through the day. Chai tea is traditionally made with black tea but we’re using rooibos tea, which is high in antioxidants and naturally caffeine-free. However… If I you are looking for a little caffeine boost, you can add 1 tsp black tea leaves (assam or black chai) to about 1 cup of near-boiling water, then add 1 cup of the heated steeped chai tea and a touch of mylk to make a really yummy morning cup of Chai tea.

I’ll usually let the tea simmer for several hours, adding water as needed, since the flavours from the spices are released the longer you steep them. I’ve even left it over night (turned off, of course) and in the morning there is a nice strong brew of rooibos chai tea ready to be made into a black-rooibos chai tea when I add black tea leaves, as mentioned above.

We have these really cool Libre tea mugs that have a strainer built right into the mug so that you can drink looseleaf teas anytime and anywhere. This comes in really handy when you’re scooping up this homemade the chai tea – spices and all.

WARMING ROOIBOS CHAI TEA

DSC_4884

Beautiful display of Rooibos chai tea ingredients.

Ingredients

  • 6 cups water
  • 2 inch chunk fresh ginger, thinly sliced
  • 3 Tbsp honey
  • 1 cinnamon stick, broken into pieces
  • 1 tsp whole cloves
  • 1 tsp whole fennel seeds
  • 15 cardamon pods, opened (about 1 generous tsp)
  • 1 – 1 ½ tsp ground cinnamon
  • 2-3 tsp rooibos loose tea (or 2 bags rooibos tea)
  • Milk or ‘mylk’ alternative, to taste

Directions

  • Place 4 cups of water, ginger, honey and all spices and in a medium sized pot.
  • Bring to a near-boil. Let simmer for 30 minutes, covered.
  • Add 2 cups water and rooibos tea, cover pot, and let simmer 10-20 minutes.
  • Scoop tea into your favorite mug or tea pot (you may need a strainer to catch any spices) and add mylk to taste.
  • The longer you let the spices steep, the more flavour will be released. Sometimes I’ll let the tea simmer for an hour or two (or more!), adding more water as needed.

Filed Under: Recipes, Smoothies & Drinks Tagged With: caffeine-free chai tea, feature, homemade chai tea, rooibos chai tea

  • « Previous Page
  • 1
  • 2
  • 3
  • 4
  • 5
  • Next Page »

Meet Dr. Nicholas ND & Dr. Lyndsay ND

We are two naturopathic doctors with a vision to inspire healthy cooking, healthy eating, and healthy living for you and your family.  Read more about us >>

  • Email
  • Facebook

Subscribe

Heart Healthy Omega Burgers

Dairy-free Cashew Cream for Breakfast Parfaits & more!

Four essential ways to use Turmeric

Easy, Every Day Spa Treatments to Enjoy at Home

Crispy Cheesy Kale Chips

Ken-Tucky Fried Chicken

Dairy-free Seafood Chowder

3 Ingredient Mango Creamsicle (dairy-free, gluten-free)

Copyright © 2025 · Foodie Theme by Shay Bocks · Built on the Genesis Framework · Powered by WordPress