Naturopathic By Nature

Healthy Eating & Healthy Living

Navigation
  • Recipes
  • Articles
    • Naturopathic
    • Pregnancy & Postnatal
    • Healthy Foods
    • Grocery Lists
  • About Us
  • Contact Us

Crispy Cheesy Kale Chips

January 2, 2017 by Dr. Lyndsay Wareham, ND 1 Comment

img_1588

~ It’s time to turn yummy kale into yummier kale chips ~

This is one of the easiest ways to get our kids to eat a whole ‘bunch’ of kale in one sitting. But it’s not just kids who like these “chips” – this recipe is for anyone who is looking for a healthier alternative to the crispy texture and salty flavour of potato chips.

There are a few keys to making these kale chips which are important in getting the finished product that you want. Here they are:

  • Curly kale seems to be the best variety to make kale chips
  • Wash and thoroughly dry your kale before using
  • Use your hands to massage the olive oil into the leaves
  • Arrange the prepared kale leaves into a single layer on the baking sheet
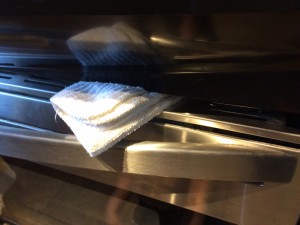
    Propping open the oven door just a crack allows moisture escape

    Propping open the oven door just a crack allows moisture escape

… And I have to share my secret to getting crispy kale chips every time — prop the oven door open, just a bit, with a tea towel, wash cloth, or oven mitt! This allows the moisture to escape, so what you’re left with is as close to dehydrated as you’ll get in 20 mins.

We hope you enjoy this recipe as much as our family does. Let us know how you like them, and if you have any questions about the process!

Crispy Cheesy Kale Chips
 
Print
Prep time
10 mins
Cook time
18 mins
Total time
28 mins
 
The measurements and baking times to this recipe will vary depending on the size of the bunch of kale you use and your oven's temperament.. As you make more and more batches, they will get better & better!
Author: Nicholas & Lyndsay
Cuisine: vegetarian
Ingredients
  • one bunch of curly kale
  • 3-4 Tbsp olive oil
  • ½-1tsp sea salt
  • ⅓ - ½ cup nutritional yeast flakes
Instructions
  1. Preheat oven to 350 F.
  2. Wash and thoroughly dry each kale leaf.
  3. Remove the leaves from the stem, ripping the leaves into fairly large bite-sized pieces
  4. Place leaves into a large bowl
  5. Pour olive oil over leaves and massage oil into leaves with your hands until each pieces has some oil on it (add more oil if necessary)
  6. Start with ½ tsp salt and mix it into the leaves to coat evenly. Taste and add more if necessary (Be conservative with the salt as you can always add more at the end of baking, but its not possible to take salt out)
  7. Sprinkle nutritional yeast over the leaves, turning the leaves to get them evenly coat (start with ⅓ cup and gradually add more to get the right seasoning for you)
  8. Arrange prepared kale leaves onto a baking sheet and spread them out so there is only a single layer of kale. You may need to use 2 baking sheets if you started with a large bunch of kale.
  9. Put the kale into the oven to bake, and be sure to use a wash cloth, tea towel or oven mitt to prop open the oven door just a crack to allow moisture to escape.
  10. After about 10 mins, turn & mix your kale (especially if your oven has hot spots) to get an even bake throughout the batch as the ones on the edges tend to cook quicker
  11. Bake for 15-18 mins (or even up to 20 mins), depending on your oven.
  12. Doneness is shown by dark green leaves with slight/light brown edges (*Don't let your kale burn, as it isn't very pleasing to the palate...)
3.4.3177

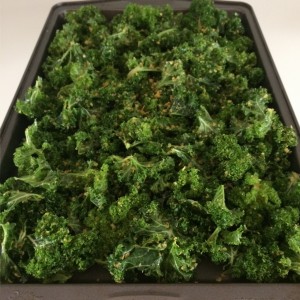
Before baking

What kale leaves look like BEFORE BAKING
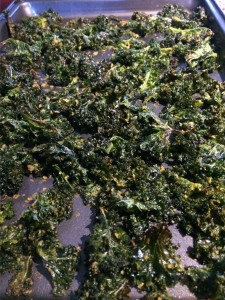
After baking

What kale chips look like AFTER BAKING
 

Filed Under: Recipes, Snacks & Baked Goods Tagged With: baked kale chips, best kale chip recipe, cheesy kale chips, crispy kale chips, curly kale, healthy chip recipe, homemade kale chips, how to make kale chips, kale chips, veggie chips

Seed cycling snack balls (gluten-free, dairy-free, vegan)

June 24, 2014 by Dr. Lyndsay Wareham, ND 8 Comments

DSC_5716

Seed cycling is a natural way to help balance and support your the hormonal shifts that happen during your menstrual cycle.

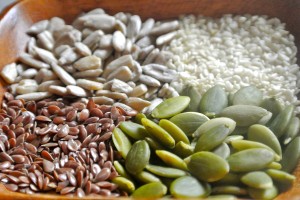
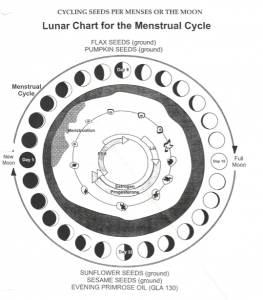
Seed cycling involves rotating certain seeds in your diet to best support the hormonal phases of your menstrual cycle. This is because seeds contain nutrients and oils to help with the production and metabolism of the hormones. The four seeds used are pumpkin & flax seeds, and sunflower & sesame seeds. The pumpkin & flax seeds are taken together during the first half of your cycle, and the sunflower & sesame seeds are taken together during the last half of your cycle. Ideally, we would menstruate with the lunar cycle, where we would have 28 day cycles, ovulating on the Full Moon and menstruating on the New/Dark Moon. This is optimal, however many women have cycles that are shorter or longer than 28 days. This is why it’s so important to become aware of your body’s rhythms and signals, and to support your cycle through its different phases. 

To get started on Seed Cycling, here are a few important things to know about your cycle:

Follicular phase: Day 1 is the first day of menstruation. This begins the follicular phase, which is when the follicle grows and matures. The follicular phase generally lasts around 14-18 days, however this varies among women and is influenced by stress, travel, diet, exercise, and other lifestyle habits. During this phase, you want to support healthy estrogen levels, which is the main hormone released by the ovaries during this time. The follicular phase ends at ovulation.

Eat 1 Tbsp each pumpkin & flax seeds – organic, raw & ground – each day. Pumpkin & flax seeds supports the estrogenic phase of the cycle (menses to ovulation) by providing omega 3’s, fiber & lignans, which help produce & metabolize estrogens.

Luteal phase: This phase begins the day after ovulation, and lasts around 14 days. There is not a whole lot of variation in this phase because the released ovum has a finite life span. During this phase the ovaries release progesterone, which makes the uterine lining ‘juicy’ and prepares it for implantation, as in pregnancy. However if pregnancy is not achieved, progesterone levels drop at the end of this phase, signalling the release of estrogen and subsequent shedding of the uterine lining (menstruation), which starts you back at Day 1.

Eat 1 Tbsp each sesame & sunflower seeds – organic, raw & ground – each day. Sesame & sunflower seeds supports the progestogenic phase of the cycle (2nd half of the cycle) by providing omega 6’s, protein, and nutrients to support this phase. Eating organic meats also assist this phase.

Seed cycling diagram

This chart shows the seeds to cycle alongside fluctuating hormones and the physiological changes of the ovarian follicle and uterus lining.

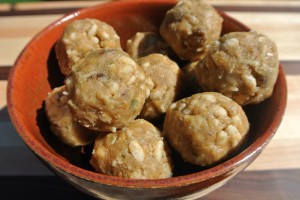
You can sprinkle the seeds in a salad, yogurt, smoothie, sandwich, wrap – or on anything you’d like, really… Here is a recipe for a batch of delicious Seed Cycling Snack Balls (aka Lady Balls) for you to try. It’s a tasty way to get your seeds in and enjoy them too. Eat 3-4 snack balls per day to get an adequate amount of seeds to fully benefit from Seed Cycling.

Seed Cycling Snack Balls (gluten-free, dairy-free, vegan)
 
Print
Prep time
15 mins
Total time
15 mins
 
These slightly sweet & nutty little treats leaves you feeling nourished & balanced. Enjoy 3-4 snack balls per day to get an adequate amount of seeds to reap the benefits of seed cycling.
Author: Lyndsay
Recipe type: snack
Serves: 25-27 balls
Ingredients
  • ½ cup almond, cashew, or peanut butter
  • ½ cup pumpkin seed butter (for menses → ovulation) or sunflower seed butter or tahini (for ovulation → menses)
  • 3-4 Tbsp maple syrup
  • 1 cup organic flax & pumpkin seed, raw & ground (menses → ovulation) 1:1 ratio or 1 cup organic sesame and sunflower seed, raw & ground (ovulation → menses) 1:1 ratio
  • ½ cup dried fruit (cranberries, raisins, chopped dates, currants, etc.)
  • ½ cup unsweetened medium shred coconut
  • ½ cup brown rice cereal (ie. ‘rice krispies’)
  • spices of your choice, to taste (ground cinnamon, cocoa powder, ground nutmeg, ginger powder, chopped crystallized ginger chunks, pure vanilla extract, etc.)
Instructions
  1. In a small mixing bowl, add nut/seed butter and maple syrup and stir well. Add spices of your choice, or leave it plain and enjoy the maple or honey flavour. Stir well.
  2. Add ground seeds and stir to combine.
  3. Gradually, add dried fruit, shredded coconut, and brown rice cereal and stir until evenly distributed.
  4. Use your Tablespoon measure to scoop up mixture and form into balls.
  5. Place in a glass container and store in the freezer for best texture.
  6. Enjoy!
3.2.2265

Filed Under: Recipes, Snacks & Baked Goods Tagged With: balance hormones with seeds, hormone balancing recipes, natural hormone balancing, regulating menstrual cycles with food, seed cycling

Gluten-free Chocolate Protein Bar (also dairy-free)

March 11, 2014 by Dr. Lyndsay Wareham, ND 6 Comments

DSC_5247

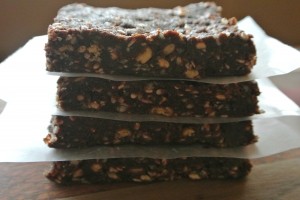
The combination of dark chocolate, nuts & seeds make for a healthy treat & a delicious snack

There are several sources of protein in these bars – nut butter, sunflower and sesame seeds, hemp hearts, and pumpkin seed protein powder. The whole recipe contains about 100 g protein. So if you cut the bars into 12, you get just over 8g of protein for each bar. The protein content in these bars combined with nutritious sources of carbohydrates and healthy fat helps stabilize blood sugar levels, provides energy, and will help you feel satisfied. And we can’t forget the star ingredient – dark cocoa powder – that makes these protein bars decadent!

We like pumpkin seed protein powder because it is a high quality and easy-to-digest protein source.  It is naturally high in vitamin K and important minerals such as zinc, magnesium, and iron. The mild flavour also makes it a versatile protein powder that can be easily added many recipes and smoothies. We use Omega Nutrition Organic Pumpkin Seed Protein Powder. If you’re a ‘Monctonian’, you can find this product at Corn Crib, otherwise check with your local health food store.

*Inside Scoop: So, after the first experiment with this recipe, I was feeling pretty good about myself – this recipe came intuitively to me and I got the exact flavour that I wanted! But ,the texture was a little runny… so I thought I would try to tweak a few things to get the right texture. But that didn’t work out so well, so I tried again. And again… and again… It wasn’t until ‘Experiment #12’ that I finally got the bar that I had envisioned – taste, texture, and all – so I hope you enjoy these little bars of imperfect perfection as much as we do 🙂

Gluten-free Chocolate Protein Bar (dairy-free)
 
Print
Prep time
30 mins
Total time
30 mins
 
These soft, chewy protein bars are perfectly sweet & balanced with nut butter & seeds. We try to always have a batch of these bars in the freezer for a tasty snack.
Author: Lyndsay
Recipe type: gluten-free snacks
Serves: 12 bars
Ingredients
dry ingredients:
  • ½ cup pumpkin seed protein powder
  • ¼ cup dark cocoa powder
  • ½ cup roasted sunflower seeds or raw pumpkin seeds
  • ¼ cup sesame seeds, raw
  • ¼ cup hemp hearts
  • ¼ cup shredded coconut (optional)
wet ingredients:
  • 6 Tbsp natural peanut butter or roasted almond butter
  • 3 Tbsp honey (& maybe a few squirts more, if needed)
  • 1 tsp pure vanilla extract
other ingredients:
  • ⅔ cup dates, pitted
  • ¼ cup hot water
Instructions
  1. Line a 10"x6" or 8"x8"glass baking dish with wax paper. Set aside.
  2. In a kettle, heat some water to near boil.
  3. Place chopped dates in a blender (a magic bullet works well, or immersion blender), add hot water, and cover. Let sit for 10 mins.
  4. Place all dry ingredients in a medium sized bowl. Mix together well.
  5. Add wet ingredients to dry ingredients and mix together a little bit. (At this point, there won’t be enough wet ingredients to combine with the dry).
  6. When dates are done soaking, blend on high for about 20 seconds (stopping to scrape down the sides) until you get a date paste. A magic bullet-like blender works really well here.
  7. Add date paste to dry & wet ingredients. Mix together really well with a large spoon. If you need a little more moisture, add a few extra squirts of honey.
  8. Spoon ingredients into wax paper-lined baking dish.
  9. Wet your hand, and smooth out mixture - this prevents the mixture from sticking.
  10. Refrigerate for 3-24 hours.
  11. Cut into bars and store in a covered container in fridge (for 10 days) or freezer (for 3 months or more). Place wax paper between the layers of bars to prevent bars from sticking together.
3.4.3177

Don’t have pumpkin seed protein powder? If you’d rather use whey protein powder, you can substitute in 1/2 cup whey protein powder and 1/4 cup almond meal in order to get the a nice chewy texture. But, since whey is derived from milk, it is no longer dairy-free. As well, whey contains small amounts of lactose, so if you are really sensitive to lactose, whey could cause digestive upset. Whey protein isolate, however, goes through an extra filtering process to remove the carbohydrate (lactose). If you think you’re lactose intolerant but whey protein isolate still wreaks havoc on your digestive system, then it is likely the whey protein itself that you’re reacting to.

Filed Under: Recipes, Snacks & Baked Goods Tagged With: chocolate almond butter protein bars, chocolate peanut butter protein bars, dairy-free snack idea, gluten and dairy free protein bar, gluten free snack idea, gluten-free protein bars, homemade gluten-free protein bars, homemade protein bars, homemade snack bars

Oatmeal Chocolate Chip Lactation Cookie Bars

March 10, 2014 by Dr. Lyndsay Wareham, ND 25 Comments

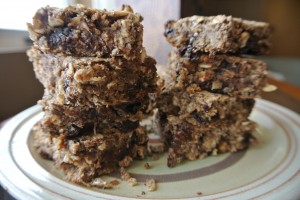
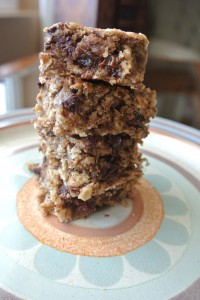
DSC_5189These cookie bars were created with breastfeeding mothers in mind as they contain a few ingredients that are believed to help promote a healthy milk supply. One ingredient is Oats, which are very nutritious, and are a good source of fiber; Flax, which contain omega-3 fatty acids and are also a source of fiber; and Brewer’s yeast, which has traditionally been known to help enrich milk supply due to its high B-vitamin content. These bars are chewy, sweet, and hearty – and best of all, they work! So feel free to indulge in these little treats Mama, because you deserve it!

In the article ‘Healthy Foods to Nurture the New Mom’, I state that chocolate is on the ‘limited or avoid’ list of foods for new moms to eat, but if you aren’t super sensitive to chocolate, then the amount of chocolate in these bars shouldn’t bother you or your baby. But in the event that it does, just omit the chocolate chips and substitute in your favourite nut or seed, shredded coconut, or even carob chips. But if you can tolerate chocolate, then I highly suggest keeping it in since it seems to be the key ingredient to take the edge off the taste of brewer’s yeast.

Gluten-sensitive or Celiac? Oats themselves do  do not contain gluten, but they are so frequently contaminated with wheat during processing that you will need to look for certified ‘Gluten-free Oats’ if you are concerned about having gluten in your diet. As well, because brewer’s yeast is a by-product of beer, it is often contaminated with barley which is a gluten-containing grain. So, if you have Celiac disease, these bars are not gluten-free but you could make them gluten-free by omitting the brewer’s yeast and selecting gluten-free oats. For those who are gluten-sensitive, these bars are gluten-limited since we are using gluten-free flours such as almond flour and coconut flour.

Oatmeal Chocolate Chip Lactation Cookie Bars
 
Print
Prep time
20 mins
Cook time
35 mins
Total time
55 mins
 
If you’d rather enjoy these bars as cookies, simply swap out the coconut oil for organic butter, spoon dough onto a cookie sheet lined with a silicone baking mat or parchment paper, gently flatten, and bake for 10-12 mins.
Author: Lyndsay
Recipe type: baking
Serves: 24-28 bars
Ingredients
dry ingredients:
  • 3 cups large flake oats
  • ½ cup almond flour
  • ½ cup coconut flour
  • ¼ cup brewer’s yeast
  • 1 tsp cinnamon
  • 1 tsp baking soda
  • ½ tsp sea salt
wet ingredients:
  • ½ cup ground flax
  • ¾ cup hot water (+ 1-2 Tbsp, if needed)
  • ½ cup coconut oil, melted
  • ½ cup unsweetened applesauce
  • ½ cup maple syrup
  • 2 tsp pure vanilla extract
other ingredients:
  • ½ cup raisins (soaked in hot water for at least 15mins, and drained)
  • ½ cup dark chocolate chips or dark chocolate bar piece
optional ingredients:
  • walnuts pieces
  • shredded coconut
Instructions
  1. Preheat oven to 350 degrees.
  2. Grease a large 13"x 9" baking dish with coconut oil.
  3. Add hot water to raisins and let sit for 15 mins. Set aside.
  4. In a large bowl, combine dry ingredients and mix together well.
  5. In a medium sized bowl, mix ground flax with wet ingredients, and blend together with a hand blender.
  6. Add wet ingredients to dry ingredients and stir together until all ingredients are incorporated. Don’t worry about over mixing.
  7. Drain raisins. Fold raisins and chocolate chips into mixture. If you need more moisture, add 1-2 Tbsp more water and mix together well.
  8. Scoop dough into greased baking dish. Smooth out the top evenly with your hand or the back of a spoon.
  9. Bake for 30-35 mins, or until edges are browned.
  10. Let cool completely before cutting into 24-28 bars.
  11. Enjoy these bars when fresh, or store them in an airtight container in the freezer. These bars freeze really well and straight out of the freezer is my favourite way to eat them!
3.2.2265

*Please note: Even though these are special for nursing Moms, other family members can safely eat them without any unwanted milk-making effects. But,  you can also make them without brewer’s yeast for a delicious oatmeal chocolate chip cookie bar treat! 

Filed Under: Recipes, Snacks & Baked Goods Tagged With: breastfeeding friendly food, gluten-limited lactation cookies, lactation bar recipe, lactation bars for gluten-sensitive, lactation cookie recipe, milk making mama bars, oatmeal lactation cookie, oatmeal lactation cookie bars, recipes for breastfeeding moms

Spirulina Energy Balls (gluten-free, dairy-free, vegan)

February 27, 2014 by Dr. Lyndsay Wareham, ND Leave a Comment

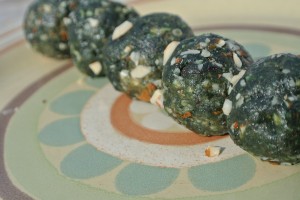
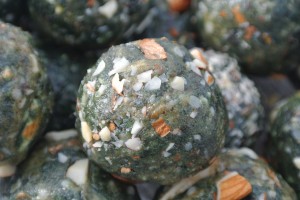
These energy balls as great as part of breakfast, as a snack on-the-go, or dessert!

These energy balls as great as part of breakfast, as a snack on-the-go, or dessert!

 I got this idea from Rita Mustafa’s ‘Gluten-free, dairy-free, egg-free recipes’ cookbook. These energy balls are quick to prepare and quick to disappear! People of all ages love them – the combination of sweet, nutty, and crunchy rolled into a little ball is irresistible even for the ‘little people’ in our lives – what a great way to get some protein into our children! 

All of the ingredients are likely something that you already have in your cupboard… except, spirulina. So, if you don’t have spirulina, you can just omit it and they will turn out just as tasty and will still contain a generous amount of protein from the almonds, almond butter, and hemp hearts.

Enjoy!

Spirulina Energy Balls (gluten-free, dairy-free, vegan)
 
Print
Prep time
25 mins
Total time
25 mins
 
These energy balls are a good vegan source of protein - hemp hearts, almonds, and spirulina
Recipe type: gluten & dairy free dessert or snack
Serves: 16-18 balls
Ingredients
  • ½ cup almonds, chopped well
  • ⅓ cup dates, pitted and chopped
  • ⅔ cup gluten-free ‘crispy rice’ cereal
  • ⅓ cup almond butter
  • ⅓ cup raisins or dried cranberries
  • 2 Tbsp maple syrup
  • 2 Tbsp hemp hearts
  • 1 Tbsp spirulina powder
optional ingredients:
  • ¼ cup chopped almonds for garnish
  • ¼ cup shredded coconut for garnish
Instructions
  1. Chop almonds well and set aside ¼ cup for garnish.
  2. Place remaining chopped almonds and other ingredients into a food processor or blender. (I used our Vitamix)
  3. Process until mixture turns sticky and will form into a ball. You’ll need to pulse and scrape down the sides a few times.
  4. Scoop mixture out by the Tbsp, roll into a ball and them roll through reserved chopped almonds, if using.
  5. Continue until remaining mixture is gone.
  6. Serve immediately or chill before serving.
  7. Store in fridge for up to 10 days or in the freezer for longer.
3.2.2265


Filed Under: Recipes, Snacks & Baked Goods Tagged With: energy balls, gluten free energy balls, gluten free snack idea, homemade protein energy balls

Maple-kissed sesame seed cookies (gluten-free, dairy-free, vegan)

February 7, 2014 by Dr. Lyndsay Wareham, ND Leave a Comment


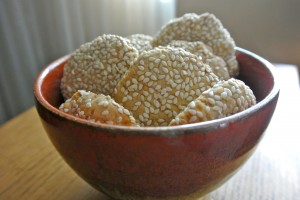
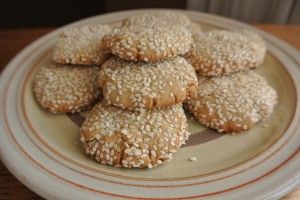
DSC_4872

Nutritious and delicious!

These cookies are slightly sweet, peanut-like flavour, and have a flaky texture similar to a sugar cookie. They are also high in calcium, which is important for most people – especially women, in particular pregnant and nursing women. And this low-sugar, nutritious cookie can be a tasty treat for kids to enjoy too!

Maple-kissed sesame seed cookies (gluten-free, dairy-free, vegan)
 
Print
Prep time
20 mins
Cook time
14 mins
Total time
34 mins
 
Treat yourself by sitting down to relax, and enjoy these sweet, nutritious cookies alongside your favourite cup of tea...
Author: Lyndsay
Recipe type: gluten-free cookies
Serves: 16 cookies
Ingredients
dry ingredients:
  • ½ cup brown rice flour
  • ½ cup sorghum flour
  • ⅓ cup tapioca starch
  • ½ tsp baking soda
  • pinch of salt
wet ingredients:
  • ⅓ cup maple syrup
  • ¼ cup tahini
  • ¼ cup melted coconut oil
  • 1 tsp pure vanilla extract
other ingredients:
  • ⅓ cup raw sesame seeds
Instructions
  1. Preheat oven to 350 degrees.
  2. Line a baking sheet with parchment paper or a silicone baking mat and set aside.
  3. In a medium bowl, add dry ingredients and mix together well.
  4. Stir in tahini, coconut oil, and maple syrup until you get a smooth batter.
  5. Roll batter into 16 equal sized balls.
  6. Place sesame seeds in a small bowl and, one by one, dip the balls into the sesame seeds and flatten into cookies.
  7. Place cookies on the prepared cookie sheet. (there will be sesame seeds everywhere, and that’s ok)
  8. Bake in oven for 12-14 minutes, or until the edges turn a golden brown.
  9. Transfer to a wire rack, let cool completely, and enjoy!
3.2.2265


Filed Under: Recipes, Snacks & Baked Goods Tagged With: calcium rich cookies, dairy free cookies, dairy-free calcium-rich foods, dairy-free source of calcium, easy gluten-free cookie recipe, featured, gluten free cookies

Almond & Date Oatmeal Muffins (gluten-free, dairy-free)

February 7, 2013 by Dr. Lyndsay Wareham, ND 2 Comments

ALMOND & DATE OATMEAL MUFFINS (gluten-free, dairy-free, & a good amount of protein!)

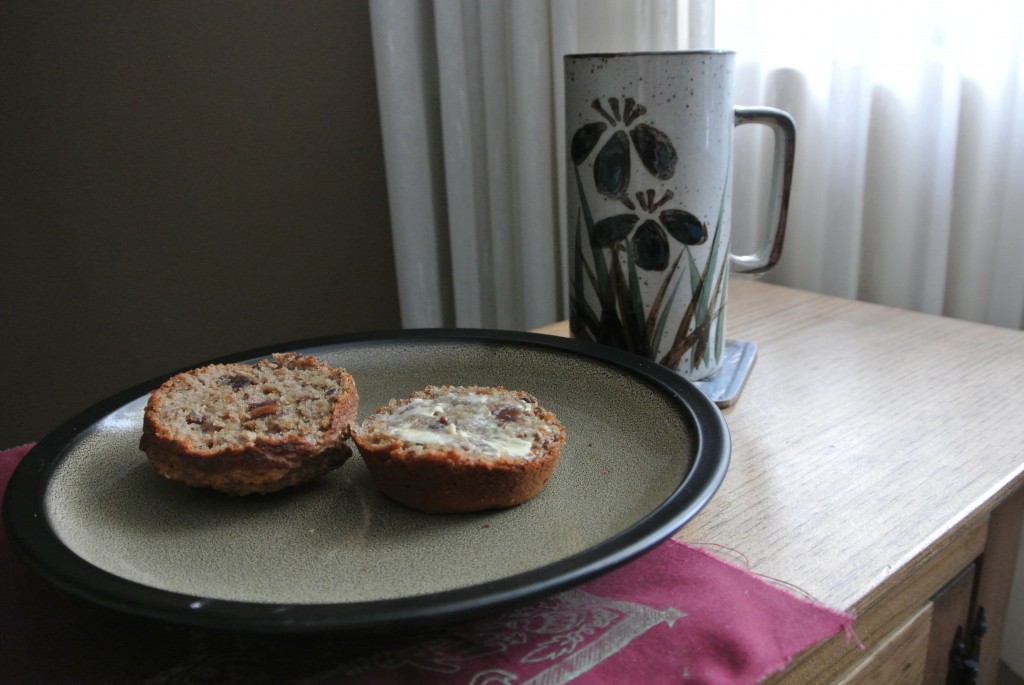
I just made these AWESOME muffins modified from the Nourishing Meals cookbook. They are our new favorite muffins! They are moist & delicious, and are especially tasty when eaten fresh out of the oven.These muffins provide a good amount of protein with the use of teff flour, almond meal, eggs & almond butter. This recipe got me very excited since I’m trying to steer away from the brown rice flour world and into the world of other nutritious gluten-free flours.

Teff flour is high in protein, slightly sweet & nutty in taste and gives a kind of fluffy or wheat-like texture to baking. The almond meal is high in protein and healthy fats, is essential for keeping the muffins moist (but if you forget this ingredient or don’t have it, you can still make a tasty muffin without it).


Delicious - in every which way!

Delicious – in every which way!


Almond & Date Oatmeal Muffins (gluten-free, dairy-free)
 
Print
Prep time
15 mins
Cook time
30 mins
Total time
45 mins
 
You can easily add or substitute many of the ingredients in this recipe to make it your own. For example, you can add any nut (walnuts) or seed (whole flax, hemp hearts), or substitute dates for dried apricots.
Author: Lyndsay & Nicholas
Recipe type: breads, baked goods
Cuisine: gluten-free, dairy-free
Serves: 14-16
Ingredients
  • 1 cup teff flour
  • 1 cup gluten-free rolled or quick rolled oats
  • ½ cup almond meal/flour
  • ½ cup tapioca flour
  • 2 Tbsp ground chia seeds
  • 2 Tbsp ground flax seeds
  • 2 tsp baking powder
  • ½ tsp baking soda
  • ½ tsp salt
  • 1 ½ cup dates, chopped
  • ¼ cup whole flax seeds or hemp hearts (optional)
  • ¾ cup unsweetened applesauce
  • ¾ cup vanilla almond or rice milk
  • ⅓ cup olive oil
  • ⅓ cup maple syrup
  • 2 large organic eggs, whisked*
  • ¼ cup plus 2 Tbsp almond butter
  • 2 tsp vanilla
Instructions
  1. Preheat oven to 350 F. Grease muffin tins with oil or butter.
  2. In a large bowl, add flours, tapioca starch, ground chia & flax seeds, baking powder, baking soda and salt. Mix together well.
  3. In a separate bowl, add olive oil, apple sauce, almond milk, maple syrup, and whisked eggs, and vanilla & mix together.
  4. Fold in dates and seeds or nuts, if using.
  5. Add wet ingredients into dry ingredients & mix together.
  6. Let the batter sit for about 5 minutes so the oats have a chance to soak up the moisture.
  7. Spoon batter into muffin tins until pretty full. It ends up filling 14-16 muffin cups, which is a bit awkward because you'll have to use 2 muffin tins. Fill the empty muffin cups ¾ with water.
  8. Bake for 25-28 mins.
  9. Place on a wire rack to cool slightly and Enjoy!! ... I know you will 🙂
3.4.3177


*Want this recipe egg-free? For each egg, mix together 1 Tbsp ground flax with 3 Tbsp water and add 1/8 tsp baking powder. You can also use ground chia seeds instead of ground flax, or add 1/2 of a large mashed ripe banana.

Filed Under: Recipes, Snacks & Baked Goods Tagged With: best gluten and dairy free muffin recipe, best gluten-free muffins, dairy and gluten free muffins, date almond quinoa gluten-free muffins, date almond quinoa muffins, favorite gluten-free muffins, gluten-free muffins, gluten-free quinoa muffins, moist gluten free muffins, teff flour

Apple Spice Muffins (gluten-free, dairy-free, vegan)

February 4, 2013 by Dr. Lyndsay Wareham, ND Leave a Comment

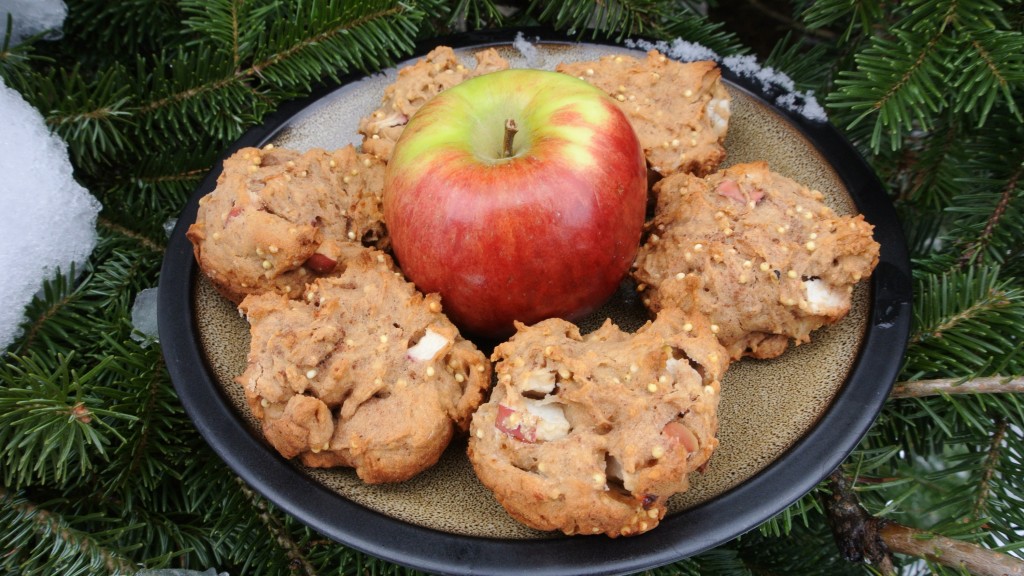
These muffins are especially great with paired with a mug of your favorite tea! These days I add millet to any of my muffin recipes – it just adds the perfect little crunch and completeness to the muffins. If you agree, you can add 1/2 cup uncooked millet to the dry ingredients.

We like these muffins with Bengal Spice or Chai tea...

A nice warming & hearty fall/winter muffin… especially with Bengal Spice or Chai tea…

APPLE SPICE MUFFINS (Gluten-free, Dairy-free, Vegan)

Dry Ingredients

  • 2 ½ cups brown rice flour (or 1 1/2 cups brown rice flour + 1 cup sorghum flour)
  • ½ cup tapioca starch
  • ½ cup cane sugar or coconut sugar (we use Madhava organic coconut sugar from costco)
  • 2 tsp baking powder
  • 1 tsp baking soda
  • 1 1/2 tsp xantham gum (optional, but it does help bind ingredients together) (*Check out my post ‘A word about xanthan gum‘ for info & substitutions)
  • ½ tsp salt
  • 2 tsp cinnamon
  • ½ tsp each ground ginger, nutmeg, cloves
  • ½ cup uncooked dried millet (optional)

Wet ingredients

  • 1 ¼ cup unsweetened applesauce
  • 1 cup chopped tart apple (peeled or unpeeled) – make it 1 “generous” cup of chopped apple
  • 1 cup vanilla rice or almond milk
  • 1 tsp vanilla extract
  • 1/3 cup melted coconut oil or organic butter

Preparation

–       Preheat oven to 375 F. Lightly oil muffin tins or line with large paper cups.

–       In a large bowl, combine flour, tapioca starch, sugar, xanthan gum, baking powder, baking soda, & sea salt (and millet, if adding). Mix together well.

–       In a separate bowl, combine applesauce, milk, melted coconut oil & vanilla and mix together well.

–       Pour wet ingredients into dry ingredients and mix together – take caution not to overmix.

–       Spoon batter into muffin tins until about ¾ to full (for smaller muffins, or completely full for larger muffins).

–       Bake at 375 F for about 20-25 mins.

Filed Under: Recipes, Snacks & Baked Goods Tagged With: gluten-free muffins, vegan gluten-free muffins

Everybody’s Favorite Chewy Oatmeal Raisin Cookie Recipe

December 13, 2012 by Dr. Nicholas Anhorn, ND 3 Comments

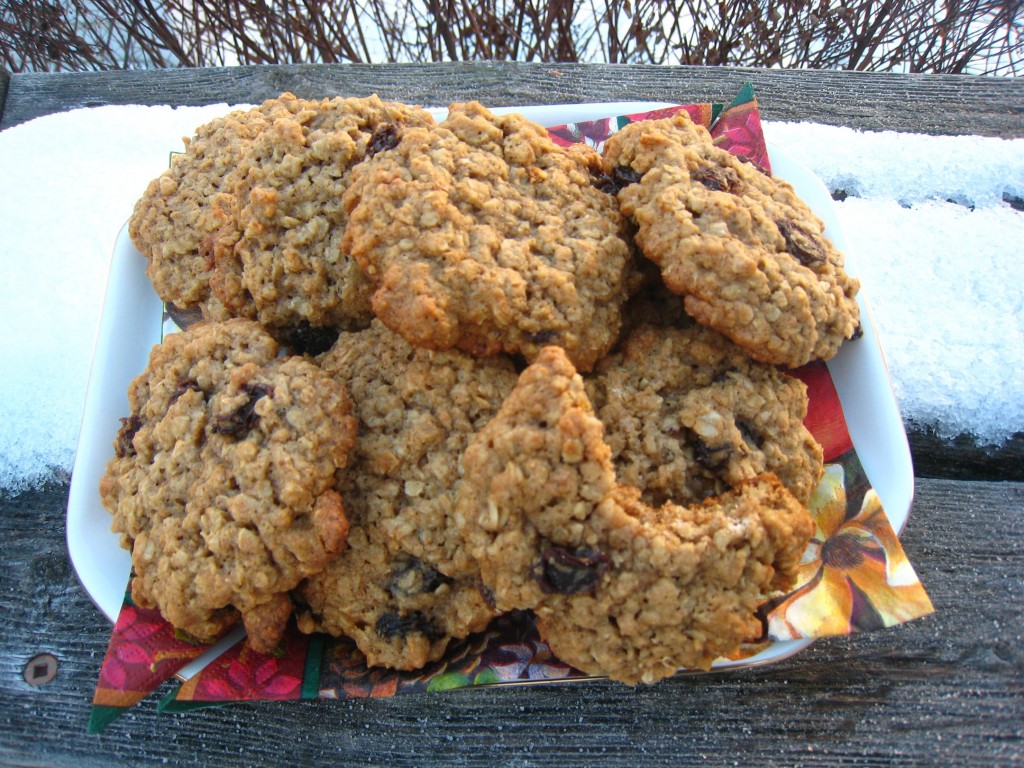
EVERYBODY’S FAVORITE CHEWY OATMEAL RAISIN COOKIE RECIPE

Who took a bite of out a cookie?!

Who’s been sneaking cookies from the cookie jar?!

I’ve tried & tried again to bake the perfect oatmeal raisin cookie, modifying and improving on already very tasty recipes… and finally, I think I’ve found it!

Two tricks I use to making the best oatmeal raisin cookies are: 1) to soak the raisins, and 2) remove the cookies when the bottoms are slightly browned and the tops may still look raw (but not wet). Soaking the raisins will ensure that the raisins don’t burn or get crispy, and removing the cookies a little earlier than if they were golden brown makes for a chewy cookie.

One last little secret that I use is that I remove my rings, give my hands a good wash, and use my hands to cream together the sugar & butter – It’s way more fun & liberating than using an electric mixer.

Everybody's Favorite Chewy Oatmeal Raisin Cookie Recipe (AKA the best recipe out there!) - not gluten or dairy free
 
Print
Prep time
15 mins
Cook time
7 mins
Total time
22 mins
 
This recipe makes about 4 dozen cookies, and is an especially nice homemade gift or treat during the holiday season.
Author: Lyndsay
Recipe type: baking
Serves: 44 - 48 cookies
Ingredients
  • 1 cup raisins (soaked for at least 20 mins)
  • 1½ cups all-purpose flour (white or whole wheat)
  • 1 teaspoon baking soda
  • 1 teaspoon ground cinnamon
  • ¼ tsp each nutmeg & all spice
  • ½ teaspoon salt
  • ¾ cup butter, softened
  • 1 cup brown sugar, packed
  • ½ cup white sugar
  • 2 eggs
  • 1 teaspoon vanilla extract
  • 2¾ cups quick rolled oats
Instructions
  1. Preheat oven to 375 degrees F (190 degrees C).
  2. Soak raisins in warm water & a few drops of vanilla extract for at least 20 mins.
  3. Mix together flour, baking soda, cinnamon, nutmeg, allspice and salt. Stir well.
  4. In a large bowl, cream together butter, brown and white sugar until smooth.
  5. Beat eggs and vanilla into butter & sugar mixture until fluffy.
  6. Gradually beat flour mixture into butter mixture.
  7. Drain raisins.
  8. Stir in raisins and oats.
  9. Scoop up a generous tablespoonful of dough into a round tablespoon measure, and drop onto a cookie sheet lined with a silicone baking mat or parchment paper. Flatten slightly.
  10. Bake for 6-8 mins, until bottoms are browned (*cookies will still look raw on top, but not wet – this is key for a chewy cookie!). Timing will depend on your oven's temperament.
  11. Remove from sheet to wire rack. Cool completely before serving.
3.2.2265


Filed Under: Recipes, Snacks & Baked Goods Tagged With: best chewy oatmeal raisin cookies, best oatmeal raisin cookie, oatmeal raisin cookie, recipe

Banana Chocolate Chip Muffins (gluten & dairy free, vegan)

November 4, 2012 by Dr. Lyndsay Wareham, ND Leave a Comment

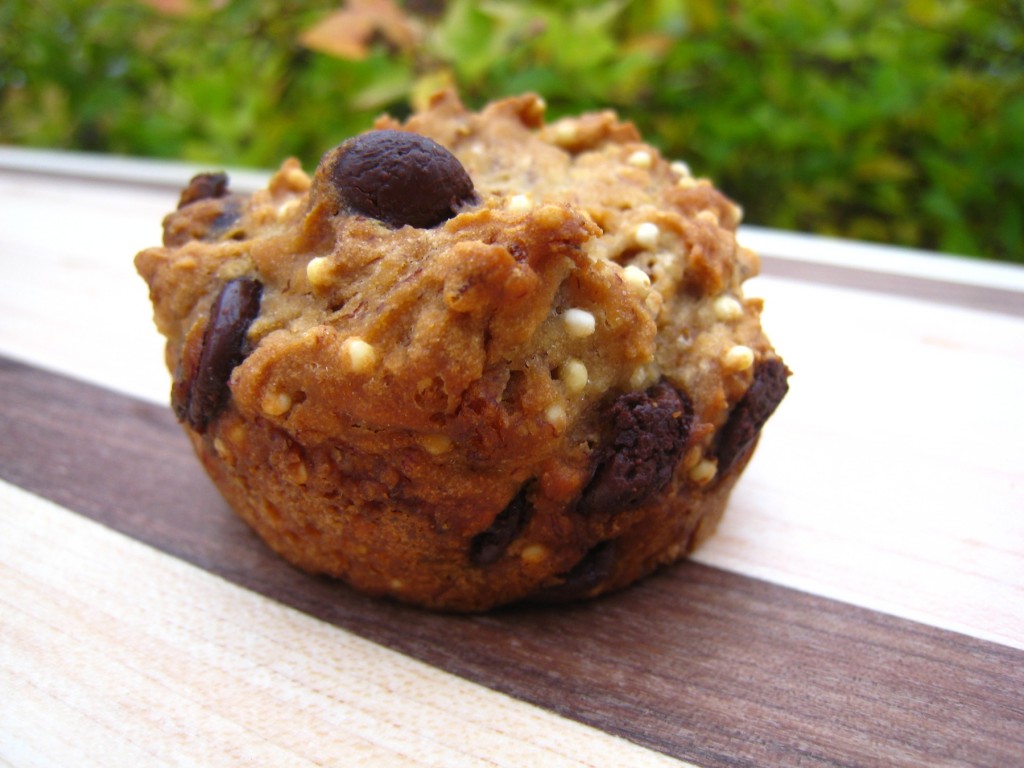
Yummm fresh out of the oven!

These muffins are delicious as a snack or sweet treat. Investing in good dark chocolate chips is the key ingredient here! We use organic 70% dark chocolate chips from Corn Crib but any dark or semi-sweet chocolate chip will do. 

This recipe was modified from the ‘Banana’Walnut Muffins’ recipe from the awesome “Whole Life Nutrition Cookbook” (see their website for more amazing recipes, health information & information on their cookbooks http://www.nourishingmeals.com).

*Sensitive to corn & want to avoid xanthan gum? Check out the Banana Blueberry Walnut Muffin recipe for substitutions for xanthan gum.

Banana Chocolate Chip Muffins (gluten & dairy free, vegan)
 
Print
Prep time
15 mins
Cook time
25 mins
Total time
40 mins
 
Banana and chocolate chips will always be a classic combination for muffins.
Author: Lyndsay
Recipe type: gluten-free baking
Serves: 12-16 muffins
Ingredients
  • 2 ½ cups brown rice flour
  • ½ cup tapioca starch
  • ¼ cup ­each brown & raw cane sugar
  • 2 tsp baking powder
  • 1 ½ tsp xanthan gum (omit if you are corn-sensitive)
  • 1 tsp baking soda
  • ½ tsp salt
  • ½ cup uncooked millet (optional)
  • 2 cups mashed ripe bananas
  • 1 cup vanilla ‘mylk’ (rice, almond, coconut, hemp, etc), near-room temp
  • ¼ cup coconut oil, melted
  • 1 tsp vanilla
  • 1 ½ cup dark chocolate chips (organic, if possible)
Instructions
  1. Preheat oven to 375 F. Lightly oil muffin tins or line with paper cups.
  2. In a large bowl, combine brown rice flour, tapioca starch, sugar, xanthan gum, baking soda, baking powder & sea salt. Mix together well.
  3. Place bananas in a 4 cup measuring cup or bowl, and mash with a fork. It should measure about 2 cups. (*Tip: to prevent coconut oil from clumping, use fresh ripe bananas or if you use frozen bananas, ensure that they are at room temperature.)
  4. Mix melted coconut oil with near-room temperature 'milk', vanilla extract, and mashed bananas.
  5. Pour wet ingredients into dry ingredients bowl and mix together – take caution not to overmix. Fold in chocolate chips & uncooked millet.
  6. Spoon batter into muffin tins until about ¾ to full (for smaller muffins, or completely full for larger muffins). Bake at 375 F for about 20-25 mins.
  7. Gently take muffins out of muffin tin (may need to loosen sides with a knife) and place onto wire rack to cool.
3.2.2265

Filed Under: Recipes, Snacks & Baked Goods Tagged With: baking, dairy free, featured, gluten-free, muffins, vegan, vegan chocolate chip muffins, vegan gluten-free muffins, vegan muffins

  • 1
  • 2
  • Next Page »

Meet Dr. Nicholas ND & Dr. Lyndsay ND

We are two naturopathic doctors with a vision to inspire healthy cooking, healthy eating, and healthy living for you and your family.  Read more about us >>

  • Email
  • Facebook

Subscribe

Heart Healthy Omega Burgers

Dairy-free Cashew Cream for Breakfast Parfaits & more!

Four essential ways to use Turmeric

Easy, Every Day Spa Treatments to Enjoy at Home

Crispy Cheesy Kale Chips

Ken-Tucky Fried Chicken

Dairy-free Seafood Chowder

3 Ingredient Mango Creamsicle (dairy-free, gluten-free)

Copyright © 2023 · Foodie Theme by Shay Bocks · Built on the Genesis Framework · Powered by WordPress