Naturopathic By Nature

Healthy Eating & Healthy Living

Navigation
  • Recipes
  • Articles
    • Naturopathic
    • Pregnancy & Postnatal
    • Healthy Foods
    • Grocery Lists
  • About Us
  • Contact Us

Heart Healthy Omega Burgers

May 26, 2018 by Dr. Nicholas Anhorn, ND Leave a Comment

IMG_0400

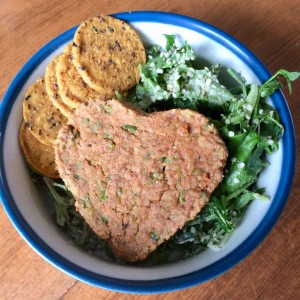
Heart Healthy Omega Burgers with a green salad & sweet potato crackers

These burgers are pretty quick to make up and can be paired with many side dishes. Of course, you can use your favourite burger bun to make them into a burger, stuff it into a pita with veggies, hummus, and Dijon mustard, or use large lettuce leaves as your ‘bun’. Our favourite way to enjoy these is to eat the burgers on top of a salad, or pair it with roasted root veggies (like turnip, carrots, potato, & yam).

Salmon is known to be a high source of heart healthy omega-3 fatty acids. Ideally, you would be using wild or sockeye salmon. We used canned here because that is what we have available year round, and because when we have fresh salmon, we like to enjoy it ‘as is’ instead of mixing it up into burgers. The walnuts are an added dose of omega-3 fatty acids, and if you are using pasture-raised free-range eggs, they are known to be a good source of omega 3 fatty acids as well!

Heart Healthy Omega Burgers
 
Print
Prep time
10 mins
Cook time
15 mins
Total time
25 mins
 
The heart-healthy omega fatty acids come from the salmon, walnuts, and eggs. We have ground up wheat-free market bread for the bread crumbs, or you can use ground Mary's crackers to keep it gluten-free.
Cuisine: dairy-free
Serves: 6-7 patties
Ingredients
  • 1 can wild or sockeye salmon, drained
  • ½ cup gluten-free or wheat free bread crumbs
  • 1 cup of walnuts
  • 2 free range eggs
  • ½ cup peas, fresh or frozen
  • 1-2 tsp lemon juice
  • 1 tsp Dijon mustard
  • ¼ tsp sea salt, and more to taste
  • ¼ tsp dried thyme (or ½ tsp if using fresh)
  • ½ tsp dried dill (or 1 tsp if using fresh)
  • black pepper, to taste
Instructions
  1. Put canned salmon, walnuts, breadcrumbs & eggs and in a food processor and process for 10-15 seconds.
  2. Add peas and the rest of the ingredients and process for another 10 seconds.
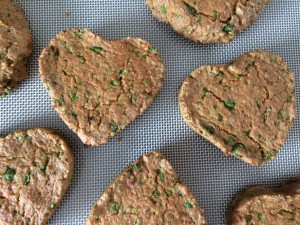
  3. Divide into 6-7 patties.. filling heart cookie cutter is optional 🙂
  4. Place on a silicone lined or parchment paper lined baking sheet with a little bit of space in between each pattie.
  5. Bake 375 for 10 minutes, flip the burgers and continue baking for another 5 min.
3.4.3177


Filed Under: Lunch & Supper, Recipes Tagged With: canned salmon recipes, healthy dinner meal ideas, healthy fats, healthy salmon burgers, kid friendly meals, omega 3, quick dinner meals, quick supper meals, salmon burgers, sockeye salmon burgers

Dairy-free Cashew Cream for Breakfast Parfaits & more!

May 26, 2018 by Dr. Nicholas Anhorn, ND Leave a Comment

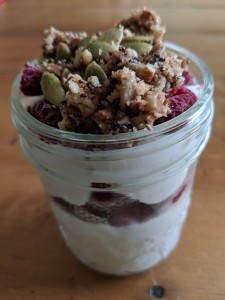
MVIMG_20180524_085815

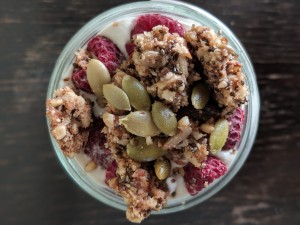
Dairy-free cashew cream in a breakfast parfait with raspberries & nutty granola

This is a nice option to have around for a weekend brunch, as it enhances a lot of dishes – topped on fruit salad, granola, pancakes, waffles, or made into a breakfast parfait or a fruit dip. It’s very easy to make, and only has 4 ingredients. I imagine that you could add flavours like cinnamon, ginger, lemon or orange zest to elevate the flavour of your sweet dish even more. I’m going to try it as a dairy-free substitute in recipes that call for yogurt! I’ll keep you posted on how that goes on our Facebook & Instagram pages.

Cashew Cream Parfait
 
Print
Cook time
5 mins
Total time
5 mins
 
Layer cashew cream with your choice of chopped dried fruits, fresh or frozen fruit, nuts, seeds, or granola. We’ve also spread it on top of pancakes!
Cuisine: dairy free, gluten-free, vegan
Serves: 1 cup
Ingredients
  • 1 cup raw cashews, soaked overnight (or at least 3 hours), rinsed & drained
  • ½ cup unsweetened almond milk (plus 1-2 Tbsp more, if needed)
  • 2 Tbsp maple syrup
  • ½ tsp vanilla extract
Instructions
  1. Add all ingredients to the blender and gradually increase speed to blend on high, adding more almond milk, as needed.
  2. Blend on high for a good 30-60 seconds, until it is smooth & creamy.
  3. Store in fridge for up to 3 days.
3.4.3177


Filed Under: Breakfast, Desserts, Recipes Tagged With: brunch ideas, dairy free breakfast, dairy free cream, dairy free parfait, dairy-free dessert, dairy-free yogurt, vegan breakfast ideas, yogurt substitute

Crispy Cheesy Kale Chips

January 2, 2017 by Dr. Lyndsay Wareham, ND 1 Comment

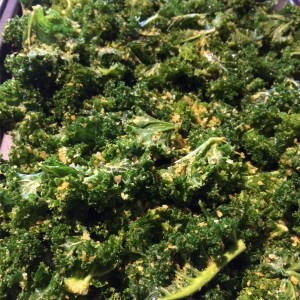
img_1588

~ It’s time to turn yummy kale into yummier kale chips ~

This is one of the easiest ways to get our kids to eat a whole ‘bunch’ of kale in one sitting. But it’s not just kids who like these “chips” – this recipe is for anyone who is looking for a healthier alternative to the crispy texture and salty flavour of potato chips.

There are a few keys to making these kale chips which are important in getting the finished product that you want. Here they are:

  • Curly kale seems to be the best variety to make kale chips
  • Wash and thoroughly dry your kale before using
  • Use your hands to massage the olive oil into the leaves
  • Arrange the prepared kale leaves into a single layer on the baking sheet

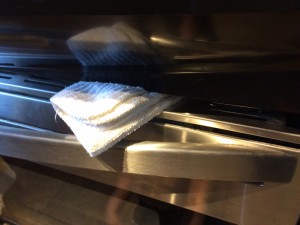
    Propping open the oven door just a crack allows moisture escape

    Propping open the oven door just a crack allows moisture escape

… And I have to share my secret to getting crispy kale chips every time — prop the oven door open, just a bit, with a tea towel, wash cloth, or oven mitt! This allows the moisture to escape, so what you’re left with is as close to dehydrated as you’ll get in 20 mins.

We hope you enjoy this recipe as much as our family does. Let us know how you like them, and if you have any questions about the process!

Crispy Cheesy Kale Chips
 
Print
Prep time
10 mins
Cook time
18 mins
Total time
28 mins
 
The measurements and baking times to this recipe will vary depending on the size of the bunch of kale you use and your oven's temperament.. As you make more and more batches, they will get better & better!
Author: Nicholas & Lyndsay
Cuisine: vegetarian
Ingredients
  • one bunch of curly kale
  • 3-4 Tbsp olive oil
  • ½-1tsp sea salt
  • ⅓ - ½ cup nutritional yeast flakes
Instructions
  1. Preheat oven to 350 F.
  2. Wash and thoroughly dry each kale leaf.
  3. Remove the leaves from the stem, ripping the leaves into fairly large bite-sized pieces
  4. Place leaves into a large bowl
  5. Pour olive oil over leaves and massage oil into leaves with your hands until each pieces has some oil on it (add more oil if necessary)
  6. Start with ½ tsp salt and mix it into the leaves to coat evenly. Taste and add more if necessary (Be conservative with the salt as you can always add more at the end of baking, but its not possible to take salt out)
  7. Sprinkle nutritional yeast over the leaves, turning the leaves to get them evenly coat (start with ⅓ cup and gradually add more to get the right seasoning for you)
  8. Arrange prepared kale leaves onto a baking sheet and spread them out so there is only a single layer of kale. You may need to use 2 baking sheets if you started with a large bunch of kale.
  9. Put the kale into the oven to bake, and be sure to use a wash cloth, tea towel or oven mitt to prop open the oven door just a crack to allow moisture to escape.
  10. After about 10 mins, turn & mix your kale (especially if your oven has hot spots) to get an even bake throughout the batch as the ones on the edges tend to cook quicker
  11. Bake for 15-18 mins (or even up to 20 mins), depending on your oven.
  12. Doneness is shown by dark green leaves with slight/light brown edges (*Don't let your kale burn, as it isn't very pleasing to the palate...)
3.4.3177

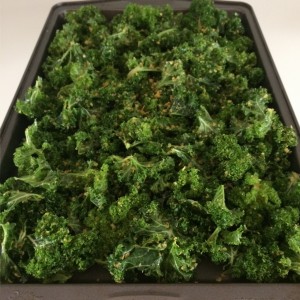
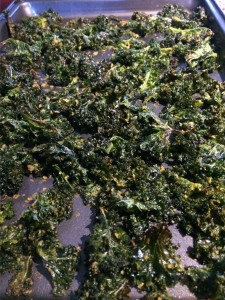
Before baking

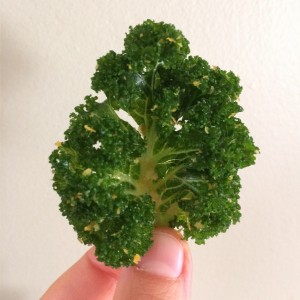
What kale leaves look like BEFORE BAKING

After baking

What kale chips look like AFTER BAKING


Filed Under: Recipes, Snacks & Baked Goods Tagged With: baked kale chips, best kale chip recipe, cheesy kale chips, crispy kale chips, curly kale, healthy chip recipe, homemade kale chips, how to make kale chips, kale chips, veggie chips

Ken-Tucky Fried Chicken

January 27, 2016 by Dr. Nicholas Anhorn, ND and Dr. Lyndsay Wareham, ND 2 Comments

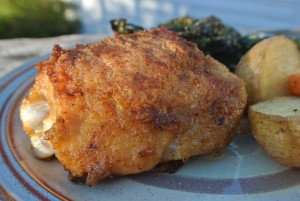
Ken's version of the famous 11 herbs & spices recipe

Ken’s version of the famous 11 herbs & spices KFC recipe

I have to give my Dad full credit for this recipe. It’s his delicious rendition of the famous 11 herbs & spices combination you’ll find in KFC recipes. The more basic herbs are brought to a whole new level with the addition of kosher salt, white pepper, curry & chili powders. (My Dad’s name is Ken, hence the ‘Ken-Tucky’ recipe name).

You can fry the chicken, as suggested below, but we’ve also baked the chicken at 350F for 35-40mins (omitting the oil), which gives you a less crispy chicken but it’s lower in fat as well. You can also start off with frying for about 15 mins to brown the chicken, and then throwing it in the oven to bake for another 20-30mins. There are alot of variations to cooking this recipe, as you can see. 

My Dad’s motto (courtesy of Chef Michael Smith) is “never make the same dish twice”.

Ken-Tucky Fried Chicken (gluten-free, dairy-free)
 
Print
Prep time
5 mins
Cook time
50 mins
Total time
55 mins
 
Add a little more of this & a little less of that with equally delicious results. Serve it alongside roasted potatoes, carrots, and kale chips - and you've got yourself one tasty meal!
Author: Lyndsay & Nick
Recipe type: gluten-free, dairy-free, dinner
Serves: 10 thighs
Ingredients
  • 10 bone in chicken thighs, skin on
  • 1 tsp (heaping) oregano, dried
  • 1 tsp (heaping) basil, dried
  • 1 tsp curry powder
  • 1 tsp chili powder
  • 1 tsp kosher salt
  • ¼-1/2tsp white pepper (depending on how spicy you want it)
  • 3-4 Tbsp brown rice flour
  • 2-3 Tbsp oil
Instructions
  1. Rinse chicken thighs in under cold water. Pat each thigh dry, individually. Place them on a cutting board or mat.
  2. Pre-heat 2 Tbsp oil on medium high heat in a large (at least 12 inch) sautee pan.
  3. Add all herbs, spices, salt, brown rice flour into a large mixing bowl. Mix together well.
  4. One by one, coat chicken thighs with spice mix by mixing it around in the bowl.
  5. Add coated chicken thigh to sautee pan, skin side up. Continue until all pieces are coated.
  6. You can sprinkle the remaining spice mixture onto each piece, or discard it.
  7. Fry chicken for 20 minutes, add 1 Tbsp oil more, if needed (if the bottom of the pan looks dry).
  8. After 20 mins, turn each piece with a fork or spatula (watch yourself!) and let cook for another 15-20 mins, or until done. You may have to let them cook for another 10-15 mins depending on the size of the thighs.
3.4.3177


Filed Under: Lunch & Supper, Recipes Tagged With: fried chicken recipe, healthy fried chicken, healthy KFC recipe, homemade KFC recipe

Dairy-free Seafood Chowder

January 16, 2016 by Dr. Nicholas Anhorn, ND and Dr. Lyndsay Wareham, ND 14 Comments

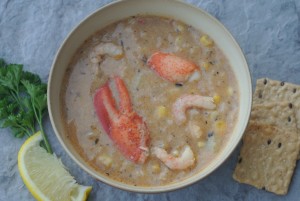
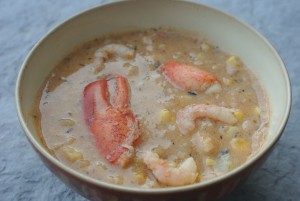
DSC_8877

Thick, creamy & dairy-free!

If we had a secret weapon – this would be it! This recipe ‘wows’ people every single time. It’s thick, rich, and decadent. We’ve made it a few times now with a few minor variations, and it’s worked out great every time – we hope you like it!

Dairy-free Seafood Chowder
 
Print
Prep time
15 mins
Cook time
40 mins
Total time
55 mins
 
This one-pot wonder satisfies any creamy chowder cravings you may be having this winter... and its dairy-free - bonus!
Author: Lyndsay & Nick
Recipe type: dairy-free, gluten-free
Serves: 6-8
Ingredients
  • 4 Tbsp ghee, earth balance, or your favorite butter-like oil (... or butter if you can tolerate some dairy)
  • 1 onion, chopped
  • ½ tsp celery seed
  • 1-2 bay leaf
  • 2 tsp dill, dried (4tsp if using fresh)
  • 1 tsp sea salt or 1½-2 tsp Herbamare
  • ¼ tsp pepper, fresh ground (or more to taste)
  • 4 medium potatoes, peeled & cut into 1in cubes
  • 1 cup water, no salt chicken or seafood broth
  • 2 cans coconut milk, but just mostly the cream (reserve the water for a smoothie)
  • 2-3 cups fresh or frozen seafood combination (skinless haddock fillet pieces, wild salmon fillet pieces, shrimp, lobster claws with liquid, scallops, crab)
  • 1½ cup frozen corn
  • lemon wedges or parsley, as garnish (optional)
Instructions
  1. In a large pot, melt ghee or oil over medium heat.
  2. Add in onions, herbs, salt & pepper. Sautee for 5 mins, until onions are browning.
  3. Add potatoes & sautee for 5 mins more. (feel free to add a bit of the water to prevent potatoes from sticking to the pot)
  4. Increase heat to high, add 1 cup water/broth & bring to a boil.
  5. Turn heat down slightly & boil potatoes, stirring often, until they reached desired tenderness (about 10 mins)
  6. Turn heat to low, add frozen corn & coconut cream and stir well. Add some coconut water or more water/broth if you prefer a slightly thinner chowder.
  7. Add in seafood & fish, and cook for another 5 mins, or until the fish is flaky, stirring often.
  8. Add salt & pepper to taste, and remove bay leaf.
  9. Serve with lemon wedges, fresh chopped parsley, and fresh ground pepper, as garnish if you'd like.
3.4.3177


Filed Under: Lunch & Supper, Recipes, Soups & Salads Tagged With: dairy-free chowder, dairy-free seafood chowder, maritime chowder, maritime dairy-free seafood chowder, maritime seafood chowder, one-pot wonder

3 Ingredient Mango Creamsicle (dairy-free, gluten-free)

May 27, 2015 by Dr. Nicholas Anhorn, ND and Dr. Lyndsay Wareham, ND Leave a Comment

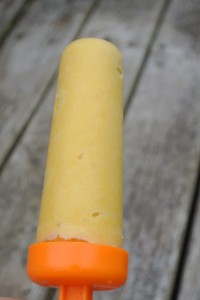
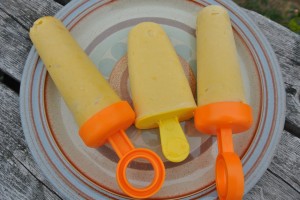
DSC_7576

*Creamy Mango Popsicle*

Yes, our last post was also a popsicle recipe, but with summer on it’s way it is just so gratifying to eat (at least) one popsicle per day. 

The already sweet mango is elevated by adding a touch of honey, which also balances the sometimes strong flavour of the coconut cream. You could use other sweeteners to make it vegan (agave syrup, coconut or cane sugar, etc), but the mango & honey do “marry” well together.

3 Ingredient Mango Creamsicle (dairy-free, gluten-free)
 
Print
Prep time
5 mins
Total time
5 mins
 
Fresh mangos give a nice buttery creamy texture to the unfrozen popsicle, whereas you can get nice little fruit chunks in your popsicle when using frozen mango chunks. We like blending it until everything is smooth & creamy.
Author: Lyndsay and Nicholas
Serves: 6-10
Ingredients
  • 4-5 cups ripe mango chunks, fresh or frozen (or both!)
  • 1 can coconut milk (unshaken! As we'll use mostly just the cream)
  • 1-2 Tbsp honey
Instructions
  1. Place mango chunks & honey in a high powered blender.
  2. Scoop in coconut cream (the thick top layer in the can of coconut milk). If its summer time, you may have to refrigerate your can of coconut milk for a day to separate the cream from the water.
  3. Add in coconut water in small amounts - just enough to allow your blender to blend everything into a smooth creamy mixture (if using frozen chunks you may need to add all of the water, but if using fresh then you won't need much). Blend until you've reached your desired consistency.
  4. The key to a creamy popsicle is adding as little water as possible.
  5. Scoop into popsicle molds. Freeze for at least 8 hours.
  6. Enjoy as a snack or dessert!
3.4.3177

Filed Under: Desserts, Recipes Tagged With: dairy-free dessert, dairy-free popsicle, homemade popsicle recipe

Adzuki Bean, Yam & Kale Salad (gluten-free, dairy-free, vegan)

April 29, 2015 by Dr. Lyndsay Wareham, ND Leave a Comment


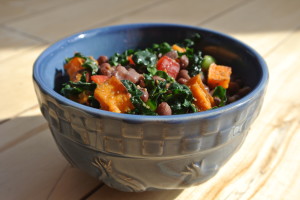
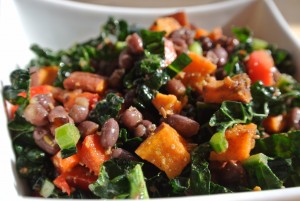
Another delicious way to enjoy kale

Another delicious way to enjoy kale

This is actually the first “meal” that I made for Nicholas while in Naturopathic College. He was working a long day at the school’s clinic, and I had the day off, so I invited him to meet me at a park during his lunch break where I brought along a little picnic with this salad as the highlight. We’ve made this salad many times since then, and we’ve been asked a few times at potlucks & dinners to share this recipe. It is healthy, hearty & is a great year-round side dish, but it is especially delicious in the fall when kale & yams are at their sweetest.

This vegetarian salad is so easy to make, and can be done relatively quickly if you use canned beans (we suggest Eden Organics as they use BPA free cans). However, if using dried beans, you’ll need to plan a bit ahead of time to soak the beans for 8-12 hours, boiling them for about 45 mins, and letting cool slightly before using the beans in the dish.

Adzuki Bean, Yam & Kale Salad
 
Print
Prep time
20 mins
Cook time
30 mins
Total time
50 mins
 
This side dish can be prepared ahead of time, stored in the fridge, and served cold, but it is an especially charming dish when served warm.
Author: Lyndsay & Nicholas
Cuisine: gluten free, dairy free, vegan
Serves: 4-6
Ingredients
  • 1-2 Tbsp olive oil, plus a bit more if needed
  • 1 large yam, cut into ½ inch cubes
  • 2 cups adzuki beans, soaked, cooked & drained (or 1 can works too)
  • 1 red bell pepper, chopped
  • 2-4 Tbsp ground cumin (fresh ground is best)
  • 6-7 stalks black (lacinato) kale, sliced thin
  • salt & pepper, to taste
  • juice of ½ of lime
Instructions
  1. Preheat oven to 400.
  2. Scrub & dry the yam, and remove any obvious blemishes from the yam, but otherwise you can leave the skin on.
  3. Cut yam into ½ inch cubes and place them into a bowl and toss with olive oil to coat. Spread yam cubes onto a baking sheet lined with a silicone baking mat or parchment paper. Bake for 20-25 mins or until soft & slightly browned. Remove from oven and let cool for a few minutes.
  4. In a large bowl, toss together cooked yam cubes with the rest of the ingredients. Mix together well. Add more olive oil, if needed.
  5. Add salt & pepper to taste, along with a splash of fresh lime.
  6. Enjoy!
3.4.3177

Filed Under: Recipes, Soups & Salads Tagged With: adzuki beans, bean salad, black kale, cumin, fall salad, how to use kale, kale, kale salad, lacinato kale, pot luck recipe, winter salad, yams

Strawberry-Blueberry Ice Cream-Popsicles (dairy-free, gluten-free, vegan)

April 29, 2015 by Dr. Nicholas Anhorn, ND and Dr. Lyndsay Wareham, ND Leave a Comment

DSC_7165

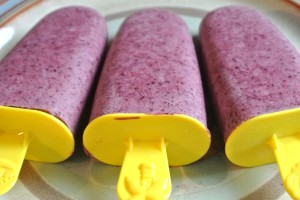
Dairy-free Blueberry Popsicles

Confusing title, right? But, I wanted to pay homage to the two beautiful berries that could potentially make up this versatile dessert. There are many other frozen berry & fruit options that you could use to create a refreshing ice cream (served now) or creamy popsicle (served later) — the possibilities are endless & also delicious! We have had the best success using strawberries & blueberries, because they are both naturally sweet fruit, but I imagine that frozen mango & peaches would also be delicious! We’ve also tried berry mixes with mainly raspberries and blackberries, but we found that you need to add more sweetener to make up for the tartness of the berries, which takes away from the fresh berry flavour.

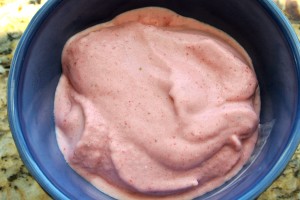
Our daughter affectionately calls the strawberry version “Pink possicle” or “Pink ice cream” (depending on what form it’s in), and asks for it no matter what season it is. It makes for a nice ice cream-like dessert to enjoy after a meal, or as an afternoon snack (or before bed…or as part of breakfast….). It is best served immediately if you want to enjoy it as ice cream, or pour into popsicle molds to be enjoyed later. 

You’ll need a high powered blender such as a Vitamix in order to get the frozen ingredients blended into a creamy mixture. I haven’t tried making it in a food processor, but if you try it, let us know how it works out!

Strawberry/Blueberry Ice Cream Popsicles
 
Print
Prep time
5 mins
Total time
5 mins
 
Enjoy this delicious berry ice cream immediately after making, or pour into popsicle molds to enjoy later.
Author: Lyndsay & Nicholas
Recipe type: dairy-free, dessert
Serves: 4-6
Ingredients
  • 2 generous cups frozen strawberries or blueberries
  • 1 medium banana, frozen
  • 1 can high fat coconut milk (*do not shake as we want to keep the cream & water separated)
  • 6-8 ice cubes
  • ¼ tsp vanilla (optional)
  • sweetener: 1-2 Tbsp cane or coconut sugar, 2-3 medjool dates, or 3-4 pitted baking dates (soaked in warm water for 5-10mins)
Instructions
  1. Place berries, frozen banana, sweetener, vanilla (if using) and ice cubes in a high powered blender such as the Vitamix.
  2. Scoop the thick coconut cream layer in with the other ingredients. Add a few Tbsp coconut water and start blending - slowly turning the blender speed to high.
  3. If the mixture needs more liquid, stop the blender & add a few more Tbsp of coconut water. (Sometimes you'll use all of the coconut water & other times you'll just need a little bit)
  4. Blend just until mixture turns creamy.
  5. *Too much blending will heat up the ice cream and make it more runny. Too little blending will give you a creamy texture, but with tiny ice crystals... which all still tastes delicious. But, to get an ice-creamy consistency, I gradually increase the blender to high and when the mixture just starts to easily turn in on itself, then I know it's done.
3.2.2265

Caught in the act

Caught in the act


Filed Under: Desserts Tagged With: coconut milk dessert, coconut milk ice cream, dairy-free dessert, dairy-free ice cream, dairy-free popsicle, easy ice cream recipe

Seed cycling snack balls (gluten-free, dairy-free, vegan)

June 24, 2014 by Dr. Lyndsay Wareham, ND 8 Comments

DSC_5716

Seed cycling is a natural way to help balance and support your the hormonal shifts that happen during your menstrual cycle.

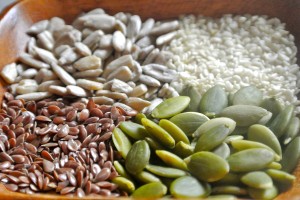
Seed cycling involves rotating certain seeds in your diet to best support the hormonal phases of your menstrual cycle. This is because seeds contain nutrients and oils to help with the production and metabolism of the hormones. The four seeds used are pumpkin & flax seeds, and sunflower & sesame seeds. The pumpkin & flax seeds are taken together during the first half of your cycle, and the sunflower & sesame seeds are taken together during the last half of your cycle. Ideally, we would menstruate with the lunar cycle, where we would have 28 day cycles, ovulating on the Full Moon and menstruating on the New/Dark Moon. This is optimal, however many women have cycles that are shorter or longer than 28 days. This is why it’s so important to become aware of your body’s rhythms and signals, and to support your cycle through its different phases. 

To get started on Seed Cycling, here are a few important things to know about your cycle:

Follicular phase: Day 1 is the first day of menstruation. This begins the follicular phase, which is when the follicle grows and matures. The follicular phase generally lasts around 14-18 days, however this varies among women and is influenced by stress, travel, diet, exercise, and other lifestyle habits. During this phase, you want to support healthy estrogen levels, which is the main hormone released by the ovaries during this time. The follicular phase ends at ovulation.

Eat 1 Tbsp each pumpkin & flax seeds – organic, raw & ground – each day. Pumpkin & flax seeds supports the estrogenic phase of the cycle (menses to ovulation) by providing omega 3’s, fiber & lignans, which help produce & metabolize estrogens.

Luteal phase: This phase begins the day after ovulation, and lasts around 14 days. There is not a whole lot of variation in this phase because the released ovum has a finite life span. During this phase the ovaries release progesterone, which makes the uterine lining ‘juicy’ and prepares it for implantation, as in pregnancy. However if pregnancy is not achieved, progesterone levels drop at the end of this phase, signalling the release of estrogen and subsequent shedding of the uterine lining (menstruation), which starts you back at Day 1.

Eat 1 Tbsp each sesame & sunflower seeds – organic, raw & ground – each day. Sesame & sunflower seeds supports the progestogenic phase of the cycle (2nd half of the cycle) by providing omega 6’s, protein, and nutrients to support this phase. Eating organic meats also assist this phase.

Seed cycling diagram

This chart shows the seeds to cycle alongside fluctuating hormones and the physiological changes of the ovarian follicle and uterus lining.

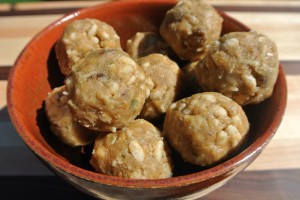
You can sprinkle the seeds in a salad, yogurt, smoothie, sandwich, wrap – or on anything you’d like, really… Here is a recipe for a batch of delicious Seed Cycling Snack Balls (aka Lady Balls) for you to try. It’s a tasty way to get your seeds in and enjoy them too. Eat 3-4 snack balls per day to get an adequate amount of seeds to fully benefit from Seed Cycling.

Seed Cycling Snack Balls (gluten-free, dairy-free, vegan)
 
Print
Prep time
15 mins
Total time
15 mins
 
These slightly sweet & nutty little treats leaves you feeling nourished & balanced. Enjoy 3-4 snack balls per day to get an adequate amount of seeds to reap the benefits of seed cycling.
Author: Lyndsay
Recipe type: snack
Serves: 25-27 balls
Ingredients
  • ½ cup almond, cashew, or peanut butter
  • ½ cup pumpkin seed butter (for menses → ovulation) or sunflower seed butter or tahini (for ovulation → menses)
  • 3-4 Tbsp maple syrup
  • 1 cup organic flax & pumpkin seed, raw & ground (menses → ovulation) 1:1 ratio or 1 cup organic sesame and sunflower seed, raw & ground (ovulation → menses) 1:1 ratio
  • ½ cup dried fruit (cranberries, raisins, chopped dates, currants, etc.)
  • ½ cup unsweetened medium shred coconut
  • ½ cup brown rice cereal (ie. ‘rice krispies’)
  • spices of your choice, to taste (ground cinnamon, cocoa powder, ground nutmeg, ginger powder, chopped crystallized ginger chunks, pure vanilla extract, etc.)
Instructions
  1. In a small mixing bowl, add nut/seed butter and maple syrup and stir well. Add spices of your choice, or leave it plain and enjoy the maple or honey flavour. Stir well.
  2. Add ground seeds and stir to combine.
  3. Gradually, add dried fruit, shredded coconut, and brown rice cereal and stir until evenly distributed.
  4. Use your Tablespoon measure to scoop up mixture and form into balls.
  5. Place in a glass container and store in the freezer for best texture.
  6. Enjoy!
3.2.2265

Filed Under: Recipes, Snacks & Baked Goods Tagged With: balance hormones with seeds, hormone balancing recipes, natural hormone balancing, regulating menstrual cycles with food, seed cycling

Easy Black Bean Dip (gluten-free, dairy-free, vegan)

June 12, 2014 by Dr. Lyndsay Wareham, ND Leave a Comment

DSC_5697

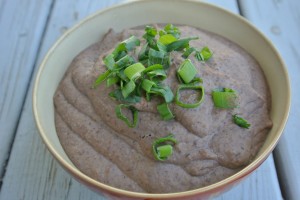
Black beans are a great vegetarian source of protein, and also provide a healthy dose of fibre.

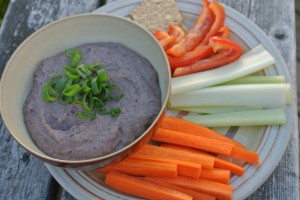
This dip serves well as part of a snack or meal. You can serve it with crackers & veggies, with nachos, or scoop it onto a wrap with some veggies and other fixings for a tasty burrito. It’s a nice alternative to hummus but it can also be served alongside hummus and other dips such as guacamole, salsa, and coconut sour cream/yogurt. For a quick & easy vegetarian meal, we like to pair this dip with a green salad, and rice jazzed up with chopped veggies, ground cumin, lime, and salt & pepper to taste.

Bean dips are a great way to sneak some protein into your child’s diet… serve it with veggies and they could be chomping on celery sticks in no time!

Easy Black Bean Dip (gluten-free, dairy-free, vegan)
 
Print
Prep time
10 mins
Cook time
10 mins
Total time
20 mins
 
Serve this dip as a snack with cut veggies and crackers, or scoop it into a pita, wrap, or alongside a green salad and rice dish and enjoy a quick & healthy vegetarian supper.
Author: Lyndsay
Recipe type: gluten-free, dairy-free
Cuisine: dips
Serves: 2 cup
Ingredients
  • 2 cans (398mL) black beans
  • ¼ cup olive oil
  • ½ onion, chopped
  • 2 cloves garlic, chopped
  • 1 red thai chili pepper, chopped (optional)
  • 3-4 Tbsp water
  • 3-4 tsp ground cumin
  • ¾ - 1 tsp salt
  • ¼ tsp black pepper
  • chopped chives, green onion, cilantro or parsley for garnish
Instructions
  1. Place 2 Tbsp olive oil, chopped onions, garlic, and thai chili pepper into a small saucepan and heat on medium heat for about 5 mins or until onions begin to soften, stirring often.
  2. Remove from heat & set aside.
  3. Drain & rinse beans.
  4. Add beans, water, 2 Tbsp olive oil, cumin, salt & pepper into a blender. Add onion mixture scraping the pan with a spatula to get all of the oil.
  5. Blend on high for about 1 minute until smooth.
  6. Add more water if needed, and seasoning to taste.
  7. Add garnish & serve immediately, or store in fridge to serve later adding garnish just before serving.
3.2.2265


Filed Under: Dressings, Dips, & Sauces, Recipes Tagged With: black bean dip, dairy-free dip, easy black bean dip, gluten-free dip, healthy food for kids, kid-friendly dip, party dip, vegan black bean dip, vegetarian meal, vegetarian snack

  • 1
  • 2
  • 3
  • …
  • 5
  • Next Page »

Meet Dr. Nicholas ND & Dr. Lyndsay ND

We are two naturopathic doctors with a vision to inspire healthy cooking, healthy eating, and healthy living for you and your family.  Read more about us >>

  • Email
  • Facebook

Subscribe

Heart Healthy Omega Burgers

Dairy-free Cashew Cream for Breakfast Parfaits & more!

Four essential ways to use Turmeric

Easy, Every Day Spa Treatments to Enjoy at Home

Crispy Cheesy Kale Chips

Ken-Tucky Fried Chicken

Dairy-free Seafood Chowder

3 Ingredient Mango Creamsicle (dairy-free, gluten-free)

Copyright © 2025 · Foodie Theme by Shay Bocks · Built on the Genesis Framework · Powered by WordPress