Naturopathic By Nature

Healthy Eating & Healthy Living

Navigation
  • Recipes
  • Articles
    • Naturopathic
    • Pregnancy & Postnatal
    • Healthy Foods
    • Grocery Lists
  • About Us
  • Contact Us

Quick & Easy Healthy Homemade Meals: Quinoa Salad with Balsamic Vinegar Dressing (gluten-free, dairy-free, vegan)

July 15, 2013 by Dr. Lyndsay Wareham, ND Leave a Comment

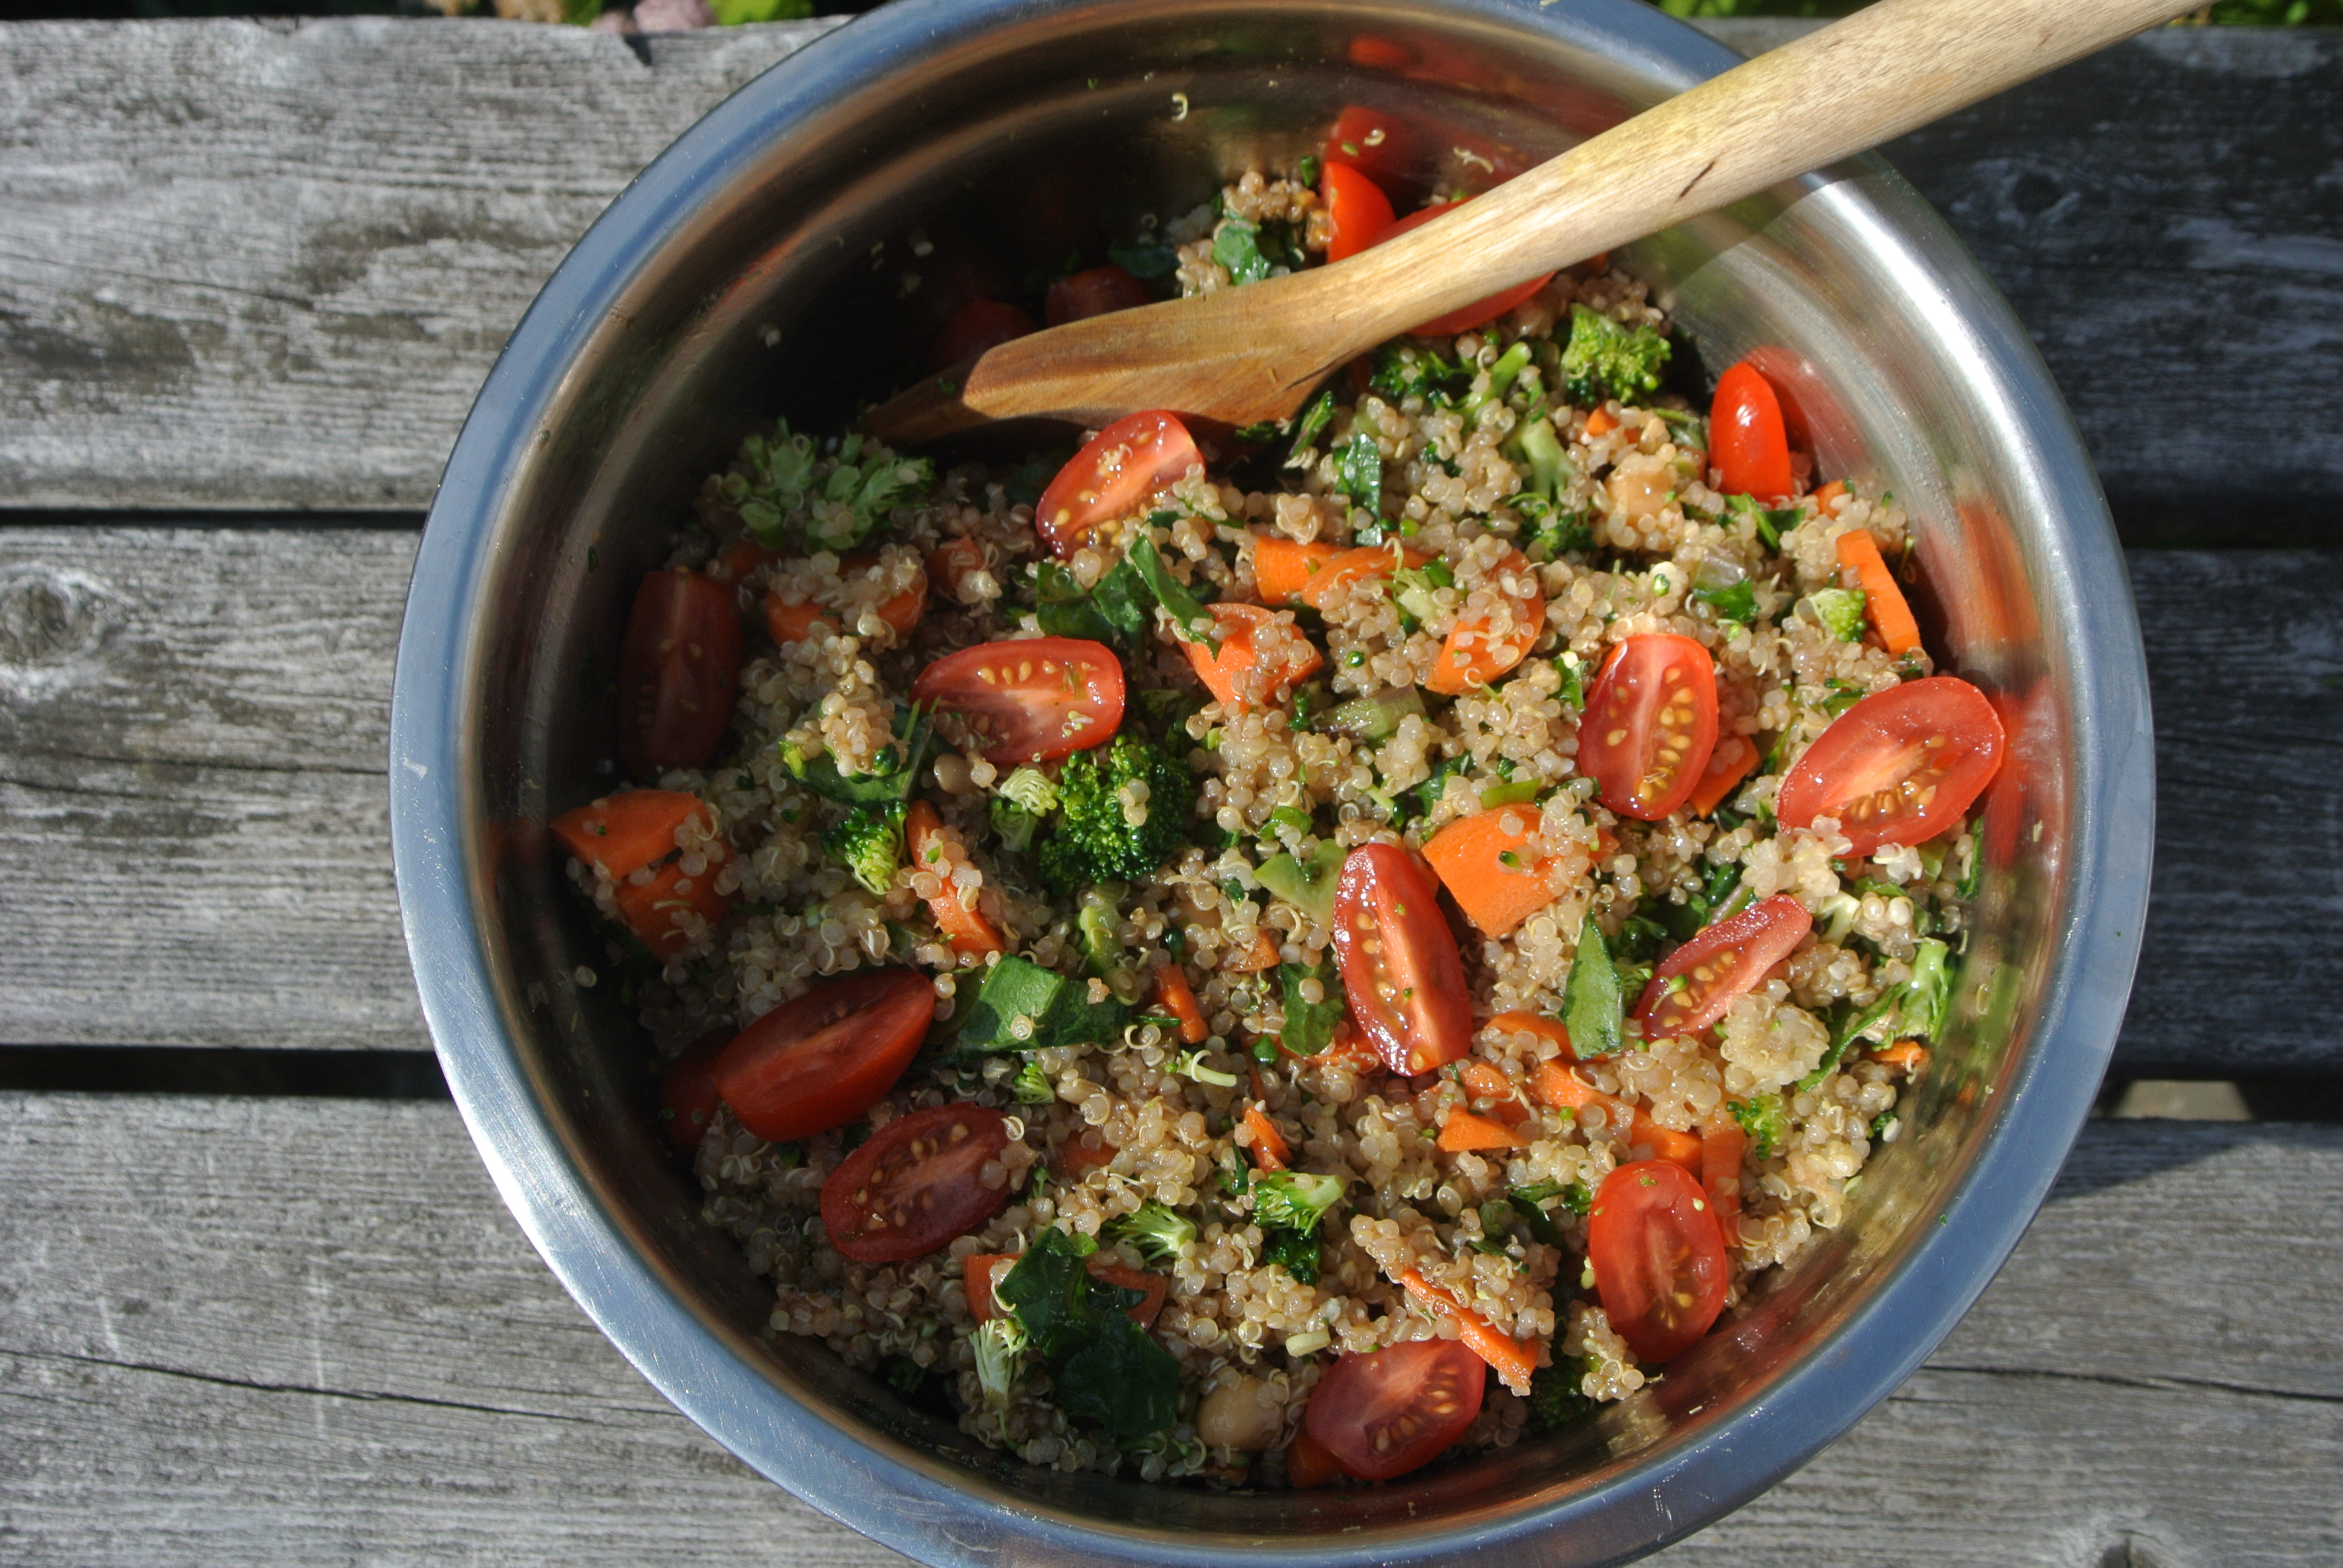
This Quinoa Salad could easily be called ‘The Every Day Quinoa Salad’ because it is so delicious, can be suited to any season, and so versatile! You can literally add any veggies that you want to it and it turns out great every time. In the summer it’s nice to have fresh raw veggies, and in the winter you can add grilled or lightly cooked veggies for a warming flavour. You can enjoy this salad with the just-cooked quinoa slightly warmed, or you can make it with quinoa that was cooked the day before (about 3 cups cooked quinoa)…The secret is in the dressing!

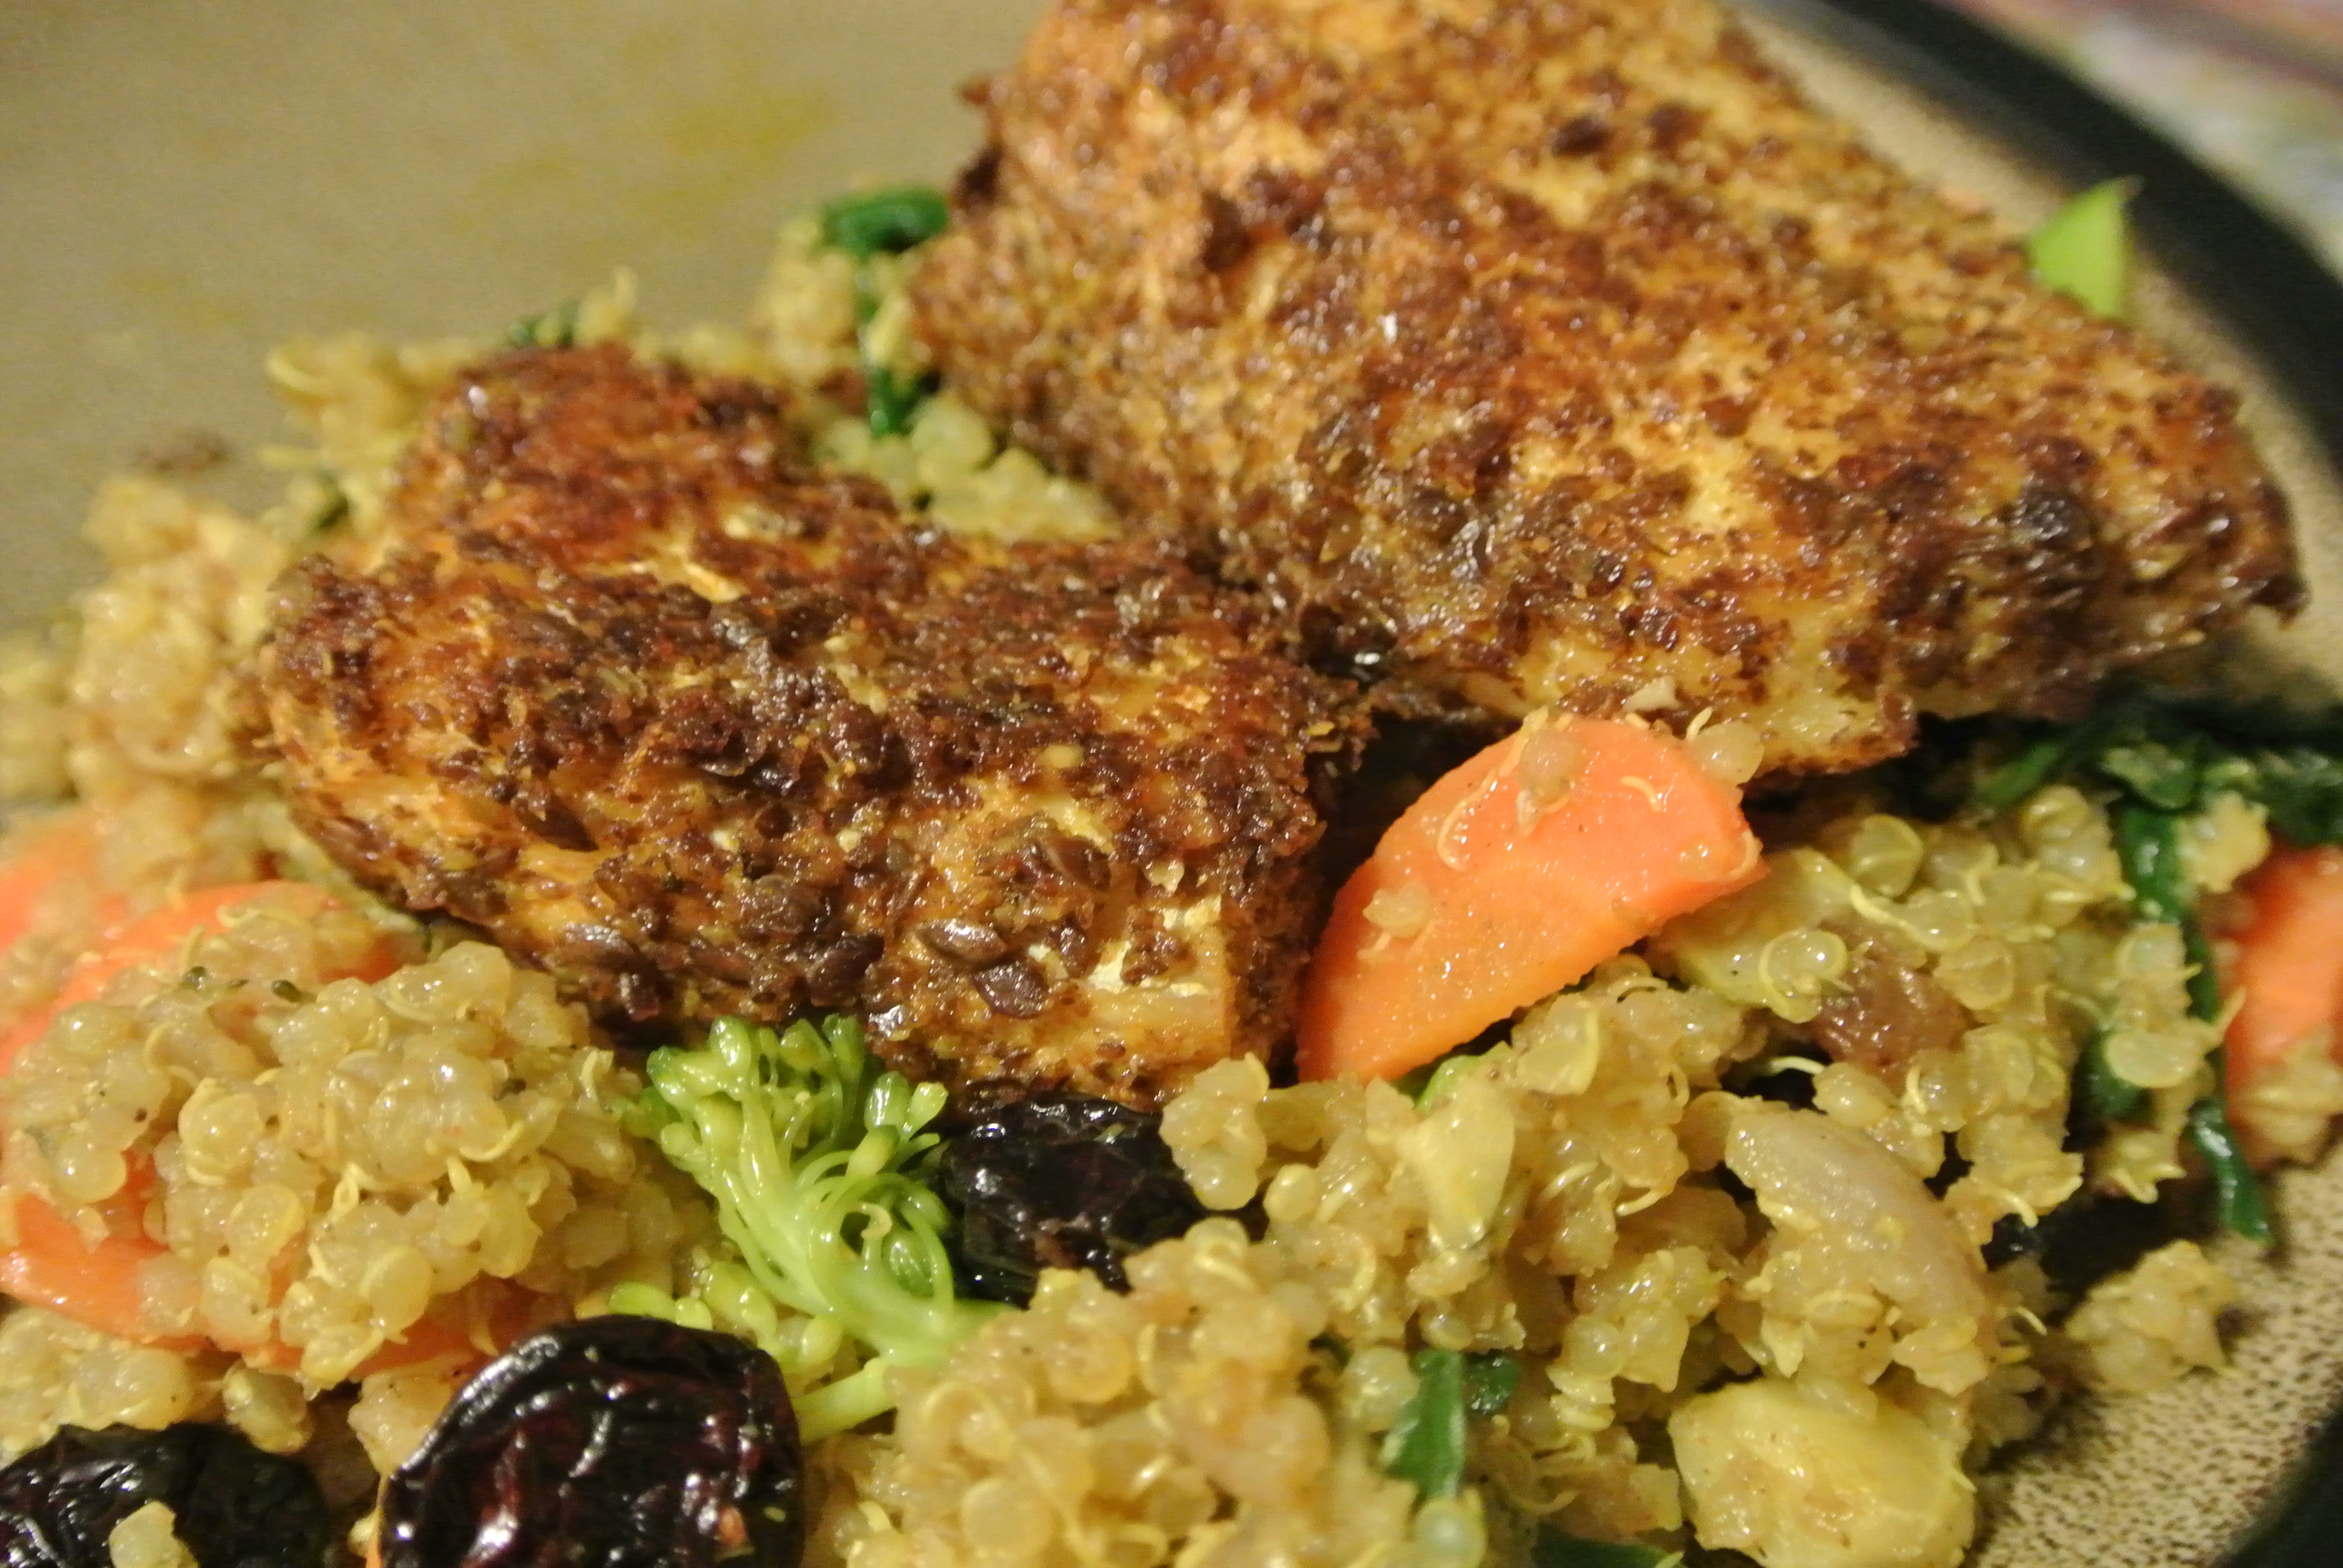
For a complete meal, we usually serve this salad with a green salad (often with our Apple Cider Vinegar Dressing) and roasted chicken or lamb. Or, for a vegan option, we’ll add sauteed tofu or cooked chickpeas to the quinoa salad. 

QUINOA SALAD WITH BALSAMIC VINEGAR DRESSING

DSC_3126

Perfect at any time of day, season, and paired with nearly every meal!

Prep Time: 30 mins

Cook Time: 20 mins

Serving size: 4-6

Ingredients

  • 1 ½ cups quinoa, uncooked
  • 2 ½ cups water
  • 1small red onion, finely chopped
  • 1 large carrot, chopped
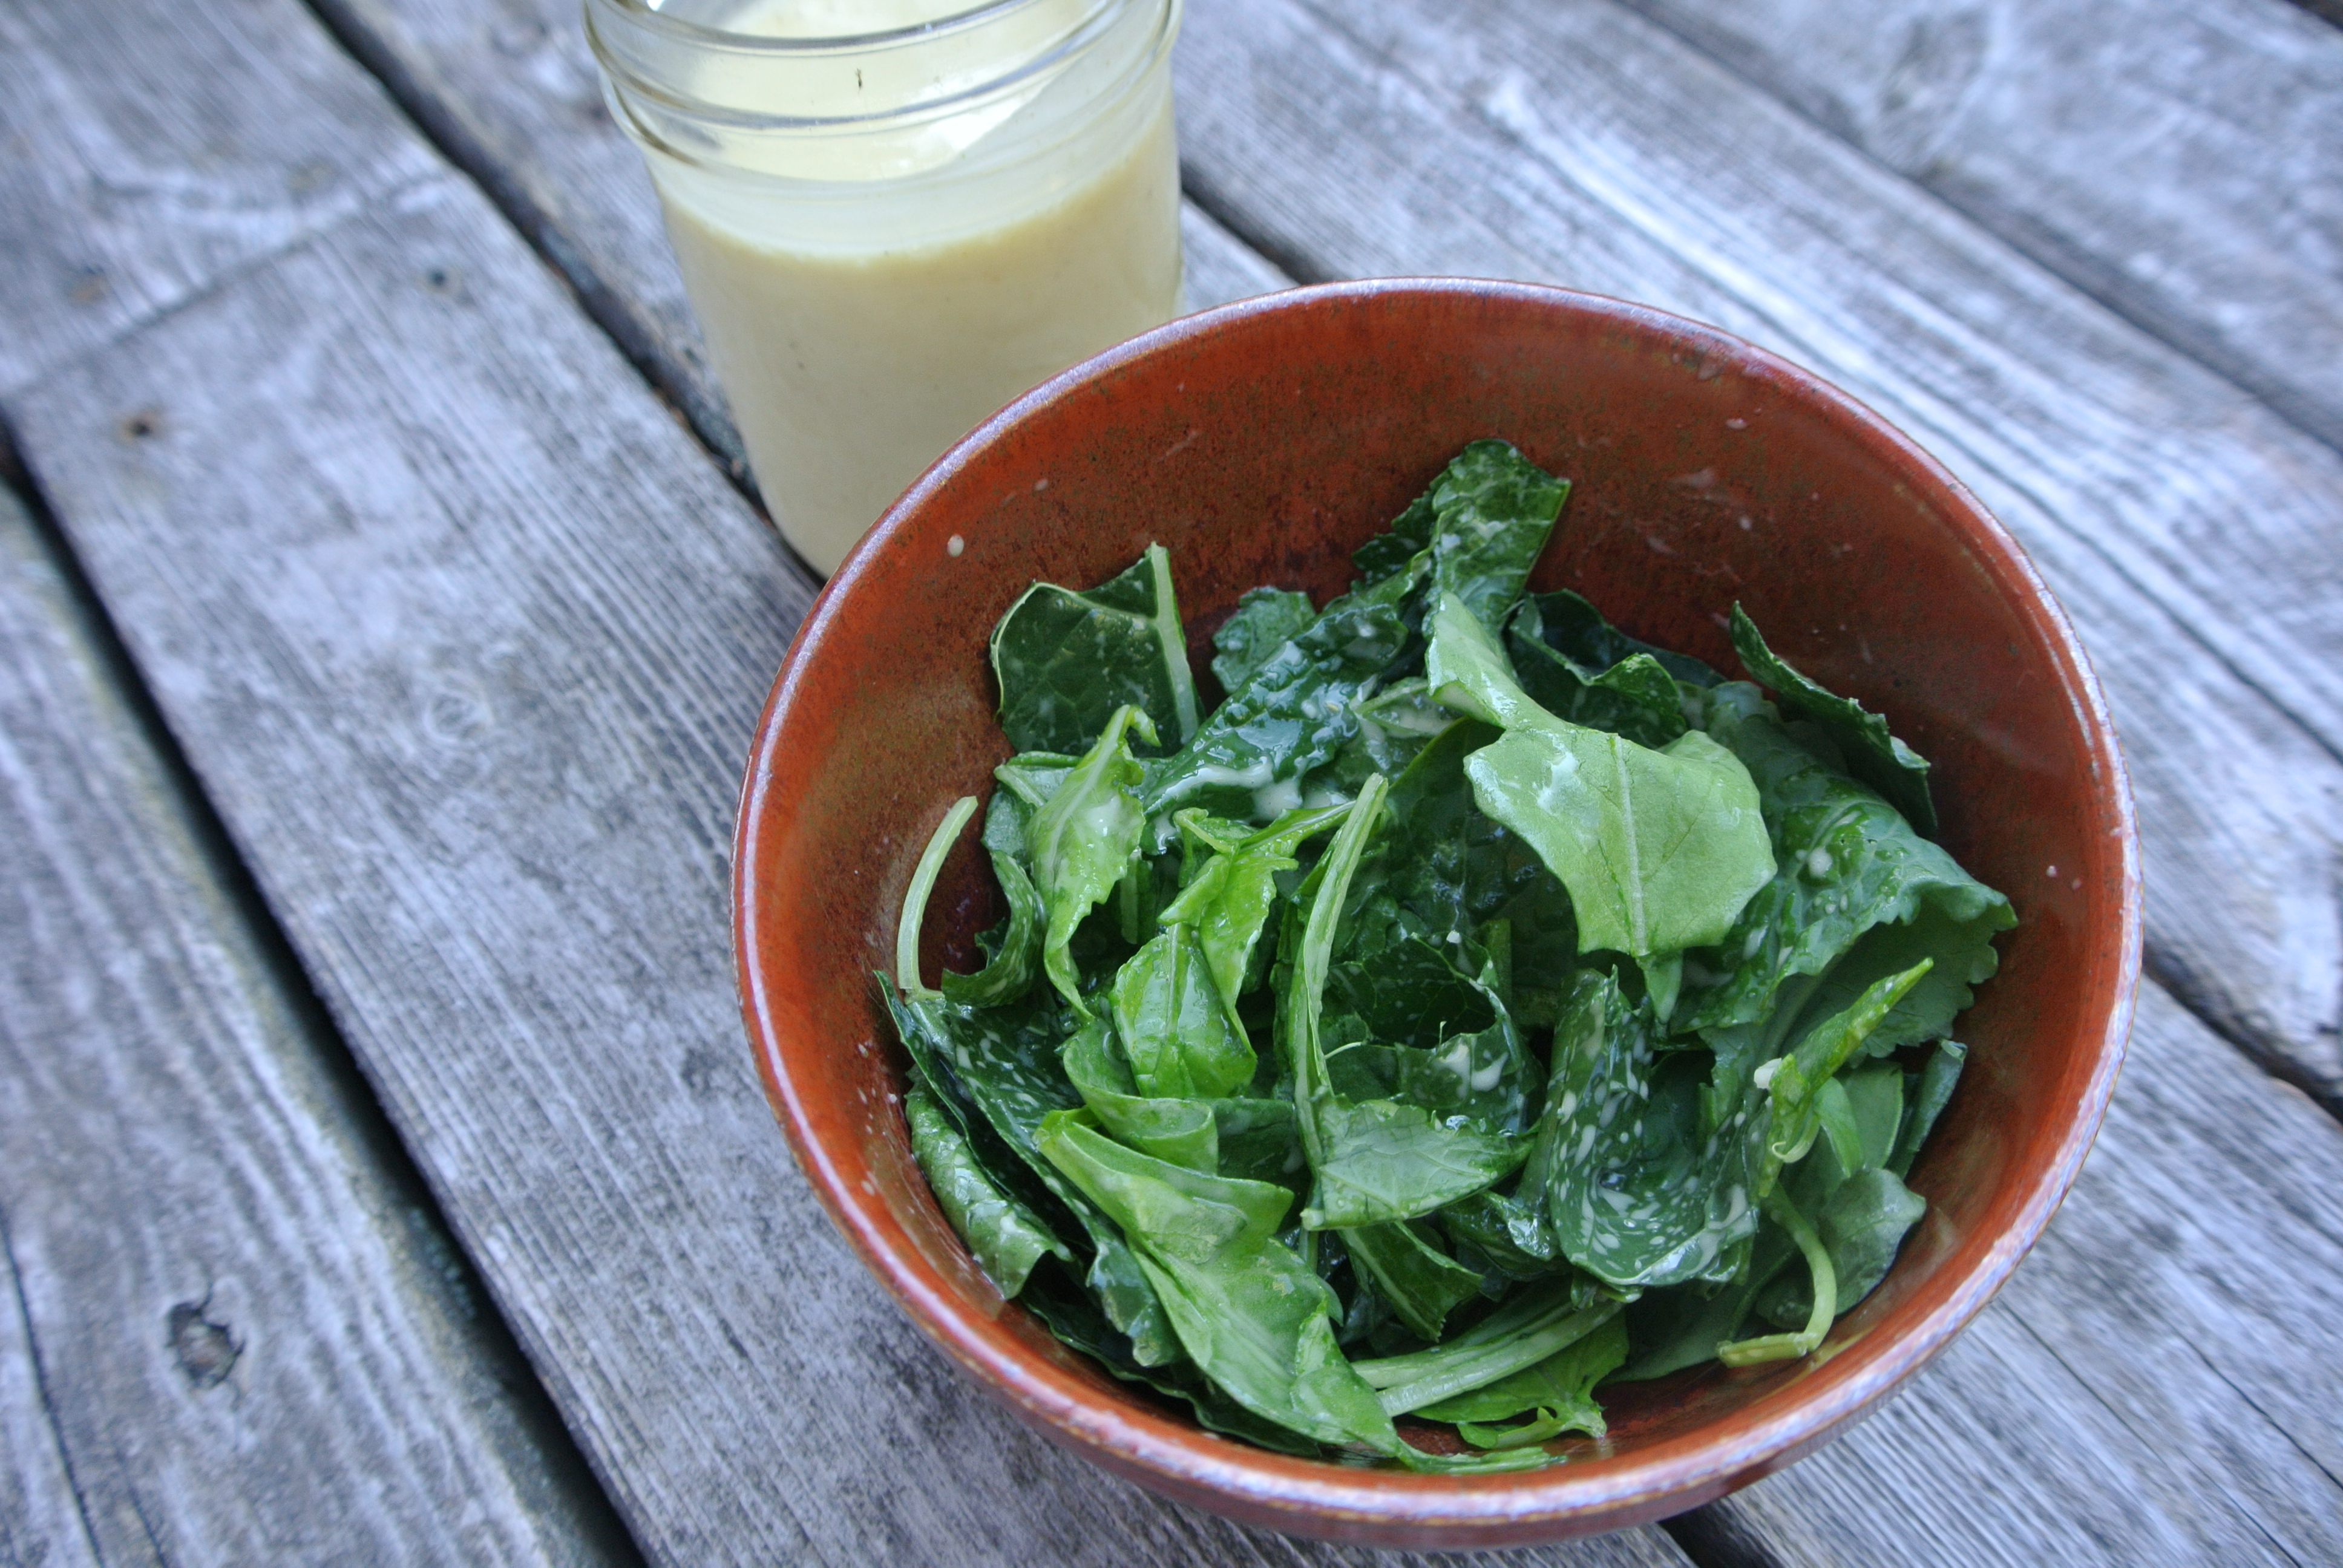
  • 3-4 leaves your favorite kale, chopped or 1 cup baby kale
  • 1 handful baby tomatoes, halved
  • ½ cup broccoli florets, chopped
  • ½ avocado, cut into chunks
  • ½ cup nuts & seeds (our favorites: walnuts, sunflower seeds, pumpkin seeds, hemp seeds)

other veggie ideas:

  • bell peppers, chopped
  • cauliflower florets, chopped
  • fresh green peas
  • celery hearts, chopped

Dressing:

  • 1/3 cup olive oil
  • 1/3 cup balsamic vinegar
  • 1/2 – 1 Tbsp coconut sugar, maple syrup or honey
  • 2 tsp Dijon mustard
  • ½ tsp salt
  • pinch of pepper

Directions

  • Place quinoa in a strainer and rinse well with water to remove the bitter saponins.
  • Add rinsed quinoa with fresh water to a medium sized saucepan, and a dash of salt. Bring to a boil, and then turn to low heat to simmer for about 20 minutes. When cooked, remove from heat and let cool.
  • While quinoa is cooking and cooling, chop your veggies and place them in a large salad bowl. 
  • Place ‘dressing’ ingredients in a blender and blend on high for a few seconds. Set aside.
  • When the quinoa has cooled, but still slightly warm, add it to the large bowl of chopped veggies. Stir quinoa and veggies together to mix well.
  • Now, you can the dressing to the salad in spoonfuls, until it has reached the desired taste. (Usually we have some left over, which you can use on a green salad or another quinoa salad).
  • Add nuts and seeds just before serving, and enjoy!
  • Enjoy this quinoa salad slightly warmed, or as left overs the next day!


Today we added chopped carrots, baby tomatoes, broccoli florets, and kale

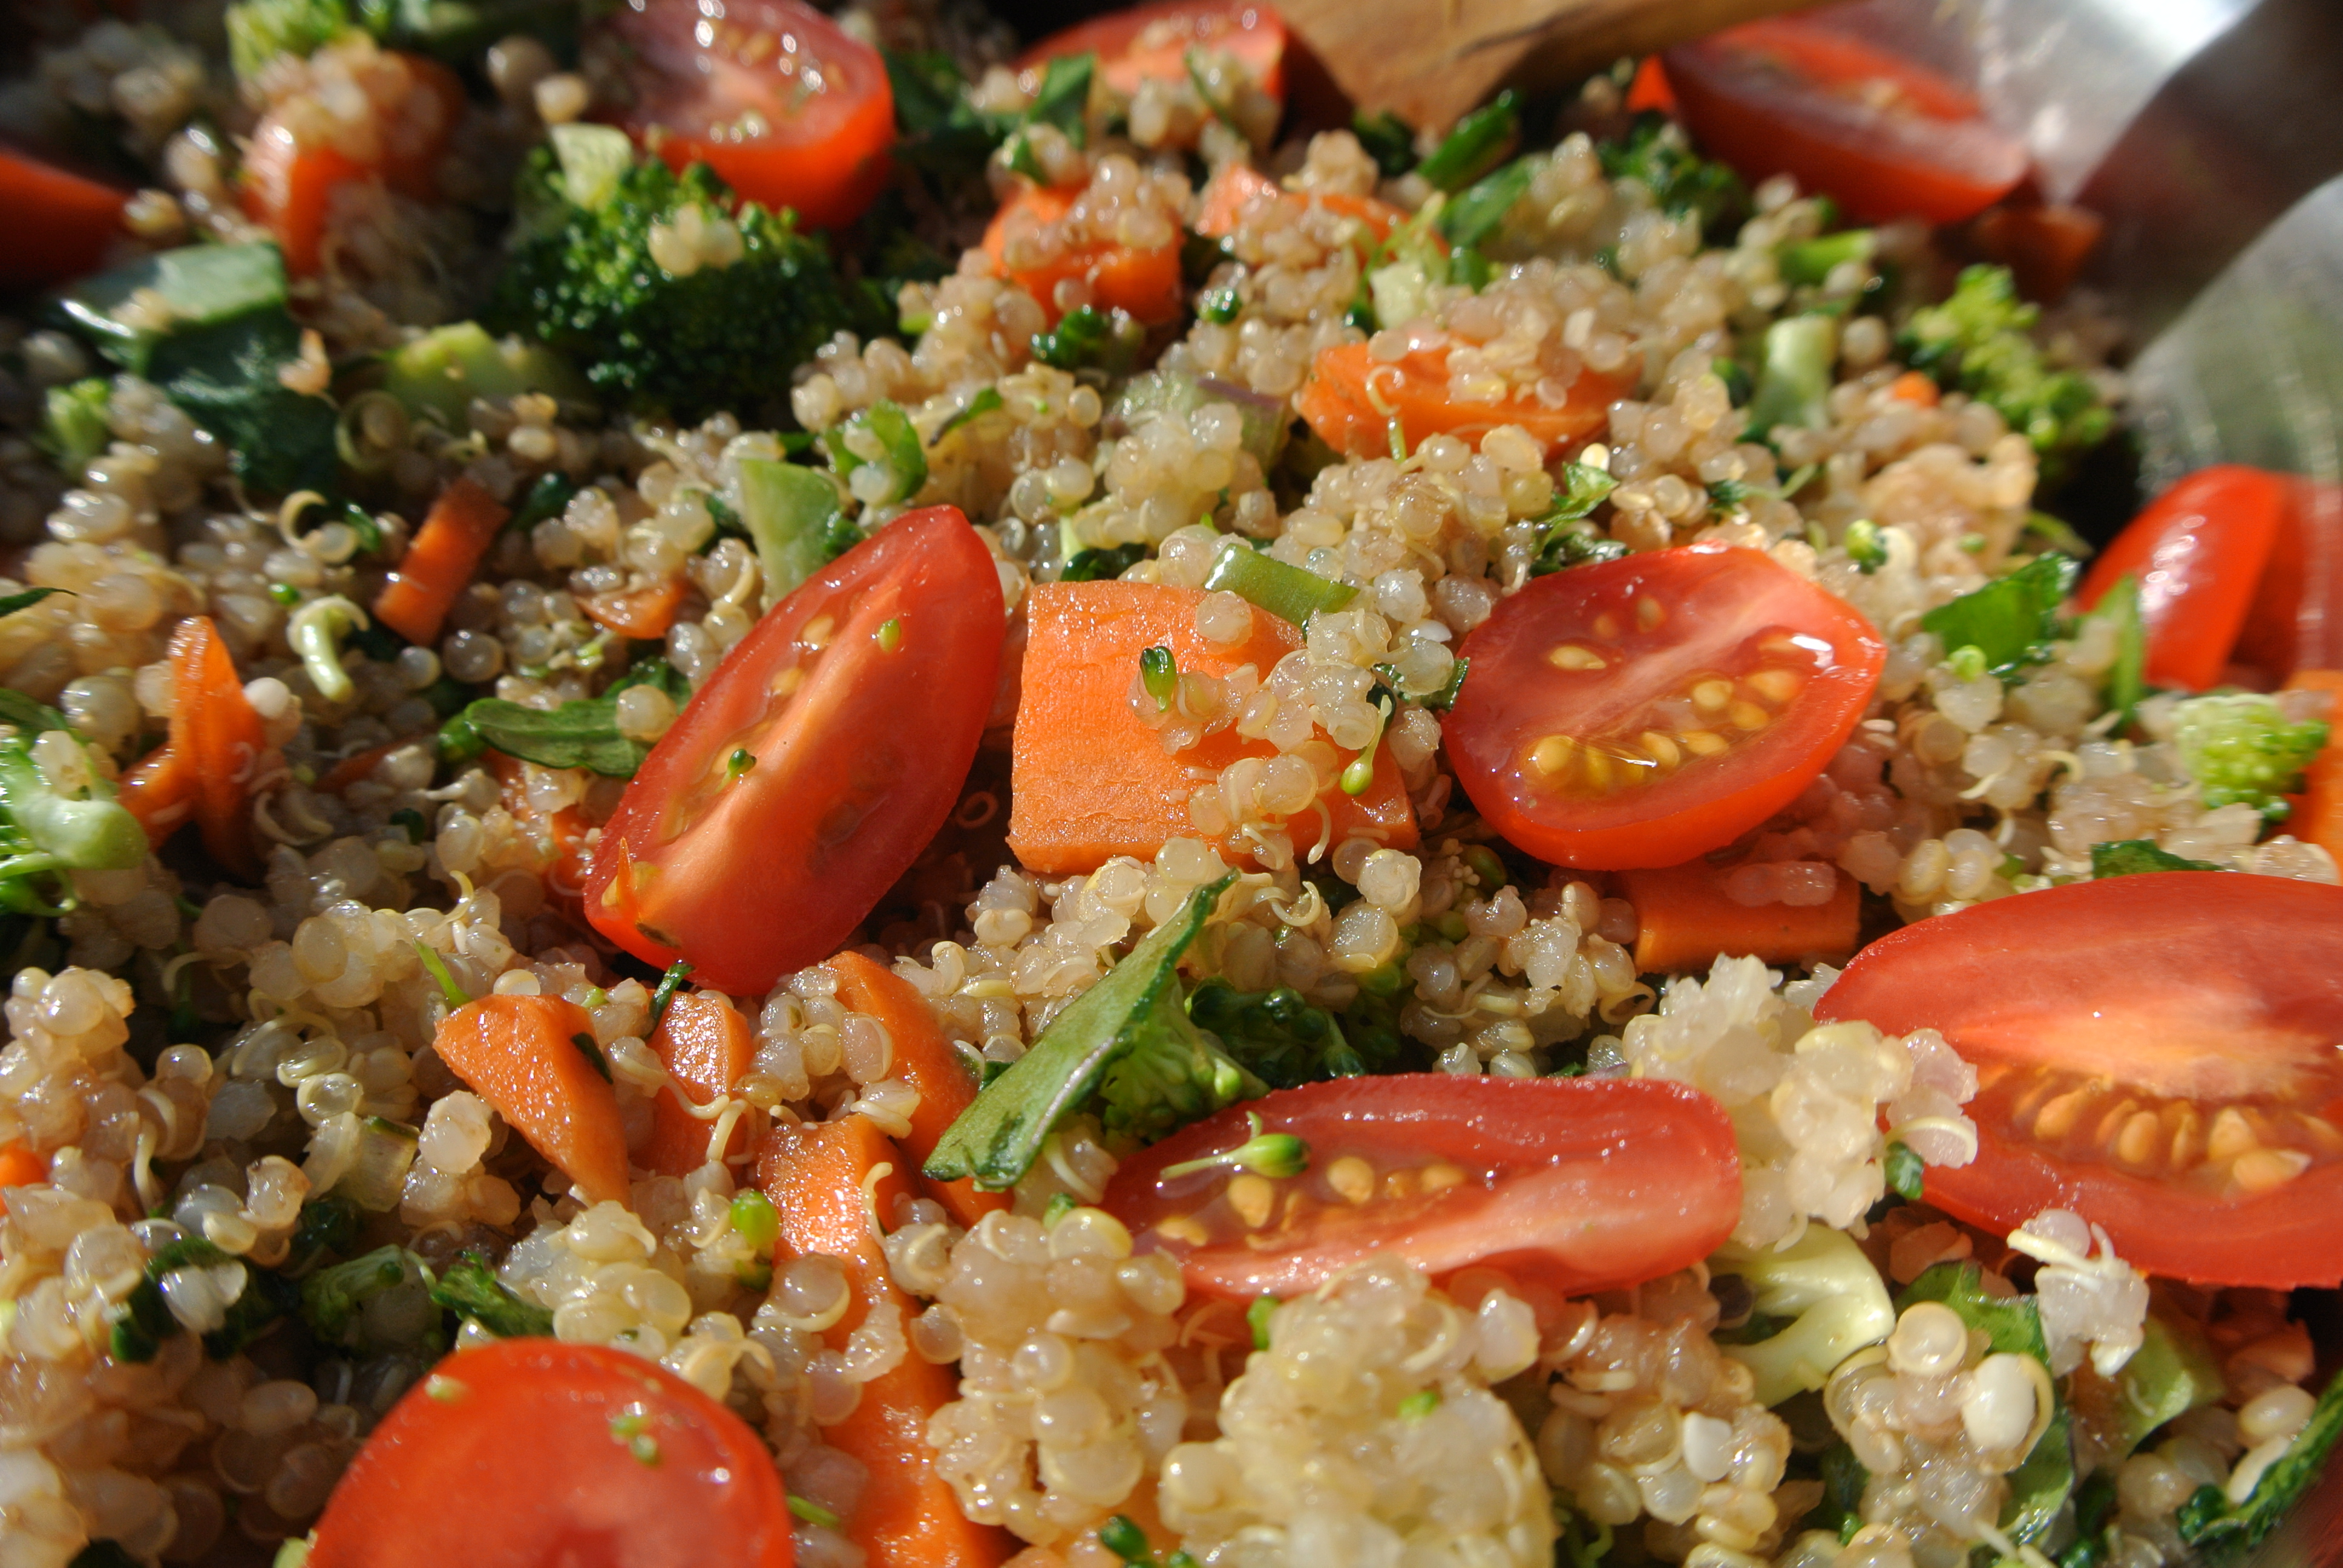
Today we added chopped red onion, carrots, baby tomatoes, broccoli florets, and kale. We’ll add hemp seeds and roasted sunflower seeds just before serving

Filed Under: Recipes, Soups & Salads Tagged With: balsamic quinoa salad, homemade quinoa salad, quick and easy quinoa salad, quinoa salad, quinoa salad recipe, quinoa salad with balsamic dressing

11 Tips to Improve Digestion: How to get the most out of what you eat

July 7, 2013 by Dr. Nicholas Anhorn, ND and Dr. Lyndsay Wareham, ND 2 Comments

1.    Kick start your metabolism with breakfast

You can imagine that your digestive metabolism acts the same as a fire. When you start a fire, first you add kindling & newspaper to get the fire started, and then only after it gets going are you able to add bigger logs to the fire. Eventually, when the fire is really going, it’s so hot that it could melt a tin can!

Similarly with digestion, it is important to start your day with an easy-to-digest meal such as oatmeal with flax and blueberries, a fruit salad with hemp seeds, a nutritious smoothie, or quinoa with steamed kale and an egg. Then, once you get the fire started, you can add in foods that require more energy to digest such as meats, nuts, and beans during lunch or dinner.

Let’s look at this another way: have you ever tried to start a fire using logs? It takes long, long (long!) time to get a hot fire going. The same is true with digestion.  If you don’t get your digestive fire burning strong first, then you are not able to fully digest the meats, nuts, and beans that you eat later on in the day. This can be experienced as heartburn, gas, bloating, food sensitivities, or lack of nutritional absorption.

2.    Cook your meals at home

The smells and aromas released when food is chopped and cooked helps ‘prime the system’ by initiating the release of stomach acid and digest enzymes that are necessary for proper digestion.

3. Eat in a stress free environment

Create a nice environment for your mealtimes by sitting in a comfortable seat, turning off all stimuli (computers, TV, cell phone… except maybe some relaxing music), light a candle or dim the lighting, calm your mind, take your time, and enjoy your meal. Doing this can actually increase enzyme production by up to 70%! And you can get the whole family involved by creating a mealtime ritual that is relaxing, fun, and a time to connect.

4. “Prime the system” by starting your meal with bitter foods

To help increase enzymes so that your body is ‘primed’ to digest your meal, you can take 1 tsp apple cider vinegar mixed with 2 oz water or by eating something bitter before your meal. Our favorite way to do this is to have a green salad before meals with bitter greens such as arugula, kale, swiss chard, mustard greens, and endive. You could even enjoy these bitter greens with an apple cider vinegar dressing! You can find our favorite in our recipe section.

5. Do not over eat: “Hari hachi bu”

This wise Japanese saying translates into “eat until you’re 80% full.” The Okinawans’ say this before every meal to remind themselves to eat only moderate amounts of food.

6. Chew each mouthful at least 31 times

The mouth is a very important part of the digestive process. Chewing breaks up the food into smaller particles and mixes it with saliva and digestive enzymes. These smaller food particles now have a larger surface area for the acid and digestive enzymes of the stomach and intestine to work on.  This allows complete digestion of the food, which is important for preventing food sensitivity/allergies and to ensure maximum absorption of the nutrients.

7. Put your fork down between each bite

Doing this helps you relax and slow down, which is just what the digestive system needs so that your stomach and brain can agree on when you are actually full. When you eat a meal, the distension of the stomach sends signals to the brain stating just how full it is. The brain then releases hormones telling you that you are full. However, this signal can have a 15 minute “lag time”, so if you’re eating too quickly then your stomach may be too full by the time the brain gets the signal and releases the hormones that tell you to stop eating.

8. Avoid drinking a large glass of water with your meal

The water you drink during a meal can dilute stomach acid and digestive enzymes, which reduces digestion and absorption of nutrients. It’s best to avoid drinking water for at least 30 minutes before or after your meal.

9. Add fermented foods to your diet

Foods that have undergone the fermentation process, such as sauerkraut, kefir, kimchi, and kombucha, have naturally high amounts of digestive enzymes and probiotics that are just waiting to get to work. Including these foods with larger meals, especially those with meat, helps reduce any discomfort or excessive fullness that often comes with eating harder to digest proteins.

10. Go for a gentle walk after your meal

The rhythmic movement of walking puts the body into parasympathetic mode (aka “rest & digest” mode), which is the best state for optimal digestion- 15 minutes is all it takes!

11. Address food sensitivities

If you feel that you’re doing everything right and are still experiencing symptoms of indigestion such as gas, bloating, cramping, lethargy, or intense food cravings, it would be worth your while to consider exploring whether you have a sensitivity to foods that you’re eating. Visit your naturopathic doctor for food sensitivity tests or other advanced lab testing.

shutterstock_68962465 copy

just to be clear… these food choices aren’t exactly “digestion friendly”. Let’s see some greens, colorful fruits, whole grains, and lean organic meats in there!

Filed Under: Articles, Naturopathic Articles Tagged With: how to absorb nutrients better from food, improve digestion, improve digestion naturally

Creamy Apple Cider Vinegar Dressing (dairy-free, gluten-free)

July 7, 2013 by Dr. Nicholas Anhorn, ND Leave a Comment

Starting your meals with a green salad helps to ‘prime the system’ for optimal digestion. Having bitters before a meal releases stomach acid and digestive enzymes so that your body is ready to digest and absorb the nutrients from your meal. Apple cider vinegar (1 tsp mixed with 2 oz water) before meals gives the same effect as having bitter greens (kale, arugula, baby swiss chard, mustard greens, endive, lettuce, etc). 

CREAMY APPLE CIDER VINEGAR DRESSING

Tangy & delicious!

Tangy & delicious way to get the digestive juices flowing!

Ingredients

  • 1/3 cup olive oil
  • 1/3 cup apple cider vinegar
  • 1-2 tbsp dijon mustard
  • 3 tsp honey
  • 1 garlic clove
  • salt and pepper, to taste

Directions

Place all ingredients in a blender and blend on high for a 15-20 seconds.  

Enjoy over a big bowl of delicious dark leafy greens!

Here we have our Apple Cider Vinegar Dressing over a bowl of mixed bitter greens - arugula, spinach, black kale, baby kale and dandelion greens - all from the local Dieppe Market!

Here we have our Apple Cider Vinegar Dressing over a bowl of mixed bitter greens – arugula, spinach, black kale, baby kale and dandelion greens – all from the local Dieppe Market!

Filed Under: Dressings, Dips, & Sauces, Recipes Tagged With: apple cider vinegar dressing, easy apple cider vinegar dressing, easy salad dressing, simple salad dressing

Here it is! Quinoa Chocolate Cake (gluten-free, flour-free, with dairy-free option)

July 6, 2013 by Dr. Lyndsay Wareham, ND 6 Comments

I’ve had so many people ask me for this recipe that I just had to post it. The original recipe comes from the head chef Moreka Jolar at the beautiful Hollyhock on Cortes Island, BC. Moreka just recently came out with a new cookbook, Garden to Table. And for those who have had the honour of spending time at Hollyhock know that they are known for their cuisine – gorgeous buffets and luscious salads made from food grown and harvested straight from their garden… a little piece of advice for you: always save room for dessert!

 In the recipe below you’ll see the substitutions that I made in (brackets). Please note “Lyndsay’s Tip” at the bottom of the recipe for a delicious chocolate sauce that not only makes the cake look pretty when you drizzle chocolate sauce over a slice of cake but also “completes” the dessert for us chocolate lovers out there. And here’s another tip for chocolate lovers… my favorite cocoa powder to use is ‘Rudy Red 22-24% fat cocoa powder’ but this is difficult to find… however, I have seen it at Bulk Barn. I’ve also used the regular 10-12% fat cocoa powder and the end product was still divine. Some other ideas for toppings are top it with coconut cream (refrigerate a can of coconut milk, scoop off the top thick layer and whip it with a little maple syrup or sugar), raspberry jam, fresh fruit, or fold in chocolate chips into the batter towards the end of mixing for nice little bursts of extra chocolate.

Dairy-free version: substitute coconut oil for the  butter and a ‘mylk’ alternative (I suggest vanilla almond, rice, or coconut mylk) instead of cow’s milk. 

QUINOA CHOCOLATE CAKE (gluten-free, flour-free, option for dairy-free)

by Moreka Jolar from Hollyhock, Cortes Island BC

Flourless Quinoa Chocolate Cake with Chocolate Sauce <3

Flourless Quinoa Chocolate Cake with Chocolate Sauce <3


Serves: 8–10
 

Ingredients

  • 1 1/3 cup water
  • 2/3 cup quinoa
  • ¾ cup cane sugar* (I used coconut sugar)
  • ½ cup butter, melted (I used melted coconut oil)
  • 1⁄3 cup milk or dairy alternative (I used vanilla almond milk)
  • ¼ cup grapeseed oil (I’ve omitted this, or swapped it with light olive oil & it still tasted great)
  • 4 eggs
  • 1 cup cocoa powder
  • 1½ tsp baking powder
  • ½ tsp baking soda
  • ½ tsp salt

Directions

  • Rinse quinoa & place quinoa and water in a small saucepan, cover and bring to boil. Reduce heat & simmer for 15 minutes. Remove lid and allow to cool.
  • Preheat oven to 350°.

  • Process cane sugar, melted butter, milk, oil and eggs in a blender at high speed for 30 seconds.
  • Add the cooked quinoa & continue to blend on high for about 1 minute.
  • Use a rubber spatula to transfer batter to a large bowl.
  • In a medium bowl, sift together the remaining dry ingredients.
  • Add to the wet batter and combine thoroughly with a wooden spoon until there are no clumps left.
  • Scoop batter into a parchment-lined 8″ springform pan or 8″ round cake pan and bake for 40–45 min until a knife comes out of the center clean.
  • Allow to cool completely before removing from pan and serving. (In fact, if you’ve got the patience, keep it in the fridge for at least 5 hours before serving. Or, you can serve it the next day for a (seriously…) super-fudgy cake!)

Moreka’s tip: Make this completely maple-sweetened by replacing sugar with maple syrup and omitting milk.

Lyndsay’s tip: make a delicious chocolate sauce with ½ cup dark chocolate chips, ¼ cup can coconut milk, 2 Tbsp maple syrup. Add all ingredients to saucepan and heat over low heat until melted. Allow to cool for 5 mins and drizzle over top of each piece before serving.

My Dad's 55th birthday cake!

Quinoa Chocolate Cake, chocolate sauce, and personalized candles for my Dad’s 55th birthday cake!

Filed Under: Desserts, Recipes Tagged With: flourless chocolate cake, gluten free chocolate cake, vegan chocolate cake

World Famous Glory Bowl Dressing

June 23, 2013 by Dr. Nicholas Anhorn, ND 6 Comments

This recipe originates from Hollyhock on Cortes Island, BC – many people actually call this dressing the “Hollyhock Salad Dressing”. You can also find it in their first cookbook called ‘Hollyhock Cooks’. The dressing is creamy, tangy and also has a cheese-like flavour which pairs well with a big luscious green salad. At Hollyhock, they also add edible flowers and sprouted chickpeas, adzuki beans, lentils, and sunflower seeds to their salad bar – a great way to add easy-to-digest protein to your salads!

GLORY BOWL DRESSING (Dairy-free)

Glory Bowl Salad Dressing

Nutritional yeast adds a creamy & cheese-like flavour as well as B vitamins!


Ingredients

  • 1 cup olive oil
  • 1/3 cup apple cider vinegar
  • 1/3 cup tamari or soy sauce
  • ½ cup nutritional yeast flakes
  • 2 Tbsp tahini
  • 2 cloves garlic

Directions

Place all ingredients into a blender and blend for 15-20 sec. Enjoy mixed into a green salad, or poured over steamed veggies and rice.

Filed Under: Dressings, Dips, & Sauces, Recipes Tagged With: dairy free, dairy free salad dressing, everyday salad dressing, healthy, homemade salad dressing, nutritional yeast

Quick & Easy Healthy Homemade Meals: Warm Breakfast Cereal

June 6, 2013 by Dr. Nicholas Anhorn, ND Leave a Comment

This recipe can be made up surprisingly quickly since you just have to get the grains started and add the rest of the spices and ingredients while it’s cooking. The more you make it, the easier it gets! Especially since you’ll find the combination of spices, fruit, nuts & seeds that tastes good to you (and as always… feel free to mix it up, add anything that looks tasty to you, and experiment as you see fit).

We initially wanted to call this recipe ‘Vega Vanilla Chai warm breakfast cereal’ but didn’t want people to pay no attention to the recipe if they didn’t have this Vega protein powder in their cupboard. But if you do have it, the Vanilla Chai flavour adds a delicious flavour!

WARM BREAKFAST CEREAL

This warming cereal is  perfect for any day of the week

This warming cereal is perfect for any day of the week

Prep time: 10 mins

Cook time: 20-30mins

Servings: 4-6

Ingredients

Grains:

  • 1 cup steel cut oats
  • ¾ cup raw buckwheat groats (or short grain brown rice)
  • ½ cup amaranth (can also substitute with millet or quinoa)
  • 4 cups water
  • pinch salt

Spices (mix & match as you please! choose between all or some of the following):

  • 1-2 tsp ground cinnamon (or grate fresh cinnamon, break up stick and let cook in mixture)
  • ¼ tsp ground nutmeg
  • ¼ tsp cardamom pods
  • 4-5 whole cloves
  • 1 star anise
  • 4-5 slices fresh ginger

Other ingredients:

  • ½ – 1 cup original or vanilla ‘mylk’ (almond, rice, coconut)
  • 4-6 dried prunes
  • 1 cup fresh or frozen blueberries
  • ¼ cup pumpkin or sunflower seeds
  • 2 Tbsp whole flax seed
  • 1-2 scoop vanilla chai Vega protein powder

Directions:

  • Place grains in a large pot with water and bring to a boil.
  • Add a pinch of salt (and dried fruit, if using), and turn the heat down to simmer covered for 20-30 mins.
  • While simmering, get your selected spices together and add them to the pot, stirring the mixture occasionally. Add more water or milk alternative if the cereal looks like it will run dry.
  • When the cereal has reached the desired consistency, add fruit, seeds, and Vega protein powder if using. Mix everything together well, and then turn off heat.
  • Serve immediately, and enjoy this nourishing and delicious start to your day!

Filed Under: Breakfast, Recipes Tagged With: breakfast cereal, warm breakfast cereal

Blueberry Green Smoothie

June 5, 2013 by Dr. Lyndsay Wareham, ND Leave a Comment

One of the best ways for us to get some nutritious veggies into Juliet

One of the best ways for us to get some nutritious veggies into Juliet

This is one of the tastiest ways to get in a few servings of greens each day! You can enjoy it as a breakfast smoothie or at any time of the day. The avocado and almond butter give this smoothie a nice creamy texture, in addition to adding healthy fats and protein to help stabilize blood sugars and reduce sugar cravings. And the berries add the perfect amount of sweetness and makes the smoothie a beautiful purple colour.

Our favourite protein powders to use are Vega’s Vanilla Chai (which we also use in our warm breakfast cereal recipe), Vega’s Nutritional Shake French Vanilla, and Thorne’s Vanilla Vegalite (available from your local naturopathic doctor). If you’re not using a protein powder, adding a bit of sweetener such as dates, stevia, or agave syrup helps to bring all of the flavours together.

Your smoothie will be turn out to be any shade of purple, blue, or green depending on the amount of certain ingredients you add.

Delicious Morning Smoothie
 
Print
Prep time
10 mins
Total time
10 mins
 
You can make this smoothie 'your own' by adding your favourite ingredients - a different green smoothie for every day of the week!
Author: Lyndsay & Nicholas
Recipe type: Smoothie
Serves: 2
Ingredients
  • • 1 cup fresh or frozen blueberries (wild or organic are best)
  • • ½ avocado
  • • 1-2 Tbsp almond butter
  • • large handful organic greens – baby kale, baby chard, arugula, green & red leaf
  • • lettuce, spinach, broccoli stem, broccoli leaves
  • • ½ cup vanilla ‘mylk’ (almond, coconut, or rice milk)
  • • ½ - 1 cup cold water
  • • 1 scoop your favorite protein powder (vanilla, original or berry flavours go well)

  • other/optional ingredients:
  • • ½ banana, fresh or frozen
  • • ½ organic apple, peeled (apples are important to buy organic as they are on the Dirty Dozen List)
  • • 1-2 Tbsp natural sweetener (maple syrup, agave syrup, honey, stevia)
  • • 1-2 medjool dates (soaked for 10 mins if you don't have a high powdered blender)
  • • 1 tsp pure vanilla extract or powdered vanilla bean
  • • 1 tsp cinnamon powder
  • • 1 tsp turmeric powder
  • • 1 Tbsp spirulina powder
  • • 1 scoop greens powder
Instructions
  1. Place all ingredients in a high-powered blender, and blend on high for 20-30 seconds.
  2. Enjoy!
3.2.2265

DSC_4982

Yumm to the last drop!


Filed Under: Recipes, Smoothies & Drinks Tagged With: berry smoothie recipe, creamy smoothie recipe, easy smoothie recipe, simple and delicious smoothie

Classic Hummus with Cumin

June 5, 2013 by Dr. Lyndsay Wareham, ND Leave a Comment

This is a classic version of hummus with our secret ingredient added – ground cumin (try grinding your own ground cumin from cumin seeds – delicious!). The cumin really adds flavour and depth to the hummus. For a thicker version of the recipe, use less water and for a thinner version, add a bit more water – just be sure to add it in small amounts so your hummus doesn’t turn out to be too runny, because it will thicken up when stored in the fridge.

Prep time: 10 mins

Cook time: 10mins

Servings: 2 cups

CLASSIC HUMMUS WITH CUMIN

The ingredients that makes this recipe stand out above the rest - ground cumin

The ingredient that makes this recipe stand out above the rest… ground cumin!

The measurements are not to be taken too seriously – feel free to add ‘a little bit of this and a little bit of that’ to suit your taste buds!

Ingredients

  • 2 cups cooked & rinsed chickpeas or 15oz cans chickpeas, rinsed & drained
  • 1/4 cup olive oil (plus 1-2 Tbsp more, as needed for consistency)
  • 3 Tbsp tahini
  • 2-3 Tbsp fresh squeezed lemon juice
  • 3-4 cloves garlic
  • 2-3 tsp ground cumin
  • 1 tsp salt 
  • 3-4 Tbsp water, as needed 
  • a generous pinch of pepper
  • dash cayenne pepper (optional)

Directions:

Place all ingredients into a high-powered blender or food processor, and mix until creamy & smooth. You may need to stop to scrape down the sides a few times. Add more water and oil, in small amounts until you reach the desired consistency. Season a little more, as desired, and Enjoy!

Nutrition Tip: Some people have a hard time digesting garbanzo beans (aka chickpeas). There are two ways to make beans more easily digested by the body (you can do one or both of these):

1. Sprout the beans – This method takes some planning because you will need up to 4 days to sprout the beans, but it is worth it! Place dried beans in a bowl and fill with fresh cool water until beans are covered with about an inch of water (since the beans will expand and you want them to still be fully submerged). Leave them overnight or between 8-12 hours. Drain and rinse chickpeas with fresh water every 8 hours for 3-4 days. (You’ll see the little sprouts growing from the bottom of the beans around the 2nd day). Then, put the beans with fresh water into a large pot, bring to a boil and cook the beans for 35-40mins.

2. Cook with Kombu – When boiling & cooking the beans, add a piece of kombu. Kombu is dried seaweed that you can find at your local Asian market. The minerals and compounds in the seaweed help break down the difficult-to-digest proteins, so the beans are easier for the body to breakdown (ie. the beans are less likely to cause gas).

Filed Under: Dressings, Dips, & Sauces, Recipes Tagged With: best hummus recipe, easy hummus recipe, healthy hummus, hummus, simple hummus

50 Ways to Use Lavender

March 17, 2013 by Dr. Lyndsay Wareham, ND 35 Comments

Lavender... a beautiful garden plant & well-rounded, intuitive and resourceful herb.

Lavender… such a beautiful garden plant, as well as a well-rounded, intuitive and resourceful herb.

50 Ways To Use Lavender

  1. Make a calming tea made with dried lavender flower heads, chamomile, oat straw & other calming herbs
  2. Make lavender talc: mix together 8 parts each bentonite clay & arrowroot powder, 1 part each slippery elm & comfrey root powder. Shake well. Add 30-50 drops lavender essential oil, shake again and enjoy.
  3. Make a lavender sachet by adding organic lavender buds to a muslin bag – gift it as a wedding favor
  4. Make homemade lavender scented candles, by adding fresh or dried lavender buds and a few drops of lavender essential oil into the heated wax
  5. Make a room spray with 2 cups water, 2 drops each lavender, tea tree & peppermint essential oils in a spritzer bottle. Use liberally.
  6. Put a few drops of lavender essential oil in a warm foot bath to help ease your child into a peaceful sleep (this also helps them pee before bed so there are no/less wake ups at night)
  7. With the abundance of lavender in your garden, make a beautiful lavender wreath
  8. For a lovely salad dressing, whisk together 6 Tbsp olive oil, 2 Tbsp balsamic or apple cider vinegar, 1 Tbsp lemon juice, 1 crushed garlic clove, 2 Tbsp honey, 1 tsp each mustard powder & organic dried lavender flowers
  9. Crush fresh flowers and spread it on your legs & arms to help repel flies & mosquitoes while sitting outside in the summer
  10. Use pressed lavender blooms to decorate homemade cards & gift wrapping
  11. Massage lavender essential oil into aching joints and muscles for added pain relief
  12. Tie a handful of fresh lavender flowers together with decorative string or ribbon, and hang it on a door for a cozy & fragrant décor
  13. You can bake with organically grown lavender by adding it into scone, cake or cookie recipes – do a search online to find a recipe that appeals to you
  14. Gift lavender seed bombs as wedding favors
  15. Dab lavender infused oil onto itchy & dry skin – is especially good for children (see #42 for Lavender oil recipe)
  16. Use organic lavender blooms as a garnish to add beautiful a purple hue to your cooking
  17. Make lavender scented soap bars and give it for a wonderful homemade Christmas gift
  18. A few drops of lavender essential oil on the skin can help soothe bug bites
  19. For lavender infused vinegar, add a handful of organic lavender buds (dried or fresh) to 2 cups white wine or apple cider vinegar. Let sit for up to 6 weeks, shaking every few days. Strain before use.
  20. Plant lavender in your garden
  21. Place a lavender pillow in your linen closet & dresser drawers, to add a sweet scent to clothes and linens
  22. Tie together a large bunch of dried lavender blooms with a few forget-me-nots, lily of the valley & small daisies for a lovely and elegant lavender bouquet
  23. Rub lavender essential oil on the temples to ease headaches
  24. Have a relaxing bath with your homemade lavender bath salt: Mix together 1 cup Epsom salt, ½ cup sea salt, 1/4 cup baking soda & 10-20 drops lavender essential oil. Mix well & store in a sealed jar. Use 1/3 cup per bath.
  25. Sprinkle lavender essential oil on your pillow at night for a peaceful night’s sleep (this is safe for the whole family, babies & toddlers included)
  26. Add lavender essential oil to your after-sun cream to help soothe sun-burned skin
  27. Enjoy aromatherapy in your home by adding 5-6 drops lavender essential oil to a bit of water in an oil diffuser
  28. Make this luscious Lavender Coconut Sugar Scrub for yourself, as a Christmas or bridesmaid gift: Mix together 1 cup white sugar, ½ cup melted coconut oil, 10-15 drops lavender essential oil, 2 Tbsp organic dried lavender buds. Store in a pretty glass jar.
  29. Add a few drops of food grade lavender oil to your homemade lemonade recipe
  30. Soothe minor burns with a few drops of lavender essential oil diluted with water and rubbed onto the skin
  31. Use organic lavender flower blooms to decorate a cake
  32. Add crushed dried lavender flowers to your homemade liquid soap recipe
  33. Add organic lavender blooms to your homemade blackberry jam for a nice & fragrant variation
  34. Make a Dream Pillow by stuffing dried flower heads into a sachet and place under the pillowcase at bedtime
  35. Add a few drops of lavender essential oil to a carrier oil (light olive, sweet almond, jojoba) and massage over the lower abdomen to help relieve menstrual cramps
  36. Homemade lavender potpourri makes for a great gift for yourself or a loved one
  37. Stir crumbled organic fresh lavender blooms and a pinch of cinnamon into vanilla ice cream for a pleasant treat
  38. Use your scrap sewing material to make a lavender eye pillow
  39. Place fresh flowers in closets and any other storage space to deter moths & silverfish
  40. Take a picture of your lavender bouquet on an old wooden table or other romantic backdrop, print it out, frame it & hang it in your house
  41. Make your own lavender water by adding 5 drops lavender essential oil for every 5oz distilled water. Store in a spritzer bottle and enjoy as a refreshing facial tonic and as a room spray
  42. Lavender oil: With a wooden mallet, bruise freshly cut organic lavender flowers, stems & leaves and stuff them into a 500mL mason jar, cover with oil (light olive, almond or jojoba) & let sit for 48 hours. Strain (repeat the above steps again for a stronger fragrance) & store oil in a dark glass jar.
  43. Prepare a recipe a homemade lavender jelly & give it for a hostess gift
  44. Dab a few drops of diluted lavender essential oil onto acne spots to reduce inflammation and inhibit overgrowth acne-causing bacteria to the skin
  45. Add 2-3 drops of lavender essential oil to your natural deodorant for a natural floral lavender scent
  46. Add 10-15 drops lavender essential oil to 40oz of carrier oil (sweet almond, or jojoba) for your own relaxing & calming massage oil
  47. To ease yourself into a tranquil night’s sleep, add 4-5 drops lavender essential oil to a hot bath at bedtime
  48. Make a Soothing Lavender Salve: slowly heat ½ cup olive oil over low heat. Add ¼ cup organic lavender buds, turn off heat and let cool 20 mins. Strain into a glass measuring cup. Boil an inch of water in a pot, simmer & place cup in water. To the cup, add 2 Tbsp grated beeswax, 10 drops lavender essential oil, contents of 1 pierced vitamin E capsule. Let simmer, stirring until all is melted. Pour into a dark glass jar, cool, seal & store. Lastly…enjoy!
  49. Make your own carpet cleaner by mixing together 5-6 drops of lavender essential oil to 1cup baking soda. Sprinkle this on the carpet an hour before vacuuming. Vacuum as normal and enjoy the fresh scent of lavender that lingers
  50. Add this Lavender Vanilla Syrup to champagne, vanilla ice cream, or over mixed summer berries: Simmer 1 cup water & ½ cup raw sugar over medium heat, stirring until sugar dissolves. Add 2 tsp pure vanilla extract & 2 Tbsp organic dried lavender blooms, and simmer 20 mins. Remove from heat, let cool, place in fridge overnight. Strain blooms and store syrup in fridge for up to 3 months.

Filed Under: Articles, Naturopathic Articles Tagged With: creative ways to use lavender, gift ideas using lavender, how to use lavender, reasons to use lavender, ways to use lavender, what to do with lavender

Quick & Easy Healthy Homemade Meals: Flax Fish

March 8, 2013 by Dr. Lyndsay Wareham, ND 2 Comments

FLAX FISH

Flax fish served over Moroccan Quinoa - a quick,  easy, and delicious healthy homemade meal

Flax fish served over Moroccan Quinoa – a quick, easy, and delicious healthy homemade meal

Battered fish is tasty, but is often high in fat & carbohydrates, and contains gluten. This recipe is a great substitute, for those looking for a healthier version of battered fish. The light sesame oil has a high smoke point, so is safe for frying, and by using ground flax seeds as your batter, you will benefit from the high fibre content of flax seeds. Also, as a last cooking tip, it’s important to dry off the fish a little or the ground flax seeds will cake/clump onto the fish rather than coat it evenly. But even if your flax ends up being clumped on, it still ends up tasting good!

We like to serve this fish over Moroccan Quinoa, for a complete and satisfying meal.

Prep Time: 10 mins

Cook Time: 10 mins

Serves: 4-6

Ingredients:

  • 2-3 fillets frozen white fish, thawed & drained (basa, haddock)
  • 1/4 cup ground flax seeds (or more)
  • 2 tsp cumin
  • 1 tsp paprika
  • 1/4 tsp cayenne
  • 1 tsp salt
  • 4-6 Tbsp light sesame oil, olive oil or coconut oil (our favourite!)

Preparation

  • Fully thaw fish and remove excess moisture by patting fish dry with dish towel or paper towel. Cut fish into 3″x3″ chunks.
  • In a large bowl, combine ground flax, seasonings. Mix together well.
  • Add 6-8 chunks of fish to the bowl with flax & seasonings. Mix together to coat fish well.
  • Pre-heat a non-stick skillet or frying pan on medium heat with 2 Tbsp sesame oil.
  • Add coated fish to frying pan and fry on one side for about 3-5 mins. Turn fish to cook the other side for another 3 mins, or until flax seeds are dark brown. Remove from frying pan and place on a large plate*.
  • Add another 6-8 chunks fish to flax mixture and coat fish well. If you need more ground flax, add it at this point and any more seasonings, as you like.
  • Add another 1-2 Tbsp sesame oil to the pan, as needed. Repeat the above steps for frying the chunks of fish until you have no more fish left to fry.

* If you would like to remove excess oil, put a sheet or two of paper towel on a large plate. When removing fried fish from the frying pan, place fish on paper towel to soak up any excess oil.

Filed Under: Lunch & Supper, Recipes Tagged With: flax fish, gluten-free battered fish, gluten-free fish recipe

  • « Previous Page
  • 1
  • 2
  • 3
  • 4
  • 5
  • 6
  • 7
  • Next Page »

Meet Dr. Nicholas ND & Dr. Lyndsay ND

We are two naturopathic doctors with a vision to inspire healthy cooking, healthy eating, and healthy living for you and your family.  Read more about us >>

  • Email
  • Facebook

Subscribe

Heart Healthy Omega Burgers

Dairy-free Cashew Cream for Breakfast Parfaits & more!

Four essential ways to use Turmeric

Easy, Every Day Spa Treatments to Enjoy at Home

Crispy Cheesy Kale Chips

Ken-Tucky Fried Chicken

Dairy-free Seafood Chowder

3 Ingredient Mango Creamsicle (dairy-free, gluten-free)

Copyright © 2025 · Foodie Theme by Shay Bocks · Built on the Genesis Framework · Powered by WordPress