Naturopathic By Nature

Healthy Eating & Healthy Living

Navigation
  • Recipes
  • Articles
    • Naturopathic
    • Pregnancy & Postnatal
    • Healthy Foods
    • Grocery Lists
  • About Us
  • Contact Us

What is Naturopathic Medicine?

February 8, 2014 by Dr. Nicholas Anhorn, ND 2 Comments

Naturopathic medicine is a distinct primary health care system that blends modern scientific knowledge with traditional and natural forms of medicine. The naturopathic philosophy is to stimulate the healing power of the body and treat the underlying cause of disease. Symptoms of disease are seen as warning signals of improper functioning of the body, and unfavourable lifestyle habits. Naturopathic Medicine emphasizes disease as a process rather than as an entity.

Treating both acute and chronic conditions, naturopathic treatments are chosen based on the individual patient – their physiological, structural, psychological, social, spiritual, environment and lifestyle factors. In addition to diet and lifestyle changes, natural therapies including botanical medicine, clinical nutrition, hydrotherapy, homeopathy, naturopathic manipulation and traditional Chinese medicine/acupuncture, may also be used during treatments.

In Canada, the naturopathic medical profession’s infrastructure includes accredited educational institutions, professional licensing, national standards of practice, participation in many federal health committee initiatives, and a commitment to state-of-the-art scientific research.

Please click on the images below to discover more about naturopathic medicine treatments & principles.

[Show as slideshow]
Physical Medicine
Clinical Nutrition
Targeted Nutrients
Acupuncture & Traditional Chinese Medicine
Botanical Medicine
Homeopathy
Mental Wellness and Counselling
Complementary Medicine
Healing Power of Nature
Treat the Root Cause
Treat the Whole Person
Individualized Medicine
Doctor as Teacher
Disease Prevention and Health Promotion
Primary Care Doctor

Filed Under: Articles, Naturopathic Articles Tagged With: natural health, naturopathic, naturopathic medicine, what is naturopathic medicine

Healthy Foods to Nurture the New Mom

February 8, 2014 by Dr. Lyndsay Wareham, ND Leave a Comment

baby&mom3Ensuring that a woman is well-nourished after she’s had the baby is just as important as it was during pregnancy, and sometimes even more so! The few days after a woman gives birth is when milk supply is being established and is often so busy for the New Mom as she’s getting to know the baby and his/her rhythms. Having help during this time is essential, especially when it comes to having household chores done for her like cleaning and cooking. If you’re a friend, relative or partner wondering how you can best support the New Mom, cooking her a meal, serving her a snack, making her tea, or filling up her water glass are often very appreciated. You can browse our recipe section for some ideas for nutritious meals, such are our Rice & Beans, Red Lentil Dahl, Warm breakfast cereal,  Warming rooibos chai tea, Maple-kissed sesame seed cookies, and the delicious Blueberry Green Smoothie… and stay tuned for Oatmeal Lactation Cookie Bar recipe 🙂

As a guideline, here is a list of foods that are nourishing for the New Mom:

*choosing organic nuts, seeds, grains (especially rice), veggies & fruits (especially the ‘Dirty Dozen‘) as much as possible would be ideal!

  • oats, especially steel cut oats 
  • whole grain brown rice, quinoa, millet, and amaranth
  • organic, free-range chicken
  • free range or organic eggs
  • wild sockeye or pacific salmon
  • lentils, beans (think hearty soups, casseroles, veggie chili, one-pot-wonders, hummus)
  • sesame seeds (high in calcium!) and tahini (sesame seed paste)
  • raw nuts and seeds (like walnuts, almonds, hemp seeds, and flax seeds)
  • nut and seed butters
  • healthy oils (olive oil, avocado oil)
  • root veggies such as yams, squash, sweet potato, and carrots
  • fresh fruit such as apple or pear (add a nut butter or handful of nuts for added nutrition)
  • organic berries, especially blueberries
  • lots of dark green leafy veggies
  • lots of fresh purified water
  • warming herbs and spices like cinnamon, ginger, cloves, and cardamom
  • nutrient teas (my favourite was a mixture of nettle, raspberry leaf, and fennel seeds to enrich milk supply and contract the uterus)
  • herbal teas like rooibos, ginger, chamomile, and echinacea

And because of baby’s sensitive tummy during this tender time, foods to limit or avoid during the postpartum period are:

  • caffeine
  • alcohol
  • dairy products
  • wheat and gluten
  • citrus fruits, especially fruit juice
  • lots of cruciferous veggies (brussel sprouts, cabbage, broccoli)
  • raw garlic and onions
  • spicy foods
  • nightshade vegetables – eggplant, tomatoes, potatoes & peppers 
  • chocolate …too much chocolate, that is 🙂 
  • iron supplements (check your multi-vitamins for iron as well)
  • herbal teas like peppermint, sage, and parsley (which may decrease milk supply)
  • any foods that are known sensitivities for you

This is a very special time in a New Mom’s life, and helping her out in the ways that you know how is a little effort that goes a long way.

shutterstock_1619788

Sleep, eat, rest. Repeat…

Filed Under: Articles, Pregnancy & Postnatal Tagged With: best food for breastfeeding moms, best food for new moms, best foods for new mom, best foods for postpartum, food for new moms, healthy meals for new mom, meals for new moms

Maple-kissed sesame seed cookies (gluten-free, dairy-free, vegan)

February 7, 2014 by Dr. Lyndsay Wareham, ND Leave a Comment


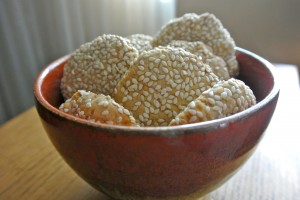
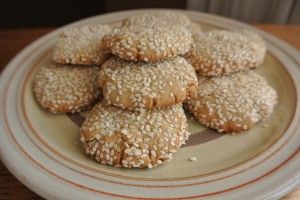
DSC_4872

Nutritious and delicious!

These cookies are slightly sweet, peanut-like flavour, and have a flaky texture similar to a sugar cookie. They are also high in calcium, which is important for most people – especially women, in particular pregnant and nursing women. And this low-sugar, nutritious cookie can be a tasty treat for kids to enjoy too!

Maple-kissed sesame seed cookies (gluten-free, dairy-free, vegan)
 
Print
Prep time
20 mins
Cook time
14 mins
Total time
34 mins
 
Treat yourself by sitting down to relax, and enjoy these sweet, nutritious cookies alongside your favourite cup of tea...
Author: Lyndsay
Recipe type: gluten-free cookies
Serves: 16 cookies
Ingredients
dry ingredients:
  • ½ cup brown rice flour
  • ½ cup sorghum flour
  • ⅓ cup tapioca starch
  • ½ tsp baking soda
  • pinch of salt
wet ingredients:
  • ⅓ cup maple syrup
  • ¼ cup tahini
  • ¼ cup melted coconut oil
  • 1 tsp pure vanilla extract
other ingredients:
  • ⅓ cup raw sesame seeds
Instructions
  1. Preheat oven to 350 degrees.
  2. Line a baking sheet with parchment paper or a silicone baking mat and set aside.
  3. In a medium bowl, add dry ingredients and mix together well.
  4. Stir in tahini, coconut oil, and maple syrup until you get a smooth batter.
  5. Roll batter into 16 equal sized balls.
  6. Place sesame seeds in a small bowl and, one by one, dip the balls into the sesame seeds and flatten into cookies.
  7. Place cookies on the prepared cookie sheet. (there will be sesame seeds everywhere, and that’s ok)
  8. Bake in oven for 12-14 minutes, or until the edges turn a golden brown.
  9. Transfer to a wire rack, let cool completely, and enjoy!
3.2.2265


Filed Under: Recipes, Snacks & Baked Goods Tagged With: calcium rich cookies, dairy free cookies, dairy-free calcium-rich foods, dairy-free source of calcium, easy gluten-free cookie recipe, featured, gluten free cookies

Sweet & Spicy Warming Rooibos Chai Tea

February 5, 2014 by Dr. Lyndsay Wareham, ND 1 Comment

Chai tea is a warming, spicy tea that helps promote healthy digestion by reducing bloating, boosts immunity, and is a nice sweet treat to sip on through the day. Chai tea is traditionally made with black tea but we’re using rooibos tea, which is high in antioxidants and naturally caffeine-free. However… If I you are looking for a little caffeine boost, you can add 1 tsp black tea leaves (assam or black chai) to about 1 cup of near-boiling water, then add 1 cup of the heated steeped chai tea and a touch of mylk to make a really yummy morning cup of Chai tea.

I’ll usually let the tea simmer for several hours, adding water as needed, since the flavours from the spices are released the longer you steep them. I’ve even left it over night (turned off, of course) and in the morning there is a nice strong brew of rooibos chai tea ready to be made into a black-rooibos chai tea when I add black tea leaves, as mentioned above.

We have these really cool Libre tea mugs that have a strainer built right into the mug so that you can drink looseleaf teas anytime and anywhere. This comes in really handy when you’re scooping up this homemade the chai tea – spices and all.

WARMING ROOIBOS CHAI TEA

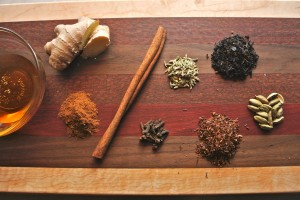
DSC_4884

Beautiful display of Rooibos chai tea ingredients.

Ingredients

  • 6 cups water
  • 2 inch chunk fresh ginger, thinly sliced
  • 3 Tbsp honey
  • 1 cinnamon stick, broken into pieces
  • 1 tsp whole cloves
  • 1 tsp whole fennel seeds
  • 15 cardamon pods, opened (about 1 generous tsp)
  • 1 – 1 ½ tsp ground cinnamon
  • 2-3 tsp rooibos loose tea (or 2 bags rooibos tea)
  • Milk or ‘mylk’ alternative, to taste

Directions

  • Place 4 cups of water, ginger, honey and all spices and in a medium sized pot.
  • Bring to a near-boil. Let simmer for 30 minutes, covered.
  • Add 2 cups water and rooibos tea, cover pot, and let simmer 10-20 minutes.
  • Scoop tea into your favorite mug or tea pot (you may need a strainer to catch any spices) and add mylk to taste.
  • The longer you let the spices steep, the more flavour will be released. Sometimes I’ll let the tea simmer for an hour or two (or more!), adding more water as needed.

Filed Under: Recipes, Smoothies & Drinks Tagged With: caffeine-free chai tea, feature, homemade chai tea, rooibos chai tea

Pregnancy pearls – Heart-felt tips to enrich your pregnancy experience

January 29, 2014 by Dr. Lyndsay Wareham, ND 1 Comment

bellyIf you’ve had a baby, are carrying a baby, or even considered having children, then you can understand how truly special the pregnancy phase of a woman’s life is. It is a special time of expansion, maturity, and perfection. It is during this time that a woman has the potential to enrich her relationship to herself and her body. We have a chance to really learn about and respect our bodies – we were made for this, baby!

I wanted to share a few of the things that I found really helpful during our pregnancy with our daughter, Juliet. These are things that you don’t typically hear about in your doctor’s office or even in pregnancy magazines. These suggestions come from the heart, and are intended to inspire you to really enjoy this miraculous experience. But, as always, take what you need and leave the rest. 

Pregnancy Journal – You can have a pregnancy journal for your eyes only, where you vent and journal any “stuff” that you go through during pregnancy, so you can look back and reflect on how far you’ve come and how pregnancy changed you in so many amazing ways.

Or, you can use your pregnancy journal to record the pregnancy and labour as a keepsake for you and your baby. Some things that you may want to record are:

  • last menstrual period
  • when and how you told people about your pregnancy and their reactions
  • when any symptoms started and how you dealt with them
  • crazy food cravings, moods, or dreams
  • momentous times (ie. when you first felt the baby kick)
  • information or thoughts after any appointments you have (ie. how you felt after you first heard the heart beat, measurements)
  • any noticeable patterns in movement or kicking
  • anything you want to say to the baby
  • any thoughts or experiences that Daddy wants to write about

You don’t need anything fancy to write in – just a good old fashion pen and paper, or an unused notebook. But if you feel that you want a pretty journal to write it, there certainly are fancy journals out there.

prenatal yogaPrenatal yoga – This is a great way to strengthen and stretch the muscles you’ll use during the pregnancy and labour. This type of yoga is especially useful when your belly grows bigger and you need some guidance on how to navigate your growing bump. It also is a time for you to relax, connect with your baby, and also connect with other pregnant women… And who knows, maybe you’ll make friends with women who will become your support network (ie. “mommy group”) in the months after you’ve had the baby.

Tea, tea and more tea – Make tea your best friend. You’ll be doubling your blood volume throughout pregnancy, so you’ll need a lot of water. Although many herbs are to be avoided during pregnancy, there are a lot of safe, gentle, and effective herbs for pretty much anything that can come up in pregnancy – Nervous? Drink chamomile. Nauseous? Try ginger. Low energy? Choose nettle. Feeling sick? Drink Echinacea. Looking for a nice warming tea? Go for rooibos. Tea is also a good way to keep your bowels moving, which may be a problem as your belly grows larger.

Making a ritual of sitting down with a cup of tea to write in your pregnancy journal is a great way to relax and connect to your baby. Raspberry leaf tea is a favorite among many expecting mothers to enjoy during the 2nd & 3rd trimester.

shutterstock_11694115Talk to your baby – Read books, sing, rub, pat, or drum your belly… do whatever you can to establish a connection to your baby, for both yours and baby’s benefit. Your baby will recognize your voice and you may even find that baby will respond with some kicks and punches when you sing or read to him/her. Reading books, talking and connecting to baby is a great way for Dad to get involved too.

Snoogle – This is a pregnancy pillow that is good support for your neck, back, knees, and belly when you are resting or sleeping in bed. It doubles as a nursing pillow when your baby arrives, and can be folded up to either support your back or prop your baby when nursing so you’re not always using your arms. It’s more of a ‘nice to have’ than a ‘need to have’, but is certainly useful in more ways than one.

Belly butter – This is usually a blend of special butters, oils, beeswax, and herbs. Nourishing ingredients to look for are cocoa butter, shea butter, olive oil, vitamin E, chamomile, and calendula. It is important to look for organic sources of these ingredients since your skin is your largest organ, so what you put on your skin will be absorbed by you and your growing baby. Lather your favorite belly butter on your belly, breasts, inner thighs, hips, gluts, or any other areas that need some extra nutrients and elasticity to accommodate your new beautiful pregnant shape. Because belly butter isn’t a lotion or a cream, it can be a bit greasy so it’s wise to apply before bed and wear a shirt or use sheets that you don’t mind getting a little oil on. If you are one of many women who love sleeping naked, you can lay a super soft towel or sheet underneath you to protect your bed sheets.shutterstock_51753472

Strongly consider breastfeeding – Breastfeeding is a great way for you to bond with your baby, nourish your baby, and keep yourself healthy. Find out if there’s a La Leche League group in your area. In my experience, this group of women, who gather once a month, are so grounded, wise, and supportive – a great group of people for a new mom to be around. However definitely don’t judge yourself if you choose not to breastfeed. There are many other ways to connect with your baby, and to keep baby healthy. The most important thing is to do whatever works for you and your family.

Perineal massage – This is typically started around 34-36 weeks pregnancy and is done to increase the elasticity of your perineum and prevent a tear during labour. However, you should not do this if you have an active infection or herpes sore on the vagina! And it is understood that this technique is not for everyone – there are other ways to support the perineum during labour such as having your caregiver place a warm compress to the perineum between pushes in the pushing stage of labour.

But if you’re interested in this technique, then read on…

It’s easiest to have a partner do this with you (and is a great way for them to really appreciate the beauty of your lady bits!), but it is possible to do it on your own – just get a large mirror handy so you can see where you are and what you’re doing. Start off by having well-trimmed nails (ideally not freshly trimmed because they can be pretty sharp), and give your hands a good wash. Sit comfortably in a semi-reclined position and have your knees out wide, with your feet planted on the bed or chair. Add lots of oil-based lubricant to your index and middle finger. (Use personal lubricant, vitamin E oil, coconut oil, or pure olive oil. Not baby oil, mineral oil, Vaseline or petroleum jelly.) Take some relaxing breaths and have you or your partner insert the index finger into the vagina up to the second knuckle. Firmly but gently press down toward the rectum and out to the side until you feel a slight burning or stinging. Hold this stretch for about 2 minutes, or until the tingling subsides. Continue taking nice relaxing breaths. Repeat on the opposite side. Do this slowly to allow time to relax. Now, slowly massage the area in a U-shaped fashion, moving your finger back and forth along the lower part of the vagina, gently pulling the tissue forward. Do this about 3 times, remembering to take nice relaxing breaths. During this time, it is helpful if the pregnant woman visualizes a healthy, progressive labour – envision the vagina gently stretching to allow the baby’s head to move through. You can also use this time to practice any relaxation and breathing techniques that you want to use during labour… Do this 4-6 times per week and you’ll notice that the more you do this, the farther you’ll be able to stretch to ‘feel the burn’ (some people call this “the ring of fire”).

shutterstock_13390819

Pregnancy is a time of highs and lows, but in the end reveals a beautiful transformation…

As always, we’d love to hear your input… what did you do to make your pregnancy extra special?

Filed Under: Articles, Pregnancy & Postnatal Tagged With: healthy pregnancy, ideas for pregnancy, pregnancy, pregnancy keepsake, pregnancy pearls

Brown Rice Wraps (gluten-free, dairy-free)

January 19, 2014 by Dr. Lyndsay Wareham, ND 2 Comments

BROWN RICE WRAPS (gluten-free, dairy-free)

Brown rice wrap with baby arugula, hummus, roasted leeks & mushrooms, & Daiya cheese

Filled with baby arugula, hummus, roasted leeks & mushrooms, & Daiya cheese


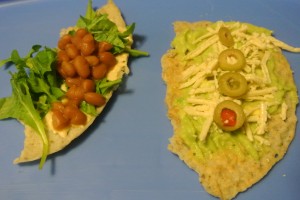
Juliet sized wraps - one half with hummus, baby arugula & homemade brown beans, the other half with guacamole, Diaya cheese & olives

Juliet sized wraps – 1/2 with hummus, arugula &  brown beans & 1/2 with guacamole, Daiya  & olives

If you’ve seen our gluten and dairy-free Delicious Crepe recipe, then you’ll already be familiar with the ingredients and how to make this simple and yummy recipe – it is basically the same as the crepe recipe, but without any sweeteners. You can always get creative by adding herbs and spices to the batter, but they are also very good plain – so good that kids enjoy them too! Top them with your favourite dip, spread, veggies, and anything else that you can imagine.

Some ideas that we have for toppings are:

  • spread: hummus, Dijon mustard, guacamole, salsa, Siracha hot sauce
  • roasted veggies: onion, mushroom, leek, peppers, broccoli florets
  • mixed greens: baby kale, arugula, spinach, lettuce, mixed greens
  • fresh veggies: diced tomatoes, shredded carrot, sliced cucumber, olives, hot banana peppers
  • scoop of beans, cooked quinoa or rice (you could try our balsamic quinoa salad), or if you’re feeling fishy, try out our dairy-free tuna salad
  • Daiya cheese (to keep it dairy-free)

And now for the recipe…

Brown Rice Wraps (gluten-free, dairy-free)
 
Print
Prep time
20 mins
Cook time
15 mins
Total time
35 mins
 
These brown rice wraps are best served fresh, but can be covered with a clean dish towel and used several hours later.
Author: Lyndsay
Recipe type: gluten-free
Serves: 7-8
Ingredients
  • 1 cup brown rice flour
  • 2 tsp baking powder
  • ¼ tsp sea salt
  • 2 eggs
  • 1½ cup to 2 cup original or unsweetened almond milk or other 'mylk' alternative
  • ghee, butter, or coconut oil for frying
Instructions
  1. In a small bowl mix together dry ingredients and set aside.
  2. In a large bowl whisk together the egg. Add dry ingredients and stir until all flour is integrated.
  3. Gradually whisk in all of the mylk into the batter until there are no clumps.
  4. Set batter aside for 10-15 mins (during this time, I like to prep the fillings that I'll be using).
  5. Heat a 10'' frying pan or skillet on medium heat. Add a small pad of oil to evenly coat the pan.
  6. Add ⅓ cup batter into the pan and swirl the pan around to distribute the batter evenly over the pan.
  7. Cook for 1-2 minutes until the edges of the batter turns a golden brown colour. Use a wide, flat spatula to gently flip the wrap and allow to cook for another minute.
  8. When done cooking, place wrap on a large plate and cover with a clean dishtowel until you're ready to serve.
  9. Repeat adding oil to the pan before adding the batter until all of the batter is gone and you have 7-8 delicious wraps ready to be served. Enjoy!
3.2.2265

DSC_4680

…Nom… Nom… Nom…

Troubleshooting

  • Lots of tiny bubbles in the batter when you add it to the pan? add more batter
  • Wraps turning crispy? turn the heat down
  • Did your wrap turn out more thick, like a pancake? add more mylk to the batter
  • Wrap sticking to the pan? add more oil and/or let cook for a few seconds longer


Filed Under: Lunch & Supper, Recipes Tagged With: brown rice flour wraps, easy homemade gluten-free wraps, gluten-free wraps

Cultured coconut yogurt (dairy-free, gluten-free, vegan)

January 17, 2014 by Dr. Lyndsay Wareham, ND 5 Comments

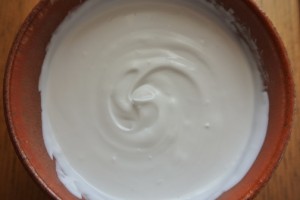
This recipe is takes no effort to prepare –  it just takes a little waiting time. There are no preservatives, gums, or binders in this recipe – its just pure coconut milk, probiotics, and fermenting time. We add a little bit of vanilla and maple syrup to make it sweet, but if you decide not to add any sweetener the end product is a pretty awesome dairy-free sour cream!

We added only about 1 Tbsp coconut water which gave us an extra thick yogurt (think: thick cream cheese haha) . But it was sooo tasty and melted into coconut goodness when added to warn oatmeal.

We added only about 1 Tbsp coconut water which gave us an extra thick yogurt (think: thick cream cheese haha) . But it was sooo tasty and melted into coconut goodness when added to warn oatmeal.

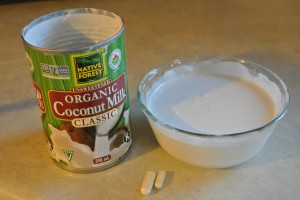
For this recipe, be sure to use the full fat coconut milk, since we will be working mostly with the fat layer. We like to use Native Forest Organic Coconut milk or Thai Kitchen coconut milk – both are brands that don’t add any sulfites. As well, in this recipe, we use 2 different probiotics, just to get a wide range of ‘good bugs’ – Pure encapsulations Probiotic 50B and NFH Probio SAP are two high quality professional brands that we like. They both came in capsules, so we just cracked them open and used the powder inside. Check with your local health food store or naturopathic doctor to see what professional lines of probiotics they carry  since any high quality probiotic will do. 

Cultured coconut yogurt (dairy-free, gluten-free, vegan)
 
Print
Prep time
48 hours
Total time
48 hours
 
This tangy coconut yogurt can double as a sour cream! You can enjoy it savoury (on pizza or mixed with pesto), or sweet (mixed with maple syrup and fresh fruit).
Recipe type: dairy-free
Serves: 4-6
Ingredients
  • 1 can of Full fat organic coconut milk
  • 1 tsp (2 capsules) high quality probiotic powder

  • optional ingredients:
  • powdered vanilla bean or pure vanilla extract
  • maple syrup, agave, honey or other sweetner
Instructions
  1. Leave a can of coconut milk in the fridge for 8 hours or overnight. The coconut milk will separate into a thick layer (fat) on top and a thin watery (water) on the bottom. We want the thick layer, so avoid shaking the can before and after cooling. However...you can omit this step if its cool enough in your cupboard that the fat layer will stay separated from the water. (sometimes if you give the can a gentle shake and you feel no movement, you can pretty much be sure that the two layers are separate).
  2. Open can, scoop out the thick layer of coconut milk, and place it in a medium sized bowl. Its convenient to use a bowl that has a lid so you can just transfer the yogurt straight to the fridge when you're done.
  3. Add 2-4 Tbsp of the coconut water to the coconut fat and mix together well. The less water you add, the thicker the yogurt will be. You can use the rest of the coconut water for a smoothie.
  4. Add probiotic powder to the coconut milk fat and stir it well until it is smooth.
  5. Cover bowl with a clean dishtowel and place it on the counter, in the stove or toaster oven (turned off) for 24-48 hours to ferment.
  6. At the end of your fermenting time, remove the dishtowel and stir in a small amount (about 1 tsp at a time) of any sweeteners or flavours that you want in your yogurt until you reach the desired taste. Or leave it as is and use it as sour cream.
  7. Store in fridge and enjoy with cereal, oatmeal, mixed berries and fruit, in smoothies, or on its own.
3.2.2265


Filed Under: Breakfast, Recipes Tagged With: coconut yogurt, dairy-free yogurt, homemade coconut yogurt, homemade dairy free yogurt, non-dairy yogurt

Grocery Shopping List

January 2, 2014 by Dr. Nicholas Anhorn, ND and Dr. Lyndsay Wareham, ND 1 Comment

When making significant dietary changes, such as eliminating gluten and dairy intake, often people fear that there are no foods that they can eat – but this is far from the truth! So, to help you find gluten-free and dairy-free food options here in Moncton, NB, we have made a grocery shopping list for selected stores and markets around the city.  And to give you a visual, we’ve added links to some of the products so you can easily recognize the foods that you’re looking for when you’re out grocery shopping.

So, try not to feel overwhelmed or discouraged when decreasing or completely phasing out two of the most common allergens – dairy and gluten. Because, as you can see, there’s lots of food options out there for you to choose from, and cooking in this way is actually very easy! With every change, it’s always good to start out small by incorporating a few new dishes and options at a time so you can discover what food items you and your family enjoy best. When people get started on this path, many find that they can easily make the change to gluten and dairy free foods, and their family either won’t notice or will enjoy the  flavours and textures that these new foods bring to the table.

Costco (*Please note that Costco’s inventory changes frequently so some items may be there seasonally or temporarily)

  • TruRoots Ancient Grains Penne Pasta (gluten-free)
  • Carrington Farms organic coconut oil
  • Manitoba Harvest hemp hearts
  • Almond Preference Unsweetened Vanilla Almond milk 
  • Ocean’s canned wild Alaskan sockeye salmon (4 cans)
  • Kirkland frozen wild caught Alaskan sockeye salmon fillet pack
  • Moov Frozen  pesticide free wild blueberries
  • Crunchmaster multi-grain gluten-free crackers
  • MaraNatha natural roasted almond butter
  • Kirklands Organic Salsa
  • Que Pasa & Kirkland organic tortilla chips
  • Kirkland Organic canned diced tomatoes, tomato sauce, & tomato paste
  • Skyvalley Organic Sriracha hot sauce
  • Kirkland organic chicken & vegetable broth
  • Home Goodness Organic beef broth
  • Simply Natural Organic Tomato & Basil pasta sauce
  • Bob’s Redmill gluten-free Steel Cut Oats
  • Fontaine Sante Traditional Hummus 
  • Grimm’s lean Turkey pepperoni
  • Nature’s Wild Grains – black chia seeds
  • Organic by Mariana organic, unsulphured Malatya Apricots
  • Kirkland’s roasted organic sunflower seeds 
  • Kirkland’s roasted organic pumpkin seeds
  • Kirkland’s walnut halves
  • Kirkland’s natural whole raw almonds
  • Bag of avocados

Dieppe Food Market

  • We buy most of our groceries here from the market, as they have a large variety of seasonal vegetables & fruits, berries, meats, bread, seafood, and maple syrup.
  • Broadfork Farm: amazing locally grown organic veggies (seasonal only)
  • Local by Atta: hydroponic salad & micro greens (order 10 week box to ensure your favorites are available to you weekly)
  • Nature’s Route Farm (Kent): carrots, kale, cabbage, potatoes, kohlrabi, onions, beets.
  • Spring Brook Farm: chicken; lamb; eggs – feed is free of additives.
  • La Ferme Terre Partagée: organic strawberries (u-pick available), organic produce (seasonal), kombucha, hot sauce, select meats
  • Wild Blueberry Meadows Farm (Murray & Diane Tweedie) : year round blueberries, juice, and jam.
  • Oliver’s German bakery – all products are sugar free, wheat free, yeast free, GMO free, & organic! such as pizza dough, bagels, buns, a large variety of bread loaves (nine grain, dark rye, bavarian rye…), a wonderful spread of baked goods baked goods, as well as pizza sauce, quiche & other treats
  • David & Murray Bunnett Family Farm: organic grass fed beef, chicken and turkey, organic sausage, organic flour, free-range eggs, organic pumpkin seeds and local organic flax seeds (join his email list to place orders and he will set up a drop off location).
  • Jamieson Beef – beautiful cuts of steak, ground beef, and other beef products
  • Lewis Mountain Fresh Farm (Craig): organic sauerkraut, organic fresh ginger, turmeric & dried spices
  • Armadale Farm (owned by Ian & Hetty): hormone/antibiotic/preservative/additive-free butter, quark, yogourts, and cheddar/gouda/feta cheeses
  • Joe Caissie Seafood: local brined shrimp.
  • La Fleur du Pommier: empire apples, preserved raspberry jam.

Corn crib

  • Bulk spices & herbs 
  • Bulk 70% dark organic chocolate chips
  • A wide variety of bulk nuts & seeds (our favorites are brazil nuts & raw pumpkin seeds)
  • Bulk tahini (seasame seed paste used to make hummus) & nut butters
  • Silver Hills – gluten free breads, frozen (omega flax & chia chia)
  • Variety of bulk gluten-free flours (teff, sorghum, brown rice flour, buckwheat flour, quinoa flour, coconut flour, etc).
  • Blue monkey organic canned coconut milk
  • Eden Organics canned chickpeas 
  • Daiya – vegan cheese shreds

Superstore

  • Organic Meadows Salted & Unsalted Butter (*Seasonally, they carry limited edition pasture fed butter)
  • Shitake & Maitake mushrooms, fresh
  • Bob’s Redmill gluten-free flours (coupon in ‘healthy shopper’)
  • Rizopia – wild rice pasta
  • Eden Organic canned chickpeas
  • A. Vogel Herbamare salt
  • Lundberg organic rice cakes
  • So Delicious Coconut cultured yogurt 
  • Olympic organic yogurt 
  • L’Ancetre organic medium white cheddar cheese

Sobeys

  • Organic baby kale and organic mixed baby lettuces
  • Our compliments organic brown rice spaghetti noodles
  • Silver Hills gluten free Omega flax & Chia Chia bread
  • So Delicious Organic Coconut milk
  • Bob’s Redmill gluten-free flours and grains (coupon in ‘healthy shopper’ coupon booklet)
  • Go Bio organic vegetable bouillon cube
  • A. Vogel Herbamare salt

Bulk Barn

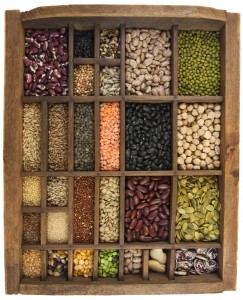
Dried beans and lentils are surprisingly easy to prepare and cook with! check out our recipe section for some ideas

Dried beans and lentils are surprisingly easy to prepare and cook with! check out our recipe section for some ideas

  • Variety of bulk gluten-free flours (teff, sorghum, brown rice flour, buckwheat flour, quinoa flour, coconut flour, etc)
  • A variety of organic beans & lentils
  • Nature’s Path Millet Rice or Mesa Sunrise 
  • San-J gluten-free organic tamari soy sauce 

Amazon.ca – Subscribe & Save

  • 365 Everyday Value Organic Brown Basmati Rice
  • 365 Everyday Value Organic Vanilla Extract
  • Taj Mahal Organic White Basmati Rice
  • New World Organic Tahini
  • Thai Kitchen Green and Red Curry Paste
  • YuPik Organic Tapioca Starch
  • Everland Organic Prunes
  • Bob’s Redmill or Everland Teff Flour
  • Thai Kitchen or Native Forest Organic Coconut Milk cans

Moncton Naturopathic Medical Clinic

  • St. Francis organic extra virgin olive oil
  • St.Francis Organic Ghee
  • Thorne Vegalite protein powder (chocolate or vanilla)
  • Thorne Mediclear Plus protein powder
  • Thorne Mediclear SGS protein powder (chocolate or vanilla)


Filed Under: Articles, Grocery Lists, Healthy Foods Tagged With: dairy free grocery list, dairy free grocery shopping list, dairy free options, dairy free shopping list, gluten and dairy free foods, gluten and dairy free grocery list, gluten free grocery list, gluten free grocery shopping list, gluten free options

What’s for supper?

January 2, 2014 by Dr. Nicholas Anhorn, ND and Dr. Lyndsay Wareham, ND Leave a Comment

When we’re hungry, we look for meals that are healthy, easy to make, relatively quick, and most importantly – delicious! The meal that most people prepare at home is supper, so this is what we decided to feature – what’s cooking for supper!

We’ve been compiling our favourite recipes have started posting them in a a series of posts labeled ‘Quick & Easy Healthy Homemade Meals’, which you can find in our Recipes section (be sure to find the ‘next page’ icon towards the bottom of the page to find earlier posts). Recipes that you’ll recognize are Quinoa Salad with Balsamic Vinegar Dressing, Apple Cider Vinegar Dressing, and Glory Bowl Dressing. Also, be on the lookout for recipes for Sunflower seed burgers, Chickpea chana masala, Ginger-tamari  stirfry sauce, Quinoa salad rolls, and Quinoa crab cakes, and more.

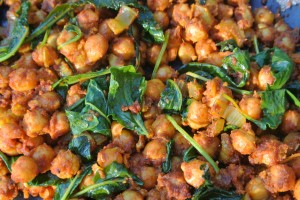
Chickpea Chana Masala

Chickpea Chana Masala with spinach served on long grain brown rice


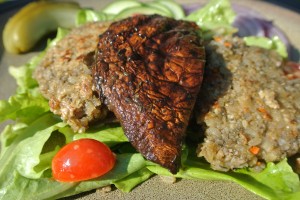
Sunflower seed burgers with grilled balsamic portabello mushrooms and a green salad

Sunflower seed burgers, grilled balsamic portabello mushrooms, sliced pickles & cuc, and a green salad with glory bowl dressing


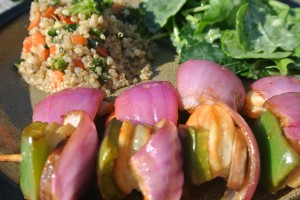
Prawn kabobs, balsamic quinoa salad and bitter greens with apple cider vinegar dressing

Prawn kabobs, quinoa salad with balsamic vinegar dressing, and bitter greens with apple cider vinegar dressing


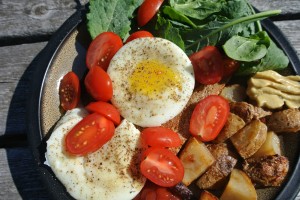
Breakfast for supper: 2 poached eggs, roasted potatoes, and baby grape tomatoes and baby kale leaves served over a slice of gluten-free toast

Breakfast for supper: 2 poached eggs, roasted potatoes, scoop of dijon mustard, baby grape tomatoes and baby kale leaves served over a slice of gluten-free toast


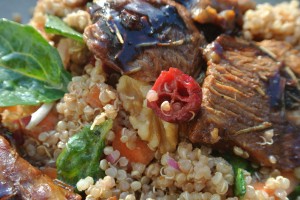
Roasted lamb with , balsamic quinoa salad with cranberries and walnuts, and a green salad

Roasted lamb shoulder with rosemary balsamic reduction,  quinoa salad with balsamic vinegar dressing (with added cranberries & walnuts), and a green salad


Beef stirfry with tamari, ginger, garlic, and black sesame seeds served over brown rice vermicelli noodles

Beef stirfry with tamari, ginger, garlic, and black sesame seeds served over brown rice vermicelli noodles


Quinoa salad rolls! with dipping sauce (recipe to come)

Quinoa salad rolls! with hot & tangy tamari dipping sauce


Quinoa crab cakes, green salad with goat feta and red wine vinaigrette

Quinoa crab cakes, green salad with goat feta and red wine vinaigrette


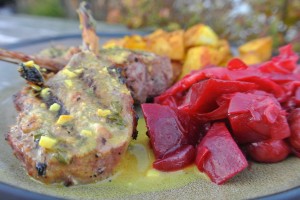
Lamb popsicles in coconut curry dipping sauce, turmeric roasted potatoes and warm beet cabbage side dish

Lamb popsicles in a tangy coconut curry dipping sauce, turmeric roasted potatoes and warm beet cabbage side dish


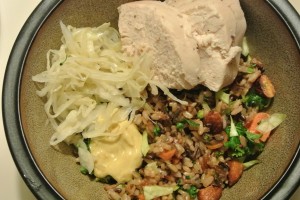
Whole roasted chicken, warm wild rice salad with roasted almonds and tamari sauce, homemade sauerkraut and dijon mustard.

Whole roasted chicken, warm wild rice salad with roasted almonds and tamari sauce, homemade sauerkraut and dijon mustard.


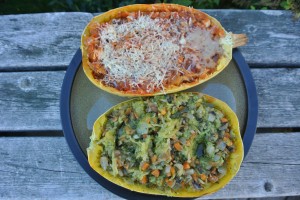
Spaghetti squash with roasted veggies and pesto, and roasted veggies with tomato pasta sauce

Spaghetti squash half with roasted veggies and pesto, and spaghetti squash other half with roasted veggies and tomato pasta sauce


Filed Under: Lunch & Supper, Recipes Tagged With: easy homemade supper, healthy family recipes, healthy supper, quick and easy healthy homemade supper

Brown Rice Crepes (gluten-free, dairy-free)

January 2, 2014 by Dr. Lyndsay Wareham, ND 1 Comment

GLUTEN-FREE CREPES (gluten-free, dairy-free)

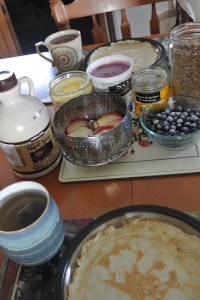
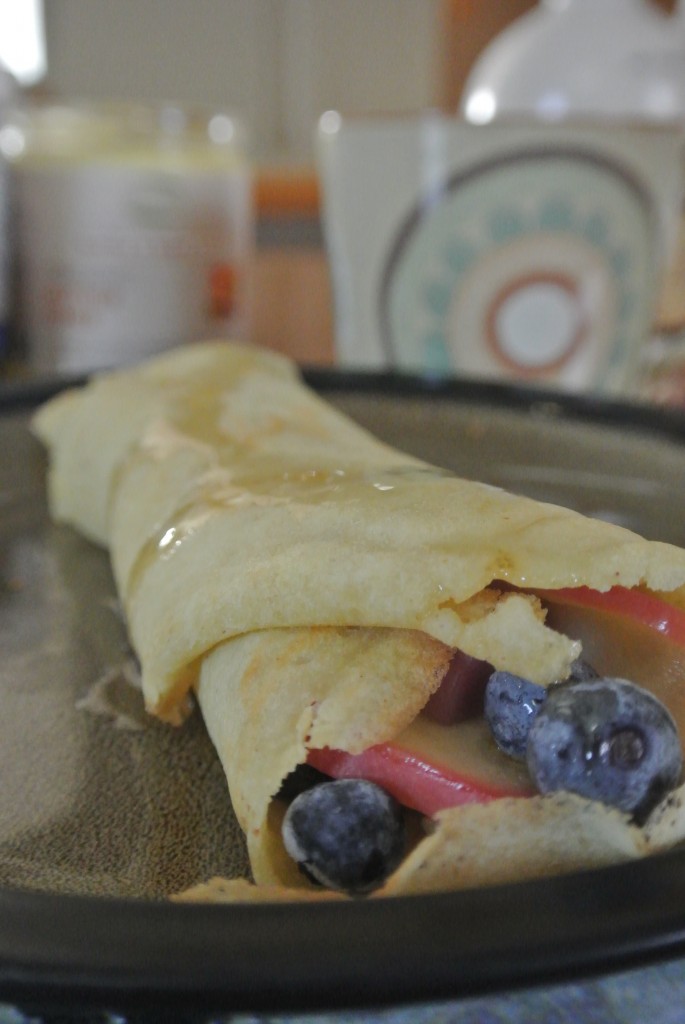
We filled these beautiful crepes with blueberries, steamed apple slices, roasted sunflower seeds, blueberry coconut yogurt, and topped it with maple syrup.

Enjoy these healthy and delicious gluten-free crepes for breakfast, brunch, lunch, snack and./or dessert.

You can enjoy these crepes as sweet or savoury, and you can also enjoy them as a healthy breakfast, lunch, snack, or a tasty dessert. As always, feel free to use your creativity, but here are some suggestions that we have for sweet and savoury crepes.

Sweet crepes:

DSC_4544

Our choice of filling for today: blueberries, steamed apple slices, roasted sunflower seeds, blueberry coconut yogurt, and maple syrup.

  • berries
  • sliced fruit: kiwi, apples, banana
  • coconut yogurt
  • nut or seed butter (almond butter, peanut butter, tahini)
  • crushed nuts (almonds, walnuts, pecans)
  • seeds (toasted sunflower seeds, hemp hearts)
  • maple syrup

Savoury crepes:

  • eggs, cooked to your liking
  • turkey pepperoni slices
  • chicken or turkey pieces
  • sliced veggies: tomatoes, olives, cucumber
  • roasted veggies: onion, mushrooms, zucchini, peppers, leeks, broccoli florets, etc
  • chopped mixed greens  (baby kale, arugula, spinach, lettuce, etc)
  • spreads: hummus, salsa, guacamole, dijon mustard
  • quinoa salad (try our balsamic quinoa salad), scoop of rice & beans
  • Daiya mozzarella cheese

Another really cool thing about these crepes is that if you omit the maple syrup and use unsweetened mylk, you have yourself a healthy, tasty homemade brown rice wrap!

Brown Rice Crepes (gluten-free, dairy-free)
 
Print
This easy recipe will make you feel like a crepe master! You can dress the crepes up or down and either way it always comes out tasting delicious.
Author: Lyndsay
Recipe type: gluten-free
Serves: 7-8
Ingredients
  • 1 cup brown rice flour
  • 2 tsp baking powder
  • ¼ tsp sea salt
  • 2 eggs
  • 2 Tbsp maple syrup
  • 1½ cup to 2 cup original or vanilla almond milk or other 'mylk' alternative (I find 2 cups is perfect, but less will give you a thicker more 'pancakey' crepe)
  • ghee, butter, or coconut oil for frying
Instructions
  1. In a small bowl mix together dry ingredients and set aside.
  2. In a large bowl whisk together the egg and maple syrup. Add dry ingredients and stir until all flour is integrated.
  3. Gradually whisk in all of the mylk into the batter until there are no clumps.
  4. Set batter aside for 10-15 mins (during this time, I like to prep the fillings that I'll be using)
  5. Heat a 10'' frying pan or skillet on medium heat. Add a small pad of oil to evenly coat the pan.
  6. Add ⅓ cup batter into the pan and swirl the pan around to distribute the batter evenly over the pan.
  7. Cook for 1-2 minutes until the edges of the batter turns a golden brown colour. Use a wide, flat spatula to gently flip the crepe and allow to cook for another minute.
  8. When done cooking, place crepe on a large plate and cover with a clean dishtowel until you're ready to serve.
  9. Repeat adding oil to the pan before adding the batter until all of the batter is gone and you have 7-8 delicious crepes ready to be served. Enjoy!
3.2.2265

Troubleshooting

  • Lots of tiny bubbles in the batter when you add it to the pan? add more batter
  • Crepes turning crispy? turn the heat down
  • Did your crepe turn out more thick, like a pancake? add more mylk to the batter
  • Crepe sticking to the pan? add more oil and/or let cook for a few seconds longer
Juliet approved!

Juliet approved!

Filed Under: Breakfast, Recipes Tagged With: best gluten-free crepe, easy gluten-free crepes, featured, gluten and dairy free crepes, gluten-free crepes

  • « Previous Page
  • 1
  • 2
  • 3
  • 4
  • 5
  • …
  • 7
  • Next Page »

Meet Dr. Nicholas ND & Dr. Lyndsay ND

We are two naturopathic doctors with a vision to inspire healthy cooking, healthy eating, and healthy living for you and your family.  Read more about us >>

  • Email
  • Facebook

Subscribe

Heart Healthy Omega Burgers

Dairy-free Cashew Cream for Breakfast Parfaits & more!

Four essential ways to use Turmeric

Easy, Every Day Spa Treatments to Enjoy at Home

Crispy Cheesy Kale Chips

Ken-Tucky Fried Chicken

Dairy-free Seafood Chowder

3 Ingredient Mango Creamsicle (dairy-free, gluten-free)

Copyright © 2025 · Foodie Theme by Shay Bocks · Built on the Genesis Framework · Powered by WordPress