Naturopathic By Nature

Healthy Eating & Healthy Living

Navigation
  • Recipes
  • Articles
    • Naturopathic
    • Pregnancy & Postnatal
    • Healthy Foods
    • Grocery Lists
  • About Us
  • Contact Us

Classic Hummus with Cumin

June 5, 2013 by Dr. Lyndsay Wareham, ND Leave a Comment

This is a classic version of hummus with our secret ingredient added – ground cumin (try grinding your own ground cumin from cumin seeds – delicious!). The cumin really adds flavour and depth to the hummus. For a thicker version of the recipe, use less water and for a thinner version, add a bit more water – just be sure to add it in small amounts so your hummus doesn’t turn out to be too runny, because it will thicken up when stored in the fridge.

Prep time: 10 mins

Cook time: 10mins

Servings: 2 cups

CLASSIC HUMMUS WITH CUMIN

The ingredients that makes this recipe stand out above the rest - ground cumin

The ingredient that makes this recipe stand out above the rest… ground cumin!

The measurements are not to be taken too seriously – feel free to add ‘a little bit of this and a little bit of that’ to suit your taste buds!

Ingredients

  • 2 cups cooked & rinsed chickpeas or 15oz cans chickpeas, rinsed & drained
  • 1/4 cup olive oil (plus 1-2 Tbsp more, as needed for consistency)
  • 3 Tbsp tahini
  • 2-3 Tbsp fresh squeezed lemon juice
  • 3-4 cloves garlic
  • 2-3 tsp ground cumin
  • 1 tsp salt 
  • 3-4 Tbsp water, as needed 
  • a generous pinch of pepper
  • dash cayenne pepper (optional)

Directions:

Place all ingredients into a high-powered blender or food processor, and mix until creamy & smooth. You may need to stop to scrape down the sides a few times. Add more water and oil, in small amounts until you reach the desired consistency. Season a little more, as desired, and Enjoy!

Nutrition Tip: Some people have a hard time digesting garbanzo beans (aka chickpeas). There are two ways to make beans more easily digested by the body (you can do one or both of these):

1. Sprout the beans – This method takes some planning because you will need up to 4 days to sprout the beans, but it is worth it! Place dried beans in a bowl and fill with fresh cool water until beans are covered with about an inch of water (since the beans will expand and you want them to still be fully submerged). Leave them overnight or between 8-12 hours. Drain and rinse chickpeas with fresh water every 8 hours for 3-4 days. (You’ll see the little sprouts growing from the bottom of the beans around the 2nd day). Then, put the beans with fresh water into a large pot, bring to a boil and cook the beans for 35-40mins.

2. Cook with Kombu – When boiling & cooking the beans, add a piece of kombu. Kombu is dried seaweed that you can find at your local Asian market. The minerals and compounds in the seaweed help break down the difficult-to-digest proteins, so the beans are easier for the body to breakdown (ie. the beans are less likely to cause gas).
Filed Under: Dressings, Dips, & Sauces, Recipes Tagged With: best hummus recipe, easy hummus recipe, healthy hummus, hummus, simple hummus

Quick & Easy Healthy Homemade Meals: Flax Fish

March 8, 2013 by Dr. Lyndsay Wareham, ND 2 Comments

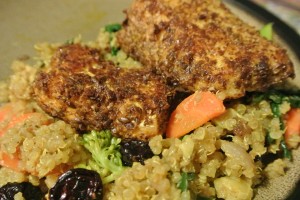
FLAX FISH

Flax fish served over Moroccan Quinoa - a quick,  easy, and delicious healthy homemade meal

Flax fish served over Moroccan Quinoa – a quick, easy, and delicious healthy homemade meal

Battered fish is tasty, but is often high in fat & carbohydrates, and contains gluten. This recipe is a great substitute, for those looking for a healthier version of battered fish. The light sesame oil has a high smoke point, so is safe for frying, and by using ground flax seeds as your batter, you will benefit from the high fibre content of flax seeds. Also, as a last cooking tip, it’s important to dry off the fish a little or the ground flax seeds will cake/clump onto the fish rather than coat it evenly. But even if your flax ends up being clumped on, it still ends up tasting good!

We like to serve this fish over Moroccan Quinoa, for a complete and satisfying meal.

Prep Time: 10 mins

Cook Time: 10 mins

Serves: 4-6

Ingredients:

  • 2-3 fillets frozen white fish, thawed & drained (basa, haddock)
  • 1/4 cup ground flax seeds (or more)
  • 2 tsp cumin
  • 1 tsp paprika
  • 1/4 tsp cayenne
  • 1 tsp salt
  • 4-6 Tbsp light sesame oil, olive oil or coconut oil (our favourite!)

Preparation

  • Fully thaw fish and remove excess moisture by patting fish dry with dish towel or paper towel. Cut fish into 3″x3″ chunks.
  • In a large bowl, combine ground flax, seasonings. Mix together well.
  • Add 6-8 chunks of fish to the bowl with flax & seasonings. Mix together to coat fish well.
  • Pre-heat a non-stick skillet or frying pan on medium heat with 2 Tbsp sesame oil.
  • Add coated fish to frying pan and fry on one side for about 3-5 mins. Turn fish to cook the other side for another 3 mins, or until flax seeds are dark brown. Remove from frying pan and place on a large plate*.
  • Add another 6-8 chunks fish to flax mixture and coat fish well. If you need more ground flax, add it at this point and any more seasonings, as you like.
  • Add another 1-2 Tbsp sesame oil to the pan, as needed. Repeat the above steps for frying the chunks of fish until you have no more fish left to fry.

* If you would like to remove excess oil, put a sheet or two of paper towel on a large plate. When removing fried fish from the frying pan, place fish on paper towel to soak up any excess oil.

Filed Under: Lunch & Supper, Recipes Tagged With: flax fish, gluten-free battered fish, gluten-free fish recipe

Quick & Easy Healthy Homemade Meals: Moroccan Quinoa

February 20, 2013 by Dr. Lyndsay Wareham, ND Leave a Comment

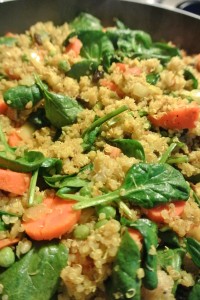
MOROCCAN QUINOA

It doesn't get much more healthy & delicious than this!

Bring this dish to your next potluck – people will be raving about it!

Prep time: 15 mins

Cook time: 30 mins

Serves: 6

 Ingredients

  • 2 cups quinoa, uncooked
  • 3 ½ cups water
  • 2 Tbsp coconut oil or olive oil
  • 1 medium onion, diced
  • 3 carrots, sliced
  • 1 cup raw almonds, chopped
  • ½ cup Thompson raisins or dried cranberries
  • 1-2 Tbsp mild curry powder (or hot curry powder if you like some spice)
  • 2 tsp ground cumin
  • ½ tsp each turmeric, ground cardamom or ground coriander
  • 1 tsp sea salt (or more, to taste)
  • ground pepper, to taste
  • 1 cup fresh or frozen green peas
  • 4 cups baby spinach (organic preferably – it’s on the Dirty Dozen)
  • 1 small (14oz) can Eden Organic Garbanozo beans or 1 cup soaked & boiled dried garbanzo beans(optional)

Preparation

– In a medium sized pot, cook 2 cups quinoa in 3 ½ cups water (and a pinch of salt) for 20 mins. Uncover when cooked, and allow to cool.

– Heat oil in a large skillet or pot over medium heat. Add the chopped onions, and sauté onions for 2-3 minutes.

– Then, add the sliced carrots and sauté for about 3-5 minutes, stirring often.

– Add almonds, raisins, spices & salt, and sauté 5 minutes more.

– Add cooked quinoa and peas (and garbanzo beans, if using), stir to coat ingredients evenly. (Add 1-2 Tbsp water, if quinoa is really dry, and/or 1 more Tbsp oil, if you think it needs it. You can also add more curry powder, if needed).

– Add in spinach and mix together well to wilt the spinach a bit (water from spinach will also help moisten the quinoa). Season with salt & pepper, and adjust spices to your liking.

– Serve and enjoy this dish – it’s a good one to add into the weekly dinner cycle!

Filed Under: Lunch & Supper, Recipes Tagged With: healthy moroccan quinoa, moroccan quinoa, moroccan quinoa recipe, quick and easy meals, quick and easy moroccan quinoa

Quick & Easy Healthy Homemade Meals: Rice & Beans

February 20, 2013 by Dr. Lyndsay Wareham, ND Leave a Comment

We really like using soaked & boiled dried beans in all of our bean dishes (see ‘Vegetarian Chili’ recipe post on how to prepare dried beans), but when we don’t have time then we use canned beans. However, we choose to use Eden Organic’s canned beans because they are BPA-free. As a reminder, BPA is a hormone disruptor that mimics estrogen in our bodies. This is especially bad for our children, as they have immature & developing (and therefore vulnerable) hormonal systems that are affected by what we eat and the environment that surrounds us. Here is an article that is easy to read & also has more information on BPA-free food products.

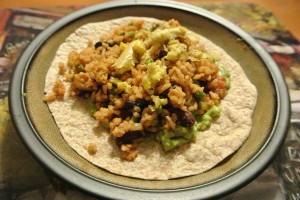
RICE AND BEANS

DSC_1473

Rice & beans served as a tortilla with guacamole & scrambled eggs

Prep Time: 10mins

Cook Time: 30mins (50mins for brown rice)

Serves 4-5

Ingredients

  • 1-2 Tbsp olive oil
  • 1 onion, chopped
  • 2-3 cloves garlic, chopped
  • 3 cups white basmati rice, cooked (use long grain brown rice for a healthier version)
  • 1 can Eden Organic kidney beans or 1-2 cups soaked & boiled dried kidney beans
  • ½ – ¾ cup tomatoes, chopped
  • 1 cup frozen or fresh green peas
  • 1 Tbsp chili powder
  • 2 tsp cumin
  • ¼ tsp cayenne (or more)
  • 1 tsp sea salt or Zesty Hebamare

Serve with one or many of the following:

  • Whole wheat tortilla
  • Brown rice tortilla (our favorite is ‘Food for Life Brown Rice Tortillas’)
  • Scrambled eggs
  • Avocado chunks
  • Guacamole
  • Salsa
  • chopped green onion
  • Shredded cheese

Preparation

– In a medium pot, cook rice according to package directions (usually about 20 minutes for white rice, 35-40 minutes for brown rice).

– Heat oil in a large skillet, add onion and garlic. Sautee for about 3 minutes. Add in rice, kidney beans, chopped tomatoes and spices. Stir to evenly coat ingredients. Add more cayenne or salt, as desired.

– Serve on its own or as a tortilla and garnish with any of the toppings mentioned above.

Filed Under: Lunch & Supper, Recipes Tagged With: best rice and beans, healthy rice and beans, homemade rice and beans, quick meals, rice and beans

Quick & Easy Healthy Homemade Meals: Vegetarian Chili

February 20, 2013 by Dr. Lyndsay Wareham, ND Leave a Comment

Using soaked dried beans really gives chili a fresh taste that is full of flavour – and it’s easier than you think! All you have to do is know that you want chili tomorrow night for dinner…

Place 2 cups of dried beans of your choice in 6 cups of water and leave them to soak for at least 8 hours. When you’re ready to use the beans, drain the water and rinse the beans. Then place the beans in a large pot with enough water to cover the beans by about one inch. Bring the water to a boil, and turn heat down to medium heat for about 30-40mins (replace any water, if needed). Meanwhile, prepare your veggies and any side dish. When beans are soft in texture, drain water and gently rinse beans. Now they are ready to use!

However if you didn’t make time to soak & boil the beans, and want to make up a quick chili, you can just use canned beans – they still make for a great chili. And you can find canned beans from Eden Organic which are BPA-free! (as a little reminder, BPA is an hormone disruptor which mimics estrogen, leading to healthy effects that are harmful to our women, men, and especially our children). As for canned tomatoes, there’s no company that makes BPA-free canned tomatoes as of yet. So, if you really want to reduce your intake of BPA (especially for your children), use home-canned tomatoes or diced tomatoes in glass jars. Here is an article that is easy to read & also has more information on BPA-free food products.

We like to serve this meal over short grain brown rice, or with a slice of toasted gluten-free bread – our favorites are kinnik-kinnick’s sunflower flax bread, Glutino’s flax seed bread, or any bakery-made or home-made bread. We also like Silvery Hill’s sprouted grain breads (they are not gluten-free) – Mack’s Flax, Big 16, or Squirrelly.

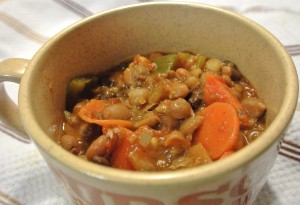
VEGETARIAN CHILI

a nice hearty bowl of chill - made in less than 1 hour

a nice hearty bowl of chill – made in less than 1 hour


Prep Time: 20mins (just under 1 hour if using soaked dried beans method)

Cook Time: 20mins

Serves: 5-6

Soaked dried beans: Soak 2 cups dried beans (your choice: garbanzo, black, pinto, kidney) at least 8 hours or overnight in 6 cups of water. Drain water, rinse beans, and place in a large pot with enough water to cover the beans by about one inch. Bring to a boil, then reduce heat to medium and boil for about 30-40mins (replace water if needed). When beans are soft, drain and rinse gently… OR… Canned beans: Choose 2 of the following cans of beans: garbanzo, black, pinto, black eyed peas, cannellini, or kidney (small red) beans  – ideally from a BPA-free source such as Eden Organic

Ingredients

  • Beans (canned or soaked & boiled)
  • 1-2 Tbsp olive oil
  • 1 large (28oz) can or glass jar of diced tomatoes
  • 1 onion, chopped
  • 3-4 cloves garlic, chopped
  • 2 large carrots, chopped
  • 2 stalks celery, chopped (organic is best – celery is high on Dirty Dozen List)
  • ½ green or red bell pepper, chopped (ideally organic – Dirty Dozen List)
  • 2 tbsp chili powder
  • 2 tsp ground cumin
  • 1 tsp paprika
  • ¼ – ½ tsp cayenne
  • 1 tsp sea salt (or Zesty Hebamare – this is my secret ingredient… can be found at Superstore, Sobeys, & Corn Crib)
  • ground pepper, to taste

optional ingredients:

  • 1 cup frozen or fresh corn
  • grated cheese, as garnish
  • avocado chunks, as garnish

Preparation

–       Heat olive oil in a large pot over medium-high heat. Quickly add chopped onion, garlic and carrot, sautee for about 3 minutes.

–       Add spices and sautee for another 2-3 minutes, stirring often.

–       Then, add celery and bell pepper. Keep stirring to mix spices together with veggies.

–       Add diced tomatoes and beans (we like to use a fork and mash some of the beans before adding to give the chili a nice thick texture). Bring to a near boil and reduce heat to simmer for about 15-20mins.

–       Garnish & serve with rice or toast side dish (recommended above) for a filling meal.

(*To make this a Non-Vegetarian Chili, just cook 1 lb ground beef fully with onions and garlic. Add carrots after ground beef is cooked.)

Filed Under: Lunch & Supper, Recipes Tagged With: best vegetarian chili, easy vegetarian chili, healthy chili, healthy chili recipe, homemade chili, homemade chili recipe, quick and easy chili, quick and easy meals, quick and easy vegetarian chili, quick chili recipe, vegetarian chili recipe

Quick & Easy Homemade Healthy Meals: Pita pizzas

February 15, 2013 by Dr. Nicholas Anhorn, ND Leave a Comment

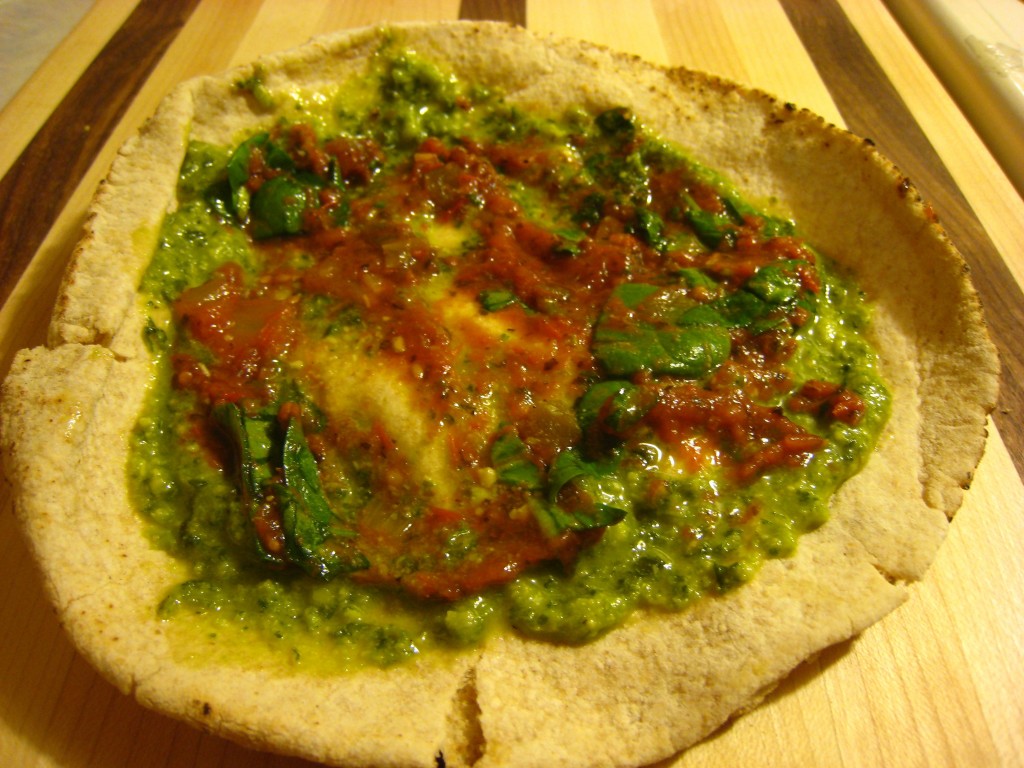
Pita pizzas are so versatile. You can switch up the veggies and sauce for a your very own personal pizza experience. And because they are so quick to make, they are great for an easy dinner, lunch or even a snack.

Prep Time: 15mins
Cook Time: 10mins
Serves: as many or as few as you make

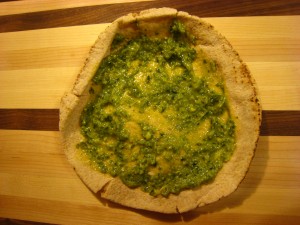
PITA PIZZAS

Whole wheat pita

Sauce (choose one or mix a few together):

with pesto

with pesto

with pesto, spinach and tomato sauce reduction

with pesto, spinach and tomato sauce reduction

  • Salsa
  • Pesto
  • Quick sauce: A few scoops of canned or fresh crushed tomatoes (without liquid) put into a blender with Italian seasoning
  • Tomato sauce reduction: A few scoops of canned crushed tomatoes reduced to have very little liquid left, with added Italian seasoning, and blended (if needed)

Toppings (choose a few or all of the following):

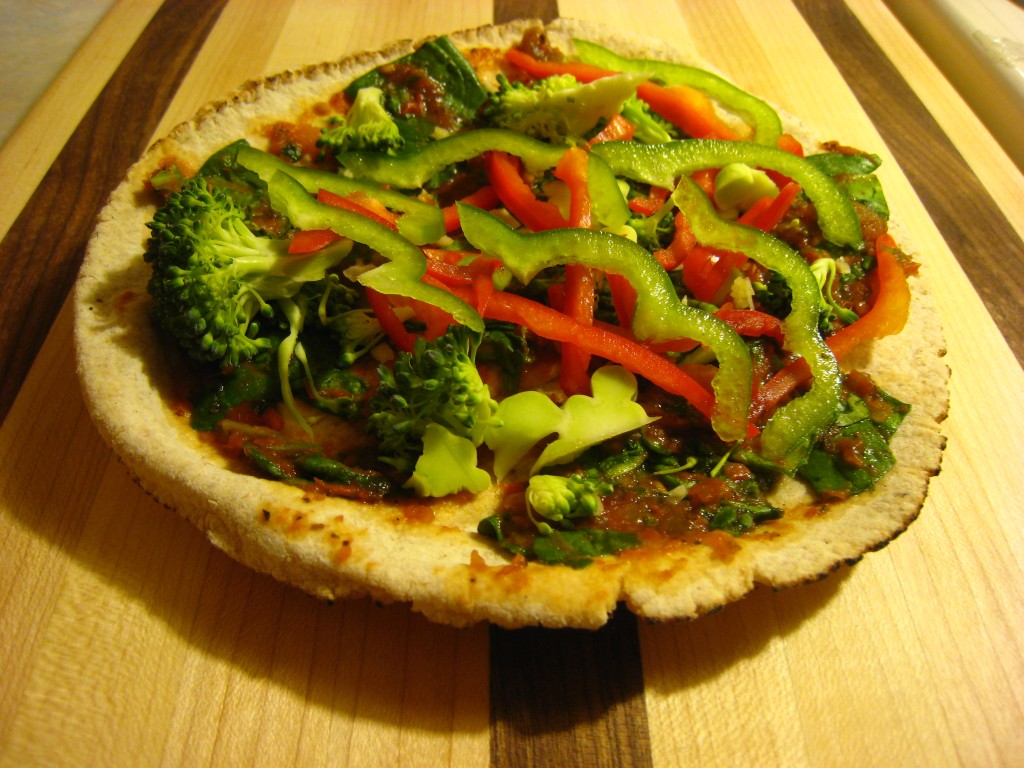
with more veggies added

with more veggies added

with veggies added

  • Onion, sliced or diced (we like red onion)
  • Mushrooms, sliced
  • Spinach, chopped
  • Peppers, chopped
  • Broccoli, chopped
  • Cheese of your choice, grated or crumbled (feta, white cheddar, mozza)
  • chunks of cooked chicken

Bake at 350F for 10-15 mins. Serve immediately, with side salad or veggie dish for a complete meal.

baked to perfection

baked to perfection

Filed Under: Lunch & Supper, Recipes Tagged With: easy pita pizza, easy pizza, easy pizza meal, easy pizza recipe, healthy pizza, healthy pizza recipe, pita pizza

Almond & Date Oatmeal Muffins (gluten-free, dairy-free)

February 7, 2013 by Dr. Lyndsay Wareham, ND 2 Comments

ALMOND & DATE OATMEAL MUFFINS (gluten-free, dairy-free, & a good amount of protein!)

I just made these AWESOME muffins modified from the Nourishing Meals cookbook. They are our new favorite muffins! They are moist & delicious, and are especially tasty when eaten fresh out of the oven.These muffins provide a good amount of protein with the use of teff flour, almond meal, eggs & almond butter. This recipe got me very excited since I’m trying to steer away from the brown rice flour world and into the world of other nutritious gluten-free flours.

Teff flour is high in protein, slightly sweet & nutty in taste and gives a kind of fluffy or wheat-like texture to baking. The almond meal is high in protein and healthy fats, is essential for keeping the muffins moist (but if you forget this ingredient or don’t have it, you can still make a tasty muffin without it).


Delicious - in every which way!

Delicious – in every which way!


Almond & Date Oatmeal Muffins (gluten-free, dairy-free)
 
Print
Prep time
15 mins
Cook time
30 mins
Total time
45 mins
 
You can easily add or substitute many of the ingredients in this recipe to make it your own. For example, you can add any nut (walnuts) or seed (whole flax, hemp hearts), or substitute dates for dried apricots.
Author: Lyndsay & Nicholas
Recipe type: breads, baked goods
Cuisine: gluten-free, dairy-free
Serves: 14-16
Ingredients
  • 1 cup teff flour
  • 1 cup gluten-free rolled or quick rolled oats
  • ½ cup almond meal/flour
  • ½ cup tapioca flour
  • 2 Tbsp ground chia seeds
  • 2 Tbsp ground flax seeds
  • 2 tsp baking powder
  • ½ tsp baking soda
  • ½ tsp salt
  • 1 ½ cup dates, chopped
  • ¼ cup whole flax seeds or hemp hearts (optional)
  • ¾ cup unsweetened applesauce
  • ¾ cup vanilla almond or rice milk
  • ⅓ cup olive oil
  • ⅓ cup maple syrup
  • 2 large organic eggs, whisked*
  • ¼ cup plus 2 Tbsp almond butter
  • 2 tsp vanilla
Instructions
  1. Preheat oven to 350 F. Grease muffin tins with oil or butter.
  2. In a large bowl, add flours, tapioca starch, ground chia & flax seeds, baking powder, baking soda and salt. Mix together well.
  3. In a separate bowl, add olive oil, apple sauce, almond milk, maple syrup, and whisked eggs, and vanilla & mix together.
  4. Fold in dates and seeds or nuts, if using.
  5. Add wet ingredients into dry ingredients & mix together.
  6. Let the batter sit for about 5 minutes so the oats have a chance to soak up the moisture.
  7. Spoon batter into muffin tins until pretty full. It ends up filling 14-16 muffin cups, which is a bit awkward because you'll have to use 2 muffin tins. Fill the empty muffin cups ¾ with water.
  8. Bake for 25-28 mins.
  9. Place on a wire rack to cool slightly and Enjoy!! ... I know you will 🙂
3.4.3177


*Want this recipe egg-free? For each egg, mix together 1 Tbsp ground flax with 3 Tbsp water and add 1/8 tsp baking powder. You can also use ground chia seeds instead of ground flax, or add 1/2 of a large mashed ripe banana.

Filed Under: Recipes, Snacks & Baked Goods Tagged With: best gluten and dairy free muffin recipe, best gluten-free muffins, dairy and gluten free muffins, date almond quinoa gluten-free muffins, date almond quinoa muffins, favorite gluten-free muffins, gluten-free muffins, gluten-free quinoa muffins, moist gluten free muffins, teff flour

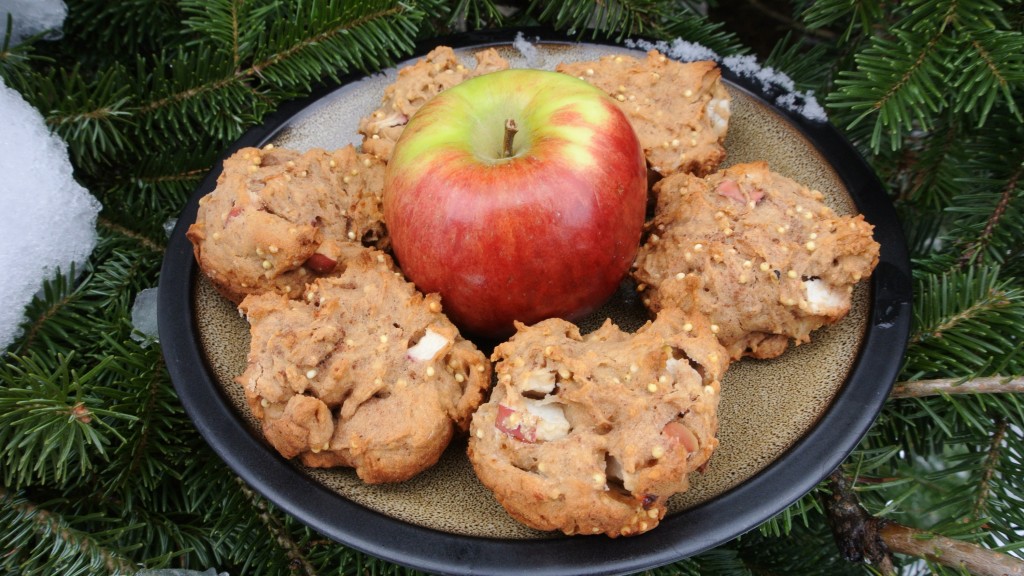
Apple Spice Muffins (gluten-free, dairy-free, vegan)

February 4, 2013 by Dr. Lyndsay Wareham, ND Leave a Comment

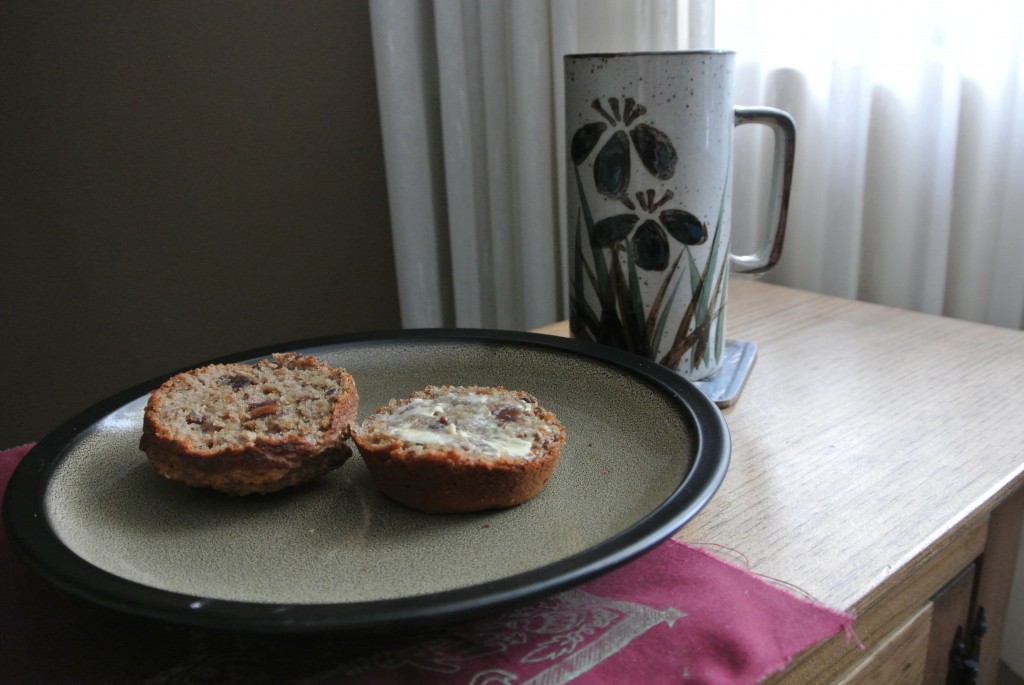
These muffins are especially great with paired with a mug of your favorite tea! These days I add millet to any of my muffin recipes – it just adds the perfect little crunch and completeness to the muffins. If you agree, you can add 1/2 cup uncooked millet to the dry ingredients.

We like these muffins with Bengal Spice or Chai tea...

A nice warming & hearty fall/winter muffin… especially with Bengal Spice or Chai tea…

APPLE SPICE MUFFINS (Gluten-free, Dairy-free, Vegan)

Dry Ingredients

  • 2 ½ cups brown rice flour (or 1 1/2 cups brown rice flour + 1 cup sorghum flour)
  • ½ cup tapioca starch
  • ½ cup cane sugar or coconut sugar (we use Madhava organic coconut sugar from costco)
  • 2 tsp baking powder
  • 1 tsp baking soda
  • 1 1/2 tsp xantham gum (optional, but it does help bind ingredients together) (*Check out my post ‘A word about xanthan gum‘ for info & substitutions)
  • ½ tsp salt
  • 2 tsp cinnamon
  • ½ tsp each ground ginger, nutmeg, cloves
  • ½ cup uncooked dried millet (optional)

Wet ingredients

  • 1 ¼ cup unsweetened applesauce
  • 1 cup chopped tart apple (peeled or unpeeled) – make it 1 “generous” cup of chopped apple
  • 1 cup vanilla rice or almond milk
  • 1 tsp vanilla extract
  • 1/3 cup melted coconut oil or organic butter

Preparation

–       Preheat oven to 375 F. Lightly oil muffin tins or line with large paper cups.

–       In a large bowl, combine flour, tapioca starch, sugar, xanthan gum, baking powder, baking soda, & sea salt (and millet, if adding). Mix together well.

–       In a separate bowl, combine applesauce, milk, melted coconut oil & vanilla and mix together well.

–       Pour wet ingredients into dry ingredients and mix together – take caution not to overmix.

–       Spoon batter into muffin tins until about ¾ to full (for smaller muffins, or completely full for larger muffins).

–       Bake at 375 F for about 20-25 mins.

Filed Under: Recipes, Snacks & Baked Goods Tagged With: gluten-free muffins, vegan gluten-free muffins

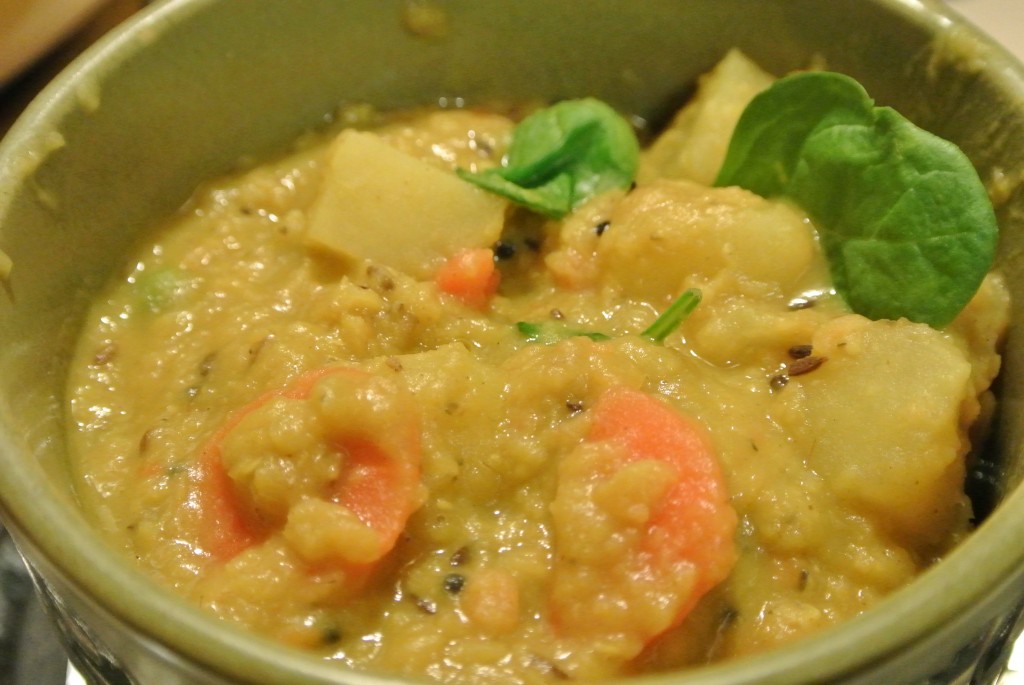
Quick & Easy Healthy Homemade Meals: Delicious Red Lentil Dahl (Vegan)

February 4, 2013 by Dr. Lyndsay Wareham, ND Leave a Comment

When I’m making this recipe, I like to prepare a lot of the recipe before hand by combining the seeds in a small dessert or custard dish and the spices in another. That way, they are ready to go when the time comes to add them. 

We like to serve this over rice – our favorites are short grain brown rice, a wild rice mix, and white jasmine . We also add a handful of fresh chopped spinach on top of the rice just before we scoop on the dahl. Alternatively, you can stir in about 4 cups of fresh chopped spinach into the dahl at the end of cooking.

DELICIOUS RED LENTIL DAHL (vegan)


So soothing & nourishing to the body & soul

So soothing & nourishing to the body & soul

Quick & Easy Healthy Homemade Meals: Delicious Red Lentil Dahl (Vegan)
 
Print
Prep time
25 mins
Cook time
30 mins
Total time
55 mins
 
This recipe takes a little bit of prep time but it is totally worth it! This dish is especially tasty on cold nights.
Author: Lyndsay & Nicholas
Recipe type: dinner
Serves: 6-8 servings
Ingredients
  • 2 Tbsp coconut oil or olive oil
  • 3 tsp each black mustard seeds & cumin seeds
  • 1 large onion, diced
  • 3-4 cloves garlic, minced
  • 1 Tbsp fresh ginger, chopped (if you don't have fresh ginger, just omit this ingredient... ground ginger doesn't substitute well)
  • 2 tsp turmeric, dried or 1 Tbsp fresh, grated turmeric
  • 3 tsp ground cumin
  • ¼ tsp cayenne (or more for more spice)
  • 2-3 carrots, peeled & chopped
  • 3 medium potatoes, peeled & cut into 1" cubes
  • 1 cup green peas (fresh or frozen)
  • 2 ½ cup red lentils, rinsed
  • 1 vegetable bouillon cube
  • 4-6 cups water (or veggie stock)
  • 1-2 tsp sea salt (start with 1 tsp and gradually add more until you reach desired taste)
Instructions
  1. In a large pot, heat oil over medium heat. Add cumin & black mustard seeds, and cover pot. Heat until you hear them begin to pop, then quickly add onions & garlic. Sautee for 3-5 minutes.
  2. Add fresh ginger, if using, along with spices (turmeric, cumin, cayenne), carrots, and potatoes. Sautee for 3-5 more minutes.
  3. Add water & bouillon cube (or veggie stock).
  4. Rinse the red lentils and add them to the pot. Stir well.
  5. Bring to a boil. Cover, turn down heat & simmer for 30 mins or more. Add salt to taste, stir well & serve.
  6. You can add a dollop of coconut cream to stir in, for extra nutrition.
3.4.3177


shutterstock_77949286

Filed Under: Lunch & Supper, Recipes Tagged With: delicious dahl, red lentil dahl, vegan, vegan dahl

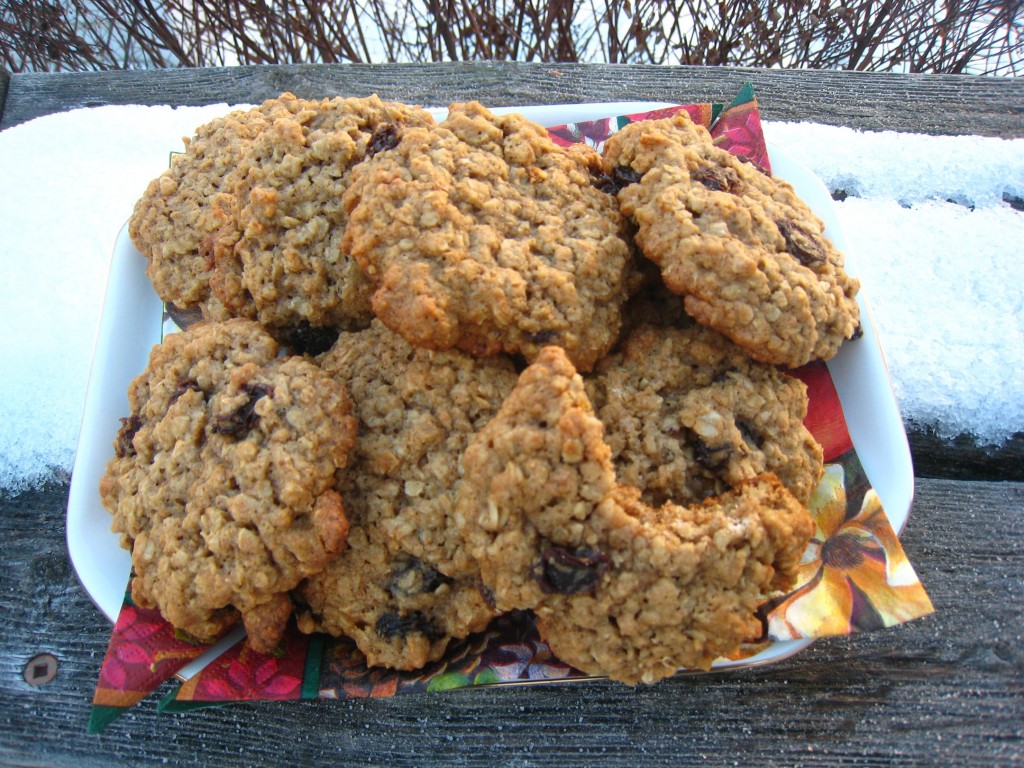
Everybody’s Favorite Chewy Oatmeal Raisin Cookie Recipe

December 13, 2012 by Dr. Nicholas Anhorn, ND 3 Comments

EVERYBODY’S FAVORITE CHEWY OATMEAL RAISIN COOKIE RECIPE

Who took a bite of out a cookie?!

Who’s been sneaking cookies from the cookie jar?!

I’ve tried & tried again to bake the perfect oatmeal raisin cookie, modifying and improving on already very tasty recipes… and finally, I think I’ve found it!

Two tricks I use to making the best oatmeal raisin cookies are: 1) to soak the raisins, and 2) remove the cookies when the bottoms are slightly browned and the tops may still look raw (but not wet). Soaking the raisins will ensure that the raisins don’t burn or get crispy, and removing the cookies a little earlier than if they were golden brown makes for a chewy cookie.

One last little secret that I use is that I remove my rings, give my hands a good wash, and use my hands to cream together the sugar & butter – It’s way more fun & liberating than using an electric mixer.

Everybody's Favorite Chewy Oatmeal Raisin Cookie Recipe (AKA the best recipe out there!) - not gluten or dairy free
 
Print
Prep time
15 mins
Cook time
7 mins
Total time
22 mins
 
This recipe makes about 4 dozen cookies, and is an especially nice homemade gift or treat during the holiday season.
Author: Lyndsay
Recipe type: baking
Serves: 44 - 48 cookies
Ingredients
  • 1 cup raisins (soaked for at least 20 mins)
  • 1½ cups all-purpose flour (white or whole wheat)
  • 1 teaspoon baking soda
  • 1 teaspoon ground cinnamon
  • ¼ tsp each nutmeg & all spice
  • ½ teaspoon salt
  • ¾ cup butter, softened
  • 1 cup brown sugar, packed
  • ½ cup white sugar
  • 2 eggs
  • 1 teaspoon vanilla extract
  • 2¾ cups quick rolled oats
Instructions
  1. Preheat oven to 375 degrees F (190 degrees C).
  2. Soak raisins in warm water & a few drops of vanilla extract for at least 20 mins.
  3. Mix together flour, baking soda, cinnamon, nutmeg, allspice and salt. Stir well.
  4. In a large bowl, cream together butter, brown and white sugar until smooth.
  5. Beat eggs and vanilla into butter & sugar mixture until fluffy.
  6. Gradually beat flour mixture into butter mixture.
  7. Drain raisins.
  8. Stir in raisins and oats.
  9. Scoop up a generous tablespoonful of dough into a round tablespoon measure, and drop onto a cookie sheet lined with a silicone baking mat or parchment paper. Flatten slightly.
  10. Bake for 6-8 mins, until bottoms are browned (*cookies will still look raw on top, but not wet – this is key for a chewy cookie!). Timing will depend on your oven's temperament.
  11. Remove from sheet to wire rack. Cool completely before serving.
3.2.2265


Filed Under: Recipes, Snacks & Baked Goods Tagged With: best chewy oatmeal raisin cookies, best oatmeal raisin cookie, oatmeal raisin cookie, recipe

  • « Previous Page
  • 1
  • 2
  • 3
  • 4
  • 5
  • Next Page »

Meet Dr. Nicholas ND & Dr. Lyndsay ND

We are two naturopathic doctors with a vision to inspire healthy cooking, healthy eating, and healthy living for you and your family.  Read more about us >>

  • Email
  • Facebook

Subscribe

Heart Healthy Omega Burgers

Dairy-free Cashew Cream for Breakfast Parfaits & more!

Four essential ways to use Turmeric

Easy, Every Day Spa Treatments to Enjoy at Home

Crispy Cheesy Kale Chips

Ken-Tucky Fried Chicken

Dairy-free Seafood Chowder

3 Ingredient Mango Creamsicle (dairy-free, gluten-free)

Copyright © 2025 · Foodie Theme by Shay Bocks · Built on the Genesis Framework · Powered by WordPress